The Ghorepani Poon Hill Trek is rated as one of the most accessible multi-day treks in Nepal. It reaches a maximum altitude of 3,210 m at the Poon Hill viewpoint, stays below the altitude threshold where serious mountain sickness becomes a significant risk, and follows a well-maintained trail with teahouses every two to three hours. That said, accessible does not mean easy. The terrain involves sustained stone staircase climbing on Day 2, pre-dawn hiking on Day 3, and long descents that stress the knees on Days 4 and 5. Understanding the physical demands before you arrive helps you prepare properly and enjoy the trek rather than struggle through it.
Trek at a Glance
Ghorepani Poon Hill Trek: Difficulty and Packing Overview
| Difficulty rating | Moderate |
| Maximum altitude | 3,210 m (Poon Hill viewpoint) |
| Highest overnight altitude | 2,860 m (Ghorepani, Night 2) |
| Daily walking time | 3 to 8 hours depending on the day |
| Total distance (standard 5-day) | Approximately 50 km |
| Total elevation gain | Approximately 2,200 m across all days |
| Trail surface | Stone steps, packed dirt, forest path, some loose rocky sections |
| Minimum fitness level | Able to walk 4 to 6 hours on uneven terrain with a light daypack |
| Age range (typical) | 12 to 70 years old with good fitness |
| Guide required | Yes, mandatory from April 2023 for all foreign trekkers |
| Porter recommended | Yes, carries main bag up to 15 kg |
| Altitude sickness risk | Low (below 3,500 m); acclimatisation not critical |
| Trek start point | Nayapul, 42 km from Pokhara by road |
| Trek end point | Nayapul (return same trailhead) |
How Difficult Is the Ghorepani Poon Hill Trek?
The overall difficulty of the Ghorepani Poon Hill Trek sits in the moderate category. This means it requires a base level of walking fitness but does not demand prior mountaineering experience, high-altitude acclimatisation, or technical climbing skills. People who walk regularly in daily life and who can handle stairs and uneven surfaces for several hours will find this trek achievable. People who are sedentary or who have significant knee, hip, or cardiovascular problems will find some sections genuinely difficult.
The hardest physical section is the stone staircase from Tikhedhunga to Ulleri on Day 2. This climb involves approximately 1,800 stone steps over roughly 2 km, ascending nearly 500 m in elevation in a short horizontal distance. The steps are wide and stable but the angle is steep and unrelenting. Most trekkers take 45 to 75 minutes to complete this section. It is the section most frequently mentioned in post-trek reports as the most challenging moment of the whole route. After Ulleri the trail continues upward but at a more moderate grade through rhododendron forest to Ghorepani.
The pre-dawn Poon Hill ascent on Day 3 adds a different kind of challenge: a 350 m climb on stone steps before daylight, often in cold temperatures between 0 and 8 degrees Celsius depending on the month. The headlamp walk is not technically difficult but requires focus and steady footing in the dark. The cold air, combined with altitude at 2,860 m, means breathing feels slightly more laboured than at lower elevations.
The descents on Days 4 and 5 are where knee fatigue accumulates. Dropping 650 m from Tadapani to Ghandruk on Day 4 and then continuing the final descent to Nayapul on Day 5 puts sustained downward pressure on the knees over several hours. Trekking poles make a significant difference on these sections. Trekkers with prior knee problems should plan for a slower pace and consider poles from the start of the trek.
Difficulty by Day
| Day | Route | Difficulty | Key Challenge | Walking Time |
|---|---|---|---|---|
| 1 | Pokhara to Tikhedhunga via Nayapul | Easy to moderate | Warm-up day; flat to gentle ascent from Nayapul to Birethanti, stone steps begin above Hile | 3 to 4 hours |
| 2 | Tikhedhunga to Ghorepani | Moderate to hard | Ulleri staircase: 1,800 steps, 500 m gain over 2 km. Sustained climbing for 5 to 7 hours total | 5 to 7 hours |
| 3 | Poon Hill sunrise, then to Tadapani | Hard (long day) | Pre-dawn 350 m climb, then 6 to 8 hours total walking via Deorali pass at 3,100 m | 6 to 8 hours |
| 4 | Tadapani to Ghandruk | Moderate | Steep forest descent 650 m; knee stress on stone and root-covered trail | 3 to 4 hours |
| 5 | Ghandruk to Nayapul to Pokhara | Moderate | Final 870 m descent to Nayapul; knees fatigued from previous days | 4 to 5 hours |
Altitude and Altitude Sickness
The Ghorepani Poon Hill Trek has a maximum altitude of 3,210 m at the Poon Hill viewpoint and a highest overnight altitude of 2,860 m at Ghorepani. Both of these figures sit well below the 3,500 m threshold above which serious altitude sickness becomes a meaningful concern. Acute mountain sickness (AMS) is extremely rare on this trek. Most years our guides handle zero AMS incidents on this route across dozens of groups.
Some trekkers do experience mild symptoms such as a light headache or mild breathlessness on the Poon Hill climb, particularly if they ascend too quickly or if they are not acclimatised after arriving directly from sea level. The standard advice applies: walk slowly on Day 3, drink enough water (at least 3 litres per day), and tell your guide if you feel unwell at altitude. Because the maximum altitude is modest, a descent of just 500 to 600 m (back to Ghorepani from Poon Hill) resolves symptoms in virtually every case.
Altitude medication (acetazolamide / Diamox) is not needed for this trek in the view of most Nepal-based trekking physicians. If you are concerned, consult a travel medicine doctor before departure. The Ghorepani route is specifically chosen by many agencies as a suitable first Himalayan trek because of its low altitude ceiling and the low AMS risk it carries.
| Overnight Location | Altitude | AMS Risk Level | Notes |
|---|---|---|---|
| Tikhedhunga (Night 1) | 1,525 m | None | Below any altitude concern |
| Ghorepani (Night 2) | 2,860 m | Very low | Some individuals may note mild breathlessness; very few develop symptoms |
| Poon Hill viewpoint (morning visit) | 3,210 m | Very low | Short visit only; not an overnight stop |
| Tadapani (Night 3) | 2,590 m | None | Lower than Ghorepani; rest day in effect |
| Ghandruk (Night 4) | 1,940 m | None | Descending; altitude symptoms resolve at this elevation |
Book with a Licensed Guide Included
Every Next Trip Nepal package includes a government-licensed guide, porter, TIMS and ACAP permits, teahouse accommodation, and private transport. One fixed price, zero hidden costs.
See Packages and PricesWho Is This Trek Suitable For?
The Ghorepani Poon Hill Trek works well for a wide range of trekkers, from reasonably fit beginners to experienced hikers looking for a manageable but rewarding route. Below is a breakdown of suitability by category:
First-time trekkers: This is one of the most recommended routes for first-time high-altitude trekking in Nepal. The infrastructure is excellent, the trail is well marked, the altitude is manageable, and the scenery is outstanding. First-timers who can walk 4 to 5 hours on a normal day in the mountains and who are not completely sedentary will cope well. We recommend training with 2 to 3 hill walks of 3 to 4 hours in the 4 weeks before departure.
Couples and small groups: The trail is wide enough for two people to walk side by side on most sections. Teahouses accommodate couples in double rooms. The route is popular but not overcrowded outside of October peak season.
Families with children: Children aged 12 and older who are active and comfortable hiking on uneven terrain generally complete this trek without major difficulty. The Ulleri staircase is the main challenge for younger trekkers. Children as young as 10 have completed this route with patient guides and an extra rest day built into the itinerary. We do not recommend this trek for children under 10.
Older trekkers: Active people in their 50s, 60s, and even 70s complete this trek regularly. The main consideration for older trekkers is knee health on the descents. A private porter, trekking poles, and a slightly extended itinerary (6 days rather than 5) are the adjustments that make the biggest difference. Several of our most satisfied solo trekkers have been in their 60s and 70s.
Trekkers with knee concerns: If you have had prior knee surgery, chronic knee pain, or ligament issues, discuss this with your doctor before booking. The Ulleri staircase ascent and the long descents from Tadapani and Ghandruk are the sections that most affect the knees. Trekking poles are essential, not optional, for this group. Many trekkers with mild-to-moderate knee issues complete the trek comfortably by walking at a slower pace with poles.
Not suitable for: People who cannot walk for 3 or more hours on uneven terrain without significant discomfort, those with serious cardiovascular conditions uncleared by a doctor, and children under 10.
Physical Preparation for the Trek
The most common mistake trekkers make is arriving in Nepal without having done any walking preparation. People who walk regularly in their normal lives often feel this is sufficient. For most office workers, it is not. The Ghorepani route involves sustained uphill effort over stone terrain that is different from flat walking or gym exercise. Targeted preparation over 4 to 8 weeks before departure makes a significant difference to your enjoyment of the trek.
| Training Activity | Why It Helps | Recommended Frequency |
|---|---|---|
| Long hill walks with a daypack | Directly replicates the terrain and load of trekking; builds leg strength and hiking-specific endurance | Once or twice per week, 3 to 5 hours per session |
| Stair climbing (buildings or outdoor steps) | Specifically prepares the legs for the Ulleri staircase and Poon Hill ascent | 2 to 3 times per week, 20 to 30 minutes per session |
| Cardiovascular exercise (running, cycling, swimming) | Builds aerobic base so sustained walking does not feel like maximum effort | 3 to 4 times per week |
| Downhill walking or stair descent | Specifically targets the quadriceps muscles used in descents; reduces post-trek knee soreness | Once per week on a hilly route |
| Wearing your trekking boots before the trip | Breaks in the boots and identifies any hotspot or blister risk areas before you are on trail | Wear on all training walks in the final 3 weeks |
If you have 4 weeks before departure, focus on stair training and 3-hour hill walks. If you have 8 weeks, add cardiovascular base work in weeks 1 to 4 and move to terrain-specific training in weeks 5 to 8. Even 2 weeks of preparation is better than none.
Complete Packing List for Ghorepani Poon Hill Trek
The standard approach on the Ghorepani Poon Hill Trek is to have your main bag carried by a porter and carry a personal daypack yourself. Your main bag should weigh no more than 15 kg including everything. Your daypack should weigh no more than 5 to 7 kg when full. Overpacking is one of the most common causes of poor trekking experience; every kilogram you carry up the Ulleri staircase is felt by your legs.
Clothing
| Item | Quantity | Notes |
|---|---|---|
| Moisture-wicking trekking shirts (long or short sleeve) | 2 to 3 | Merino wool or synthetic; cotton retains sweat and chills you |
| Trekking trousers or zip-off pants | 2 | Lightweight, quick-dry; avoid jeans completely |
| Thermal base layer top and bottom | 1 set | Essential for Ghorepani and Poon Hill pre-dawn; merino wool preferred |
| Fleece jacket or midlayer | 1 | For cold mornings and evenings at Ghorepani (2,860 m); temperatures can drop to 0 to 5 degrees Celsius at night |
| Down jacket or insulated jacket | 1 | For the Poon Hill pre-dawn climb; essential in November through February |
| Waterproof rain jacket | 1 | Lightweight; doubles as windbreaker on Poon Hill ridge; essential year-round |
| Rain trousers or waterproof pants | 1 | Optional in October; more important in pre-monsoon and monsoon months |
| Trekking socks (wool or wool blend) | 3 to 4 pairs | Merino wool reduces blisters; change daily and dry overnight |
| Underwear (synthetic or merino) | 3 pairs | Quick-dry fabric only |
| Warm hat or beanie | 1 | For Poon Hill summit; exposed to wind; essential in all months |
| Sun hat or cap with brim | 1 | UV at altitude is stronger than at sea level |
| Neck gaiter or buff | 1 | Versatile; use as face cover in dust or cold wind |
| Lightweight gloves | 1 pair | For Poon Hill pre-dawn and high ridge sections above Ghorepani |
| Trekking shorts | 1 | For lower-altitude warm sections on Days 1, 4, and 5 |
| Camp/teahouse clothes | 1 set | Loose, comfortable; to change into at teahouse after each day’s walk |
| Sandals or lightweight shoes for teahouse evenings | 1 pair | Rests your feet and reduces boot smell in communal spaces |
Footwear
| Item | Notes |
|---|---|
| Waterproof ankle-support trekking boots | The single most important item. Must be broken in before the trek. Ankle support significantly reduces sprain risk on stone steps and root-covered trails. Mid-height boots are the minimum; high-height offer more ankle protection on the descent sections. |
| Spare laces | One pair; laces break at inconvenient moments |
| Traction devices (microspikes or crampons) | Only needed if trekking in December through February when ice is possible on the Ulleri steps and Poon Hill trail before dawn |
| Gaiters (lightweight) | Optional; useful in monsoon season to keep mud and debris out of boots |
Gear and Equipment
| Item | Notes |
|---|---|
| Daypack (20 to 30 litres) | What you carry during walking hours. Should have a hip belt for weight distribution on long days. |
| Main bag or duffel (50 to 70 litres) | Carried by your porter. A lockable duffel or backpack with a rain cover works best. |
| Trekking poles (collapsible) | Optional on ascents; very strongly recommended for descents. Reduces knee stress significantly on the Tadapani to Ghandruk and Ghandruk to Nayapul descents. |
| Headlamp with fresh batteries or rechargeable | Essential for the Day 3 pre-dawn Poon Hill ascent. LED with red light mode is easier on your eyes in the dark. Bring spare batteries or a USB-rechargeable model with a power bank. |
| Sleeping bag (-5 to -10 degree Celsius rating) | Teahouses provide blankets but they can be thin at Ghorepani (2,860 m) where temperatures drop to 0 to 5 degrees Celsius overnight. A sleeping bag liner alone is insufficient in cold months. |
| Sleeping bag liner | Adds 3 to 5 degrees of warmth and keeps your sleeping bag clean across multiple nights |
| Rain cover for main bag | Protects your porter’s load in rain; many duffels are not waterproof |
| Dry bags or zip-lock bags | Protect electronics, documents, and clothes inside the main bag |
| Trekking towel (quick-dry microfibre) | Compact; teahouses sometimes provide a towel but not always clean ones at remote locations |
| Power bank (10,000 mAh minimum) | Phone charging is available at teahouses for a fee (NPR 100 to 300 per device) but a power bank ensures you always have power for camera, headlamp, and navigation apps |
| USB charging cables for your devices | Nepal uses 230V; bring a universal adapter if your plugs differ |
| Reusable water bottle (1 litre minimum) | Reduces plastic waste on the trail; refill from teahouse boiled water rather than buying single-use bottles |
| Water purification backup (iodine tablets or SteriPen) | For emergency water treatment above Banthan; stream water is not safe without treatment |
Health and Hygiene
| Item | Notes |
|---|---|
| Sunscreen SPF 50+ | Apply daily. UV at 2,000 to 3,000 m is significantly stronger than at sea level; sunburn happens fast even on cloudy days at altitude. |
| Lip balm with SPF | Cold air and altitude dry lips quickly; cracked lips are painful on a multi-day trek |
| Sunglasses (UV400) | Polarised lenses recommended; reflected glare off snow on Poon Hill in winter and spring is intense |
| Personal first aid kit | Include: ibuprofen, paracetamol, antihistamine, blister pads, plasters, antiseptic wipes, and any personal prescription medication. Your guide carries a group kit. |
| Blister treatment kit | Compeed or moleskin patches; treat hotspots before they become blisters; the Ulleri staircase is the main blister trigger |
| Hand sanitiser (small bottle) | Teahouse toilet facilities vary; clean hands before eating every day |
| Toilet paper (small pack) | Some trail toilets do not supply paper |
| Biodegradable soap or body wipes | Hot showers available at Ghorepani and Ghandruk; body wipes for the nights when showers are cold |
| Personal medications | Bring a full supply plus a 2-day buffer in case of itinerary extension. Store medications in your daypack, not in the porter bag. |
| Insect repellent (DEET-based) | Mainly needed at lower altitudes below 1,800 m on Days 1 and 5; less relevant above Tikhedhunga |
| Toilet kit (toothbrush, paste, small mirror) | Keep compact and minimal |
Documents and Money
| Item | Notes |
|---|---|
| Passport (original) | Required for TIMS card and ACAP permit registration; carry at all times on the trail |
| TIMS card | Issued by your agency or the Nepal Tourism Board in Pokhara; checked at Birethanti and the exit checkpoint |
| ACAP permit | Annapurna Conservation Area Permit; checked at multiple points including Ghorepani; both permits included in all NTN packages |
| Travel insurance documents | Carry a printed copy; confirm policy covers trekking up to 4,000 m and helicopter evacuation |
| Cash in Nepali rupees (NPR) | No ATMs on the trail after Birethanti; carry NPR 8,000 to 15,000 for personal expenses across 5 days. USD not accepted at teahouses. |
| Emergency contact card | Name, blood type, medical conditions, next of kin, and your agency contact number; laminate or place in a waterproof sleeve |
Photography and Electronics
| Item | Notes |
|---|---|
| Camera or smartphone | The Poon Hill sunrise, Ulleri mountain views, and Ghandruk village are the three main photography moments of the trek |
| Extra memory cards or cloud backup | Pre-dawn photography and mountain panoramas fill storage quickly |
| Lightweight tripod or gorilla pod | For sunrise photography when light is low; optional but useful |
| Offline maps downloaded to phone | Maps.me or Gaia GPS; download the Pokhara and Annapurna region before leaving Pokhara; mobile data is unreliable above Birethanti |
Everything Carried, Nothing Forgotten
Our porters carry your main bag so you walk light. Permits, guide, teahouses, and transport are all arranged before you arrive. Just focus on the trail.
Get a Quote for Your DatesWhat to Leave Behind
Overpacking is the most common preparation mistake on this trek. Everything you carry above Tikhedhunga, whether in your daypack or in your porter’s bag, makes the Ulleri climb and the Poon Hill ascent harder. Leave the following at your Pokhara hotel in a stored bag:
Laptop computers (use your phone instead), heavy camera gear unless photography is the primary purpose of the trip, full-size toiletry bottles (decant into 50 to 100 ml travel bottles), more than two books or heavy reading material, multiple pairs of jeans or heavy non-trekking clothing, and any shoes other than trekking boots and one pair of lightweight sandals or camp shoes.
Weather and Seasonal Preparation
The gear you need varies significantly by season. The tables below outline the key clothing and gear adjustments for each main trekking period:
| Season | Months | Temperatures at Ghorepani | Key Extra Items |
|---|---|---|---|
| Post-monsoon peak | October to November | Day: 10 to 18 degrees Celsius. Night: 2 to 8 degrees Celsius | Down jacket for Poon Hill, fleece, warm hat, gloves. Light rain jacket. Sunscreen essential. |
| Winter | December to February | Day: 3 to 10 degrees Celsius. Night: minus 5 to 2 degrees Celsius | Heavyweight down jacket mandatory. Thermal base layer essential. Traction devices (microspikes) for Ulleri and Poon Hill ice. Warm gloves. Balaclava optional. |
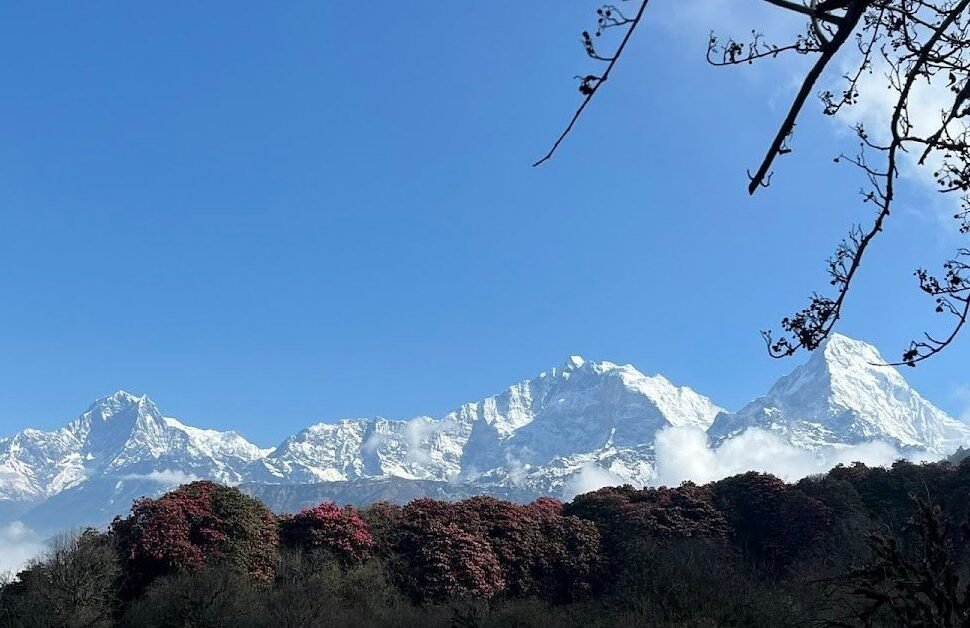
| Pre-monsoon spring | March to April | Day: 12 to 20 degrees Celsius. Night: 5 to 12 degrees Celsius | Down jacket still needed for Poon Hill pre-dawn. Rain jacket essential from late March. Rhododendron forests in full bloom; outstanding photography conditions. |
| Late spring | May | Day: 15 to 22 degrees Celsius. Night: 8 to 14 degrees Celsius | Rain gear becomes more important; afternoon rain showers possible. Lighter insulation but still bring a fleece for high sections. Trails can be muddy. |
| Monsoon | June to September | Day: 15 to 22 degrees Celsius. Night: 10 to 16 degrees Celsius | Full waterproof jacket and trousers essential. Gaiters useful for mud. Leech socks recommended below 1,800 m. Anti-leech spray. |
Leech Season and Monsoon Trekking Preparation
Leeches are present on the Ghorepani trail between June and September below approximately 1,800 m. They are found in the leaf litter and undergrowth on both sides of the trail and attach to boots, socks, and lower trousers. They are not dangerous but are unpleasant. The following items significantly reduce leech encounters:
Leech socks (worn over trekking socks and tucked under trouser hems) are the most effective physical barrier. DEET-based repellent sprayed on the outside of boots, socks, and lower trouser legs repels leeches. Inspect yourself at every rest stop below Tikhedhunga and remove any leeches with a quick flick before they attach. Above Tikhedhunga at 1,525 m, leeches become uncommon. The Ghorepani and Poon Hill sections above 2,000 m are leech-free even in monsoon season.
Guide and Porter: What They Carry, What You Carry
Nepal’s government has required licensed guides for all trekkers in the Annapurna Conservation Area since April 2023. A guide is not optional. On the practical side, a good guide manages all navigation, permit checks, teahouse bookings, food ordering, and communication with lodge owners on your behalf. They also carry group essentials such as a first aid kit and altitude medication for emergencies.
A porter carries your main bag, typically up to 15 kg. Some trekkers choose to bring a porter and forego their own daypack by keeping all essentials in small pockets or a vest. Most trekkers prefer to carry a small daypack with their camera, water, snacks, and a layer, and have the porter carry the heavy load.
| Bag | Who Carries It | Typical Contents | Weight Limit |
|---|---|---|---|
| Main duffel or pack | Porter | Sleeping bag, extra clothing layers, toiletries, teahouse clothes, shoes, and anything not needed during the day’s walk | 15 kg maximum |
| Daypack | You | Water (1 to 2 litres), snacks, rain jacket, spare layer, headlamp, camera, permits, power bank, sunscreen, first aid essentials | 5 to 7 kg maximum |
| Guide’s pack | Guide | Group first aid kit, emergency supplies, walkie-talkie if provided, their own personal items | Guide’s discretion |
Trail Safety and Emergency Procedures
The Ghorepani Poon Hill Trek has a strong safety record because of its relatively low altitude, heavy teahouse density, and constant foot traffic. However, awareness of basic trail safety applies on every multi-day trek in Nepal.
Twisted ankles are the most common injury on this route. The Ulleri staircase, the Deorali descent, and the Tadapani to Ghandruk forest path all involve uneven stone and root-covered surfaces where a misplaced step can sprain an ankle. Ankle-support boots and trekking poles are the best preventive measures. If you twist an ankle, stop, assess severity, and tell your guide. In most cases with rest, strapping, and anti-inflammatory medication, trekkers can continue. In serious cases, a stretcher and a jeep from Kimche or Ghandruk provides evacuation without a helicopter.
Altitude symptoms at Ghorepani are rare but possible. Headache that worsens after rest, dizziness, or nausea at altitude are signals to descend rather than continue up. Your guide knows the protocol and has the authority to stop the group from continuing if a member shows worsening symptoms.
Pre-dawn Poon Hill safety: the trail from Ghorepani to Poon Hill is on stone steps that can be icy in winter. Walk at a pace that allows careful footing. Do not run to catch a sunrise position. Falls on the pre-dawn section happen primarily when trekkers rush in the dark. Your headlamp should light the next 3 to 4 steps clearly; a headlamp with a wide beam mode is better than a narrow spot beam for this purpose.
Emergency contacts on the trail: The ACAP checkpoint at Ghorepani has a radio link to Pokhara. Most teahouses in Ghorepani and Ghandruk have phone signal on NTC or Ncell networks. Your guide carries your agency’s emergency number. Nepal’s mountain rescue hotline can coordinate helicopter evacuation from Pokhara.
Travel insurance must cover trekking: Standard travel insurance does not always cover mountain trekking. Before departing Nepal, confirm your policy explicitly covers trekking up to 4,000 m and helicopter medical evacuation. Helicopter evacuation from the Annapurna region typically costs USD 2,500 to 4,000 and is not covered by Nepali public healthcare for foreign nationals.
Preparing to Trek in Winter (December to February)?
Extra preparation matters for winter trekking on the Ghorepani route. The Ulleri steps and the Poon Hill trail can be icy before dawn. A down jacket rated to minus 10 degrees Celsius, traction devices, warm gloves, and a balaclava are all worth packing. The reward: fewer crowds, clear mountain air, and snow on Poon Hill that makes for outstanding photography. Temperature at Ghorepani can drop to minus 5 degrees Celsius overnight in January.
Frequently Asked Questions
Is the Ghorepani Poon Hill Trek hard for beginners?
It is moderately challenging for beginners. The Ulleri staircase on Day 2 is the hardest single section and will test anyone who is not used to sustained climbing on uneven terrain. Beginners who do 4 to 6 weeks of hiking and stair training before departure will find the trek very manageable. Beginners who arrive without preparation will find Day 2 and Day 3 genuinely hard but still achievable with a patient guide and a slow pace.
Do I need trekking poles?
Trekking poles are optional on the ascents but strongly recommended for the descents. The Tadapani to Ghandruk descent (650 m over 4 to 5 km) and the final descent to Nayapul put significant stress on the knees. Poles reduce that stress by distributing load onto your arms and upper body. Trekkers with any history of knee problems should treat poles as mandatory, not optional.
What temperature should I expect at Poon Hill before dawn?
Temperatures at Poon Hill (3,210 m) before dawn range from minus 5 degrees Celsius in December and January to around 5 to 10 degrees Celsius in October and April. Wind chill at the exposed summit tower makes it feel colder than the air temperature. A down jacket, warm hat, and gloves are essential regardless of season for the pre-dawn climb. Standing on the viewpoint tower while waiting for sunrise is the coldest part of the experience; movement up the steps warms you, but standing still at the top cools you quickly.
Can I rent trekking gear in Pokhara?
Yes. Pokhara lakeside has a well-developed trekking gear market. Sleeping bags, trekking poles, down jackets, and rain gear can all be rented for a daily fee or purchased at reasonable prices in the Lakeside market area. Quality of rental items varies; inspect them carefully before renting. Trekking boots are available for purchase but are rarely good value in rentals as fit is critical. We recommend bringing your own boots from home, broken in before the trek.
Is there a weight limit for my porter bag?
The standard and ethical limit for a trekking porter’s bag on the Ghorepani route is 15 kg including the bag itself. Next Trip Nepal enforces this limit for all our porters. Overloading porters is both unsafe and a violation of porter welfare standards set by the Trekking Agencies Association of Nepal (TAAN) and the International Porter Protection Group (IPPG). If you bring more than 15 kg, arrange for two porters or leave items in Pokhara.
What if I get a blister during the trek?
Treat hotspots before they become blisters. As soon as you feel rubbing on the Ulleri staircase (Day 2 is the prime blister moment), stop, remove the boot, and apply a blister pad or Compeed patch to the pressure point. A fully formed blister needs to be left intact and padded; your guide can help manage it. The most common blister locations are the heel and the little toe due to the lateral foot movement on uneven stone steps.
Do I need to carry a sleeping bag?
A sleeping bag is strongly recommended for the Ghorepani night (2,860 m). Teahouses at Ghorepani provide blankets, but in October, November, and December through February the blankets are often thin and the rooms are cold overnight. A sleeping bag rated to minus 5 or minus 10 degrees Celsius provides comfortable sleep at any temperature you will encounter on this route. In May, June (early), and September, a sleeping bag liner may be sufficient. In the peak cold months a sleeping bag is not optional.
Mental Preparation: What to Expect Each Day
Physical preparation matters, but mental preparation is equally important on a multi-day trek. Knowing what is coming helps you pace yourself appropriately and prevents the discouragement that sometimes hits trekkers who underestimate the cumulative effort of back-to-back days of hiking.
Day 1 is typically easier than trekkers expect. The walk from Nayapul to Birethanti is mostly flat, and the gentle ascent to Tikhedhunga passes through farming villages and terraced fields. Most groups arrive at Tikhedhunga well before 2:00 pm, with energy to spare. This surplus energy is worth conserving, not celebrating, because Day 2 is where the route makes its demands known.
Day 2 is the day that tests mental resolve as much as physical fitness. The Ulleri staircase begins almost immediately above Tikhedhunga and does not relent for nearly two kilometres. Many trekkers stop multiple times on this section. This is expected and normal. The guide sets the pace, and that pace is deliberately slow to conserve energy for the full day ahead. After Ulleri, the trail becomes a forest path through rhododendron with occasional village tea stops. The arrival at Ghorepani, with its mountain views and teahouse warmth, makes the effort feel immediately worthwhile.
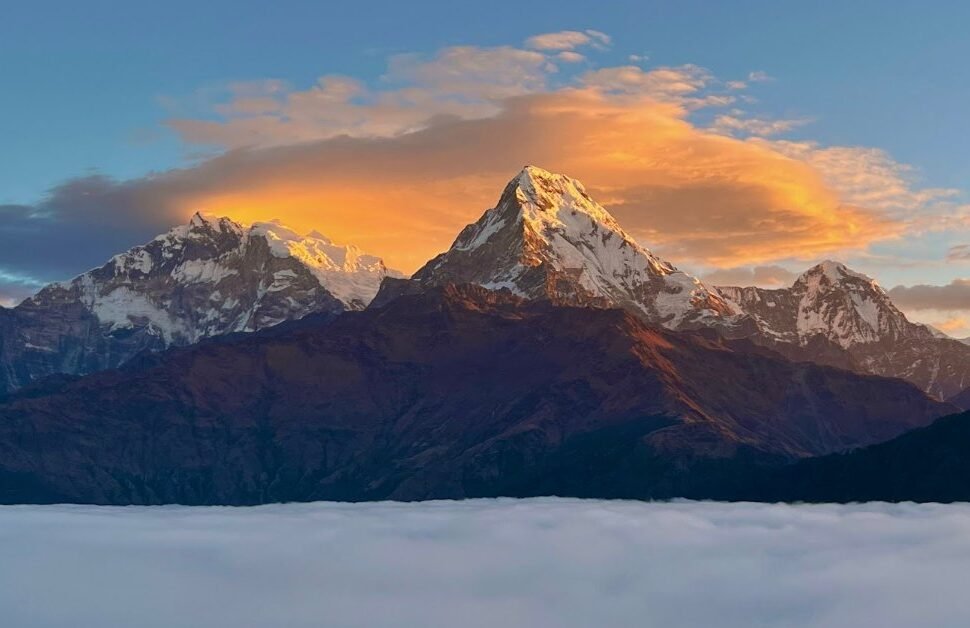
Day 3 divides into two completely different experiences. The pre-dawn Poon Hill section is quiet, focused, and memorable in a way that most trekkers do not fully anticipate until they are standing at the top watching the Himalayas turn from grey to gold. The emotional impact of the sunrise is significant for many people. After returning to Ghorepani for breakfast, the day shifts to a full trekking day via Deorali to Tadapani. This second section of Day 3 is where energy reserves are tested. Arrive at Tadapani and rest early. The teahouse terrace views at Tadapani looking toward Machhapuchhre are a reward for the effort.
Day 4 is the shortest day by walking time and many trekkers underestimate how tired their legs are from the previous three days. The steep descent from Tadapani feels harder than it looks on the map because of cumulative fatigue in the quadriceps from previous days. Walk carefully. The afternoon in Ghandruk is one of the most relaxed and enjoyable of the entire trek.
Day 5 feels like coming home. The trail descends through familiar lower-altitude terrain, the air gets warmer, and the sounds of the valley replace the high-ridge silence. Most groups have a mix of tiredness and satisfaction by the time they reach Nayapul. The drive back to Pokhara lakeside marks the end of the trek and the beginning of the post-trek appetite: most returnees eat a large meal and sleep deeply on their first night back.
Fuelling the Trek: Food and Hydration Strategy
What you eat and drink on the trail has a direct impact on performance. Many trekkers underestimate their caloric needs during multi-day mountain walking. A moderate-to-hard trekking day at altitude burns 400 to 700 calories per hour of walking, meaning a 6-hour day on the Ghorepani route burns 2,400 to 4,200 calories depending on your body weight and pace. Teahouse food is the primary fuel source.
Dal bhat (lentil soup with rice, vegetables, and pickles) is the most nutritious and filling meal available at every teahouse. Our guides eat dal bhat twice a day on every trek for exactly this reason. The combination of carbohydrates from the rice, protein from the lentils, and sodium from the pickles directly supports sustained walking effort. The custom of free refills at most teahouses means you can eat as much as you need for a single fixed price of NPR 350 to 550 depending on altitude.
Breakfast on trekking days should include carbohydrates and some protein. Porridge with honey, tsampa (roasted barley flour), eggs with Tibetan bread, or pancakes are the most practical options. Avoid skipping breakfast on any day of the trek; the Ulleri climb on Day 2 on an empty stomach is genuinely hard.
Hydration at altitude is critical. The dry mountain air and increased respiratory rate at altitude cause water loss faster than at sea level. Drink at least 3 litres of water per day throughout the trek. Urine colour is a reliable hydration indicator: pale yellow is correct; dark yellow means drink more. Carry a reusable bottle and refill from teahouse boiled water supplies. Dehydration contributes to headaches and fatigue that many trekkers attribute to altitude when the real cause is insufficient fluid intake.
Carry trail snacks from Pokhara rather than relying solely on teahouse purchases. Teahouse snacks (chocolate bars, chips, instant noodles) are 20 to 40 percent more expensive at altitude than in Pokhara. Nuts, dried fruit, energy bars, and dried mango bought in Pokhara before departure are better value and more nutritious for sustained energy on the trail.
Responsible Trekking: Porter Welfare and Trail Etiquette
Responsible trekking on the Ghorepani Poon Hill route includes awareness of the people who make the trek possible. Porters carry heavy loads over difficult terrain for daily wages and deserve respect and fair treatment. When booking through a trekking agency, confirm that the agency pays porters above the minimum daily wage set by TAAN and provides appropriate insurance. Next Trip Nepal follows these standards across all our treks.
Practical porter welfare tips: keep your main bag under 15 kg, provide your porter with appropriate clothing for cold conditions if they are not equipped for the Ghorepani altitude (temperatures drop to minus 5 degrees Celsius at night in winter), and tip based on the standard of effort and service your porter provides. The accepted tipping range for a 5-day Ghorepani trek is USD 40 to 75 for a porter and USD 50 to 100 for a guide, paid in Nepali rupees at the end of the trek.
Trail etiquette on a busy route like Ghorepani is straightforward. Yield to mule and donkey trains by moving to the uphill side of the trail; they are the priority users and their loads make steering difficult. Greet local villagers and other trekkers. Avoid playing loud music on the trail; the sound travels in mountain terrain and disturbs both other trekkers and wildlife. Carry all non-biodegradable waste out from the trail rather than leaving it at teahouses. The ACAP permit fees you pay go directly to trail maintenance and conservation in this region.
More Ghorepani Poon Hill Trek Guides
Continue planning your trek with these detailed guides: