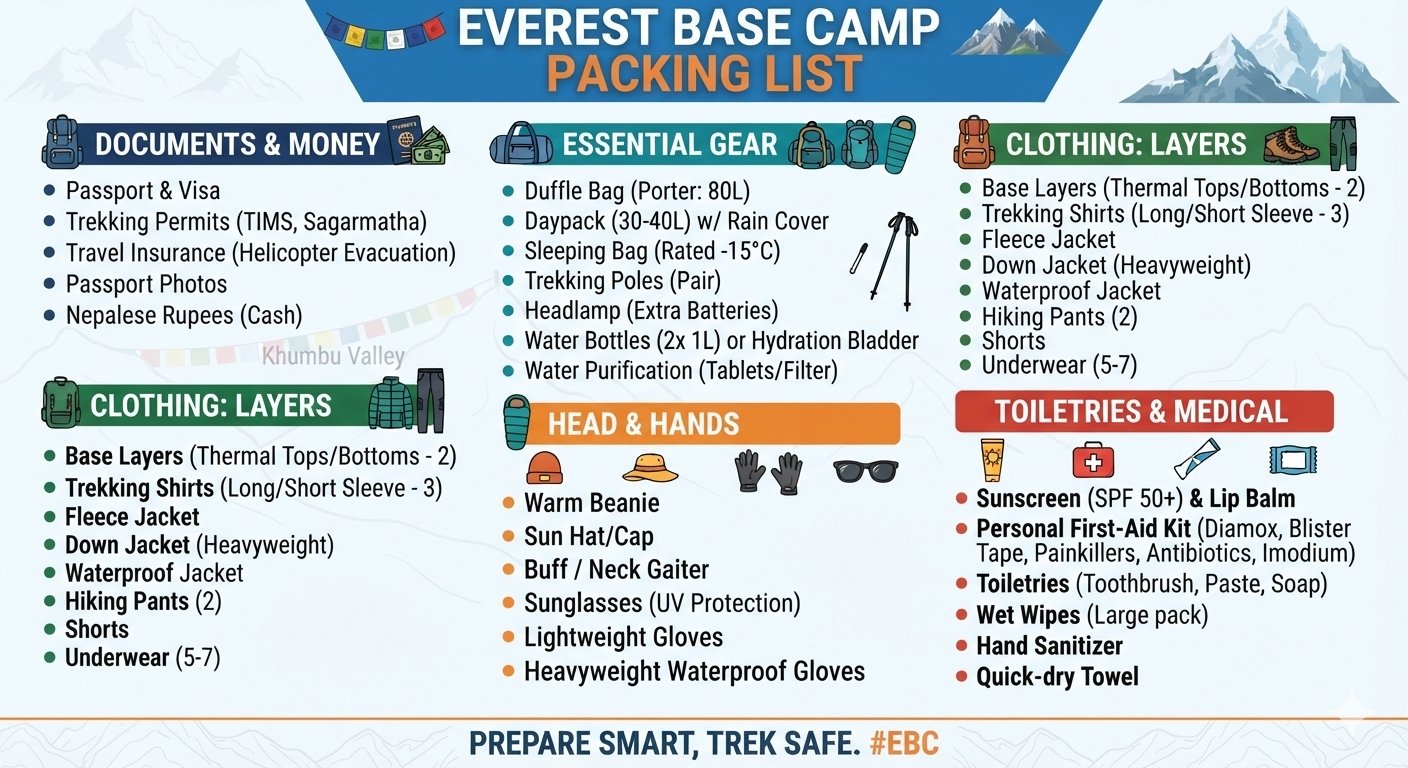
Packing correctly for Everest Base Camp is genuinely one of the few fully controllable factors that directly affects how comfortable and safe your entire trek actually feels, day after day on the trail, and it deserves far more careful thought than simply throwing together whatever cold weather gear you already happen to own at home. This guide gives you a complete, honest packing list built around the trek’s real temperature range, altitude, and daily conditions, along with practical guidance on what to buy versus rent, what genuinely matters versus what is overkill, and how to keep your pack weight reasonable for a porter supported trek.
The short answer: pack in layers built around a genuinely warm insulated jacket, proper broken in trekking boots, and a sleeping bag rated well below freezing, since overnight temperatures at higher elevations regularly drop below minus 15 Celsius even during the reliable, generally favorable autumn and spring trekking seasons. Beyond the core cold weather items, keep the rest of your packing list practical and minimal, since porters typically carry a weight limited duffel and you will be wearing much of your warmest gear rather than carrying it.
Quick Packing Overview by Category
Before diving into item by item detail, this quick overview frames the priority level of each major packing category, so you can focus your time and budget on what genuinely matters most for this specific trek.
| Category | Priority Level | Why It Matters |
|---|---|---|
| Insulation and outer layers | Essential, do not compromise here | Overnight temperatures at higher elevations regularly drop well below freezing |
| Footwear | Essential, break in before departure | Blisters from new boots are one of the most common preventable problems on this trek |
| Sleep system | Essential | Teahouse rooms are unheated, and a properly rated sleeping bag is what actually keeps you warm at night |
| Health and hygiene items | Important | Limited availability of specific products once you are on the trail |
| Electronics and extras | Optional, keep minimal | Charging costs money at altitude and weight adds up quickly |
Base Layers
| Item | Quantity | Notes |
|---|---|---|
| Merino wool or synthetic base layer top | 2 to 3 | Avoid cotton entirely, since it retains moisture and loses insulating value when wet |
| Merino wool or synthetic base layer bottoms | 2 | Worn under trekking pants on colder days and at higher elevations |
| Lightweight long sleeve trekking shirts | 2 to 3 | For warmer lower elevation days early and late in the trek |
Mid Layers and Insulation
| Item | Quantity | Notes |
|---|---|---|
| Fleece jacket or lightweight down midlayer | 1 | Worn over your base layer during the day at higher elevations |
| Heavyweight down jacket | 1 | Your primary defense against serious cold, particularly for mornings, evenings, and the Kala Patthar sunrise climb |
| Insulated down pants | Optional | Not essential for most trekkers but genuinely valued by those who feel the cold intensely |
Outer Shell Layers
| Item | Quantity | Notes |
|---|---|---|
| Waterproof, windproof shell jacket | 1 | Protects against wind chill and occasional precipitation, particularly important at higher, more exposed elevations |
| Waterproof shell pants | 1 | Worn over trekking pants in wind or light precipitation |
Lower Body
| Item | Quantity | Notes |
|---|---|---|
| Trekking pants, quick drying | 2 | Convertible zip off pants are popular but not required |
| Fleece or softshell trekking pants | 1 | Extra warmth for colder days without needing full waterproof shell pants |
| Underwear | 7 to 10 pairs | Synthetic or merino wool dries faster than cotton if you wash any along the way |
Footwear
| Item | Quantity | Notes |
|---|---|---|
| Waterproof trekking boots | 1 pair, genuinely broken in | The single most important gear decision on this entire list, blisters from new boots ruin more trips than any other equipment failure |
| Trekking socks, wool blend | 5 to 7 pairs | Thicker for colder, higher elevation days |
| Liner socks | 2 to 3 pairs | Worn under trekking socks to further reduce blister risk |
| Lightweight camp shoes or sandals | 1 pair | For resting your feet in teahouses each evening after a day of walking |
| Gaiters | Optional | Useful for keeping snow and debris out of boots, particularly in winter or early spring |
Head, Hands and Neck
| Item | Quantity | Notes |
|---|---|---|
| Warm insulated hat | 1 | Covers ears, essential for the coldest mornings and the Kala Patthar sunrise climb |
| Sun hat or cap | 1 | Protects against strong high altitude sun during the day |
| Buff or neck gaiter | 1 to 2 | Versatile for neck warmth, dust protection, and sun protection on the face |
| Lightweight gloves | 1 pair | For general daytime use while still allowing dexterity |
| Heavyweight insulated gloves or mittens | 1 pair | Essential for the coldest mornings, particularly the pre dawn Kala Patthar climb |
| Sunglasses, UV protective | 1 pair | Snow glare and strong high altitude sun make this genuinely necessary, not optional |
Sleep System
| Item | Notes |
|---|---|
| Sleeping bag rated to minus 15 to minus 20 Celsius | Teahouse rooms are unheated, this single item determines how well you actually sleep at higher elevations |
| Sleeping bag liner | Adds several degrees of warmth and keeps the bag cleaner across the trip |
Health and Hygiene
| Item | Notes |
|---|---|
| Personal first aid kit | Blister treatment, pain relievers, any personal prescription medications |
| Diamox (acetazolamide) | Discussed with your doctor before departure, widely used for altitude sickness prevention |
| Water purification tablets or a filter | Backup for teahouse boiled water, though boiled water is generally reliable at established teahouses |
| Hand sanitizer and wet wipes | Showers become less available at higher elevations, wipes are a practical substitute |
| Sunscreen, high SPF | High altitude sun exposure is significantly stronger than at sea level |
| Lip balm with SPF | Wind and altitude dry and crack lips quickly without protection |
| Toilet paper | Available at teahouses for purchase but worth carrying your own as backup |
Electronics and Extras
| Item | Notes |
|---|---|
| Headlamp with spare batteries | Essential for the pre dawn Kala Patthar climb and general use in unlit teahouse rooms |
| Power bank | Charging at teahouses costs money and is not always reliable at higher elevations |
| Trekking poles | Meaningfully reduce knee strain, particularly on descents |
| Dry bags or packing cubes | Keep gear organized and protected from moisture inside your duffel |
| Camera | Optional, though most trekkers find their phone camera sufficient for this trip |
Documents and Money
| Item | Notes |
|---|---|
| Passport and passport photocopies | Required for permits, carry both the original and a photocopy separately |
| Passport sized photos | 4 to 6, required for permit applications |
| Travel insurance documents | Including your policy number and emergency contact information |
| Cash in Nepali Rupees | ATMs become unreliable past Namche Bazaar, carry sufficient cash for the full trip |
What Not to Bring
Just as important as knowing what to pack is knowing what to deliberately leave behind, since unnecessary weight is one of the most common and most easily avoidable packing mistakes.
- Excessive changes of clothes. You will rewear the same few layers repeatedly, and laundry, while available at lower elevation teahouses, is unnecessary to plan around heavily.
- Heavy hardback books. A lightweight ereader or phone with downloaded content serves the same purpose at a fraction of the weight.
- Full sized toiletries. Travel sized versions of everything genuinely reduce pack weight without sacrificing function.
- Climbing or technical mountaineering gear. The standard route requires none of this, and bringing it is simply wasted weight.
- A second, backup pair of boots. One genuinely well broken in pair is sufficient, and a second unused pair only adds weight your porter has to carry.
Buy Versus Rent: What Actually Makes Sense
For the bulkiest, most expensive items on this list, the decision to buy new or rent locally in Kathmandu genuinely changes your total gear budget.
| Item | Recommendation | Why |
|---|---|---|
| Trekking boots | Buy and break in well before departure | Rented boots are never properly broken in to your specific feet, a genuine blister risk |
| Heavyweight down jacket | Rent in Kathmandu if this is a one time trip | Widely available, inexpensive, and reduces upfront cost for gear you may not use again |
| Sleeping bag | Rent in Kathmandu if this is a one time trip | Same reasoning as the down jacket, quality rental options are widely available and reliable |
| Trekking poles | Rent or buy, either is reasonable | Inexpensive either way, and useful for future trips if purchased |
Kathmandu’s Thamel district has a well established rental and gear shopping infrastructure specifically built around trekkers, and renting the bulkiest, most trip specific items like a heavyweight down jacket and sleeping bag is a genuinely practical way to reduce upfront cost, particularly for trekkers uncertain whether this will be their only major high altitude trek.
How Porters Affect Your Packing Strategy
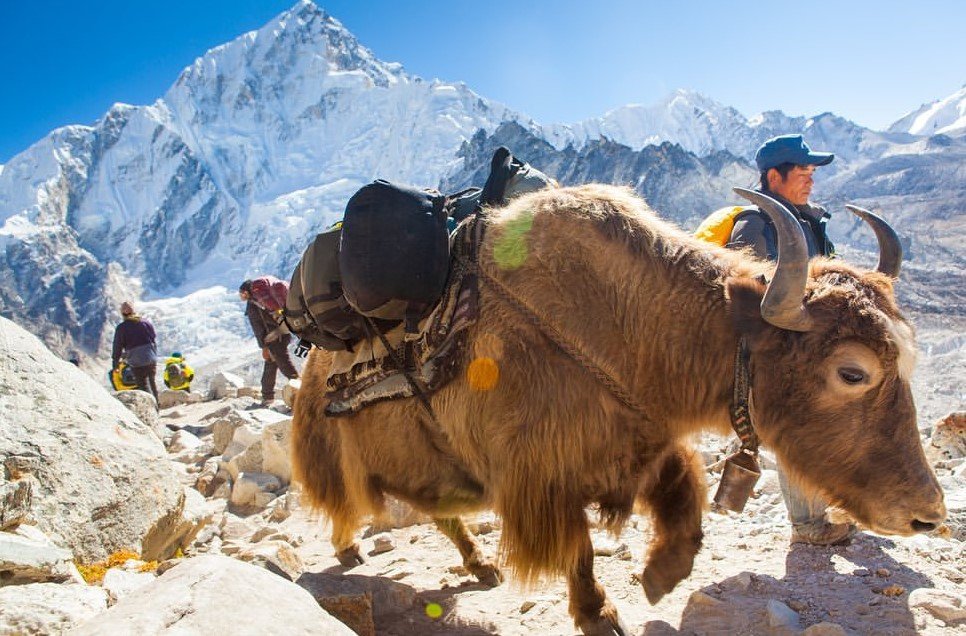
Understanding how porter support works meaningfully changes how you should think about packing. Porters typically carry a weight limited duffel bag, commonly capped around 10 to 15 kilograms per trekker depending on your specific package, while you carry only a daypack with the items you need during the walking day itself: water, snacks, a camera, sun protection, and a light layer. This division means your heaviest, bulkiest cold weather gear does not need to be carried by you personally during the day, which should inform how much genuine warmth you prioritize over minimizing weight, since the porter, not you, carries the bulk of it.
What Goes in Your Daypack Specifically
- Water bottle or hydration bladder, insulated if possible to prevent freezing at higher elevations.
- Snacks for energy throughout the walking day.
- A light insulating layer for unexpected weather changes or rest stops.
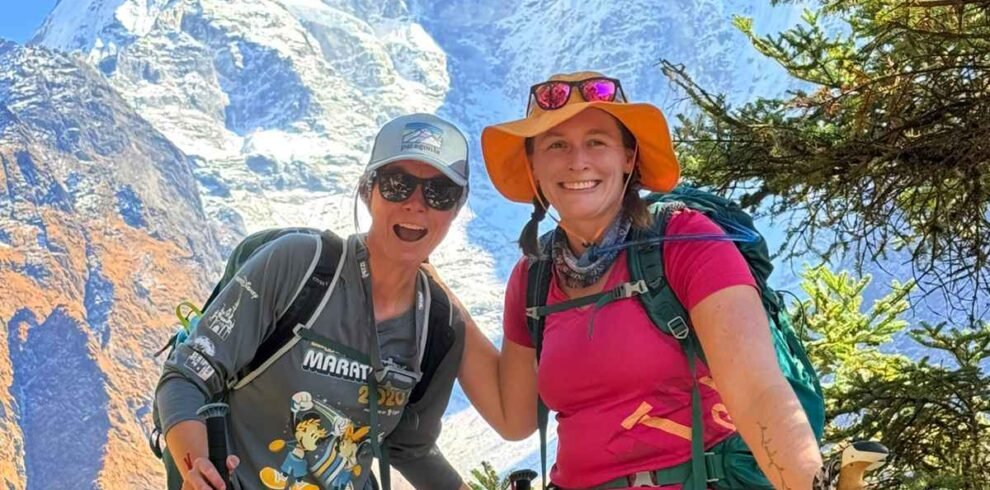
- Sun protection: sunglasses, sunscreen, and a hat.
- Camera or phone for photos throughout the day.
- Headlamp, particularly on the Kala Patthar sunrise climb day.
- Personal medications you might need during the day rather than only at the teahouse.
Seasonal Packing Adjustments
| Season | Key Adjustments |
|---|---|
| Autumn and spring (recommended seasons) | The standard packing list above applies well, with a solid mid weight down jacket sufficient for most trekkers |
| Winter | Upgrade to a heavier expedition grade down jacket, a warmer rated sleeping bag, and bring additional insulating layers for the significantly colder overnight temperatures |
| Monsoon (not generally recommended for this route) | Add genuine rain protection and consider gaiters for muddy, wet trail sections at lower elevations |
Frequently Asked Questions
How many kilograms should my duffel weigh?
Most packages limit porter carried duffel weight to around 10 to 15 kilograms, so pack thoughtfully rather than bringing everything you might conceivably want.
Can I do laundry during the trek?
Yes, at lower elevation teahouses, though it becomes less available and reliable at higher elevations, and cold, slow drying conditions make it less practical the higher you go.
Do I really need a sleeping bag if teahouses provide blankets?
Yes. Teahouse provided blankets are not warm enough for the temperatures you will encounter at higher elevations, and a properly rated sleeping bag is essential rather than optional.
Should I buy gear in my home country or in Kathmandu?
Both are reasonable. Kathmandu offers competitive prices and a wide selection specifically built for this trek, though quality varies by shop, so buying trekking boots at home where you can properly try them on and break them in is generally the safer choice.
Is a water filter necessary if teahouses provide boiled water?
Boiled water at established teahouses is generally reliable, but a backup filter or purification tablets add a genuine safety margin at minimal extra weight.
Packing List Mistakes That Actually Affect Your Trip
Beyond simply forgetting an item, a few specific packing mistakes consistently cause real problems on the trail rather than minor inconvenience. Bringing boots that have not been properly broken in is the single most common and most consequential mistake, since blisters that develop early in the trek can genuinely affect a trekker’s ability to continue comfortably for the remaining days. Underestimating how cold the pre dawn Kala Patthar climb actually feels, and packing only moderate gloves and a light hat for what is genuinely the coldest single stretch of the entire trip, is a second common and avoidable mistake. Packing too much rather than too little is a third, less dangerous but still meaningful mistake, since an overweight duffel either exceeds your porter’s weight allowance, requiring an awkward and sometimes costly adjustment on the trail, or simply becomes dead weight you did not need to bring in the first place.
A Practical Packing Timeline Before Departure
| Timing | Task |
|---|---|
| 8 to 10 weeks before | Purchase trekking boots and begin breaking them in on training hikes |
| 4 to 6 weeks before | Purchase or arrange rental for your down jacket, sleeping bag, and other major gear items |
| 2 weeks before | Do a full packing trial, weigh your duffel, and remove unnecessary items |
| Final days before | Pack final toiletries, confirm documents, and reconfirm your rental arrangements if using Kathmandu rentals |
Breaking in boots specifically requires genuine lead time, ideally 6 to 8 weeks of regular wear on training hikes before departure, since this is not a step that can be meaningfully compressed into the final days before your trip without real blister risk on the trail itself.
How This List Was Put Together
This packing list reflects the gear patterns Next Trip Nepal consistently recommends to trekkers booking the standard Everest Base Camp itinerary, cross checked against the trek’s actual seasonal temperature ranges and altitude profile covered in detail in our Everest Base Camp difficulty guide. It is built around what genuinely matters for safety and comfort on this specific route, rather than a generic cold weather packing list repurposed from a different kind of trip.
Choosing the Right Down Jacket: What the Numbers Actually Mean
Down jacket shopping can feel confusing given how many different specifications get marketed at once, but a few figures genuinely matter for this specific trek. Fill power, a measure of down quality typically ranging from 550 to 900, indicates how much warmth a given weight of down provides, with higher numbers meaning better warmth to weight ratio. Fill weight, the actual amount of down inside the jacket, matters just as much as fill power, since a jacket with excellent fill power but very little actual down will still underperform. For Everest Base Camp specifically, a jacket combining a fill power of at least 700 with a genuinely substantial fill weight, rather than an ultralight jacket designed primarily for packability over raw warmth, strikes the right balance for the temperatures you will actually encounter. Trekkers should be wary of very cheap down jackets marketed as suitable for this trek, since these frequently use lower quality down and insufficient fill weight to actually perform at the temperatures Everest Base Camp regularly reaches.
Understanding Sleeping Bag Temperature Ratings
Sleeping bag temperature ratings can be genuinely misleading if you do not understand how they are typically presented. Many manufacturers list both a comfort rating and a lower limit rating, and the comfort rating, the temperature at which an average sleeper stays genuinely warm through the night, is the figure that matters most for planning purposes, rather than the more marketing friendly lower limit figure, which represents survival rather than comfort. For Everest Base Camp, look specifically for a comfort rating of minus 15 Celsius or colder, since teahouse rooms are unheated and overnight temperatures at higher elevations regularly reach this range even during the reliable autumn and spring seasons. A sleeping bag liner adds a genuinely useful additional 3 to 5 degrees of warmth on top of the bag’s own rating, which is a worthwhile addition even with a properly rated bag, both for the extra warmth margin and for keeping the bag itself cleaner across the trip.
The Layering System Explained Properly
Understanding why layering works, rather than simply following a packing list mechanically, helps you make better decisions on the trail when conditions change day to day. The base layer’s job is moisture management, wicking sweat away from your skin so you do not get cold from dampness even during active walking. The mid layer’s job is insulation, trapping warm air close to your body, which is why fleece and down both work well here despite feeling very different. The outer shell layer’s job is protection from wind and precipitation, and critically, a good shell does this while still allowing some breathability, rather than trapping moisture against your insulating layers underneath. Understanding this three part system means you can mix and match layers intelligently as temperature and conditions change throughout a single day, rather than simply putting on every layer you own whenever you feel cold.
Boot Selection: Beyond Just Breaking Them In
While breaking in your boots properly is essential, boot selection itself deserves more thought than simply choosing the most popular model. Look specifically for a boot rated for cold weather trekking with genuine waterproofing, not just water resistance, since river crossings and occasional snow are realistic possibilities even during peak season. Ankle support matters more on this trek than many casual hikers initially assume, given the uneven stone staircases and moraine sections near Base Camp itself. A boot that fits well with a proper trekking sock and liner sock combination, rather than one that only fits comfortably with thin everyday socks, avoids a common mistake where trekkers buy boots that feel great in the store but become uncomfortably tight once actual trekking socks are added for warmth on the trail.
Trekking Poles: Why They Matter More Than Many Trekkers Expect
Trekking poles are often treated as an optional add on, but they genuinely earn their place near the top of any serious Everest Base Camp packing list. Beyond the obvious balance assistance on uneven terrain, poles meaningfully reduce the cumulative strain on knees and joints across twelve to fourteen consecutive days of walking, particularly on the steep descents below Namche Bazaar and on the return from Kala Patthar. Adjustable, collapsible poles pack down small enough to strap to the outside of a daypack without adding meaningful bulk, and the modest cost of a decent pair is easily justified by the reduced physical strain over the full length of the trek. Trekkers who arrive without poles frequently end up purchasing a basic pair in Namche Bazaar or Lukla once they realize how much they would have benefited from having them from day one.
Altitude Specific Gear Considerations
Beyond general cold weather gear, a few items specifically address the altitude related challenges of this trek rather than simply the cold. A pulse oximeter, while not strictly necessary if your guide carries one, gives trekkers who want their own objective data point on blood oxygen saturation a useful tool for tracking their own acclimatization trend. Snack items with genuine caloric density, rather than simply sugary treats, help address the appetite suppression that is common at altitude, since maintaining adequate calorie intake meaningfully supports the acclimatization process. A small supply of electrolyte tablets or powder, added to water, helps address the increased hydration needs altitude places on the body beyond what plain water alone easily accomplishes.
Packing for Photography Without Overpacking
Trekkers with a genuine interest in photography face a specific packing tension between bringing quality equipment and keeping weight manageable. A single capable camera body with one versatile lens, rather than a full kit with multiple lenses, strikes a reasonable balance for most trekkers, since the trek’s varied but generally consistent high alpine scenery does not typically demand specialized lenses the way some other photography focused trips might. Extra batteries matter more than extra lenses in cold weather specifically, since battery performance degrades meaningfully in cold temperatures, and carrying spare batteries kept warm inside an inner jacket pocket, rather than in an outer pocket exposed to the cold, genuinely extends usable battery life throughout a full day of shooting.
What Experienced Guides Say Trekkers Most Commonly Overpack
Guides who have led this route repeatedly consistently identify a similar pattern in what first time trekkers tend to overpack. Excessive changes of regular clothing, beyond what is genuinely needed given the practical reality that most trekkers rewear the same few layers repeatedly, is the most commonly cited example. Multiple redundant light sources beyond one solid headlamp and a spare set of batteries is another common pattern, since a single reliable headlamp genuinely covers the trek’s lighting needs. Full sized toiletries, rather than travel sized versions of the same products, add unnecessary weight for a two week trip where minimal quantities are entirely sufficient. Recognizing these common overpacking patterns before you finalize your own list is a genuinely practical way to keep your duffel within a reasonable weight without sacrificing anything that actually matters for comfort or safety.
Packing List Differences for Solo Trekkers Versus Groups
Solo trekkers and those traveling in a group face largely the same core packing needs, but a few practical differences are worth noting. Solo trekkers sometimes benefit from carrying a slightly more complete personal first aid kit, since they will not have the option of borrowing a forgotten item from a travel companion the way group trekkers sometimes can. Group trekkers can reasonably share certain bulkier items, such as a single larger first aid kit or a shared power bank, reducing redundant weight across the group as a whole. Neither situation requires a fundamentally different packing approach, but being aware of these small practical efficiencies helps solo and group trekkers alike pack slightly more intelligently for their specific situation.
How Much Should Your Full Packing List Actually Cost?
| Scenario | Approximate Total Cost | Notes |
|---|---|---|
| Buying everything new, no existing gear | $500 to $900 | Includes boots, sleeping bag, down jacket, and all layers and accessories |
| Owning some general hiking gear already, buying the rest | $250 to $500 | Most trekkers already own base layers, socks, and some accessories from general outdoor activity |
| Renting bulky items in Kathmandu, buying the rest | $150 to $350 | Renting the down jacket and sleeping bag specifically reduces upfront cost meaningfully |
Understanding the realistic cost range for a full packing list helps trekkers budget accurately rather than being caught off guard by gear expenses on top of the trek package price itself. For trekkers who already own general outdoor gear, the incremental cost of preparing specifically for Everest Base Camp is often considerably lower than trekkers without any existing gear initially assume.
Packing for the Return Journey and Kathmandu Time
It is easy to focus entirely on trail specific gear and forget to plan for the days spent in Kathmandu before and after the trek itself. A single set of comfortable, non trekking clothes for your time in the city, along with any specific items needed for sightseeing or cultural site visits, such as a scarf or shawl for temple visits where modest dress is expected, rounds out a genuinely complete packing list. Many trekkers leave a small bag of city clothes at their Kathmandu hotel for the duration of the trek itself, rather than carrying everything to and from the mountains, a practical strategy worth arranging with your hotel or trekking agency before departure.
Weight Distribution: Packing Your Duffel Intelligently
Beyond simply staying under the weight limit, how you distribute weight within your duffel affects how comfortably your porter carries it and how easily you can access items you need without unpacking everything. Heavier items like your sleeping bag and down jacket should sit toward the bottom and center of the duffel, closer to where a porter’s back rests against the load, rather than shifted toward one end where they create an awkward, unbalanced carry. Items you might need mid trip, such as a spare headlamp battery or medication, are worth packing in an easily accessible outer pocket or near the top of the main compartment, rather than buried beneath everything else, so you are not unpacking your entire duffel at a teahouse just to find one small item.
Caring for Your Gear During the Trek
A few simple habits help keep your gear functioning well across the full two week trip. Airing out damp clothing and boots overnight in a well ventilated part of your teahouse room, rather than sealing everything back into your duffel while still damp, meaningfully reduces both odor and the risk of gear staying wet into the following day. Keeping electronics and batteries inside an inner jacket pocket overnight, rather than left in a cold room, preserves battery performance and prevents the specific cold related battery drain that catches many trekkers off guard. Checking boots each evening for any developing hot spots or early signs of wear, rather than waiting until a blister has already formed, allows you to address minor issues with tape or moleskin before they become genuinely trip affecting problems.
What to Do if You Forget Something Important
Despite careful planning, trekkers occasionally realize partway through their trip that they forgot a genuinely important item. The good news is that Namche Bazaar, reached on day two of the standard itinerary, has a surprisingly well stocked collection of trekking shops selling everything from gloves and hats to basic trekking poles and even some down jackets, often at reasonable prices given the remote location. Beyond Namche, options become progressively more limited, so addressing a forgotten essential item as early as possible in the trek, rather than assuming you will find it further along the route, is the more reliable approach. Guides are also generally happy to help trekkers problem solve a forgotten item, sometimes lending a spare piece of their own gear or helping arrange a local purchase, which is one more practical benefit of trekking with an experienced, well connected guide rather than navigating this kind of issue entirely alone.
Packing List Adjustments for Trekkers Who Feel the Cold Intensely
Cold sensitivity varies significantly between individuals, and trekkers who know from experience that they feel cold more intensely than average should adjust the standard packing list accordingly rather than assuming a one size fits all approach works equally well for everyone. This might mean upgrading to a heavier fill weight down jacket even during the recommended autumn and spring seasons, adding an extra warm layer beyond what this guide’s standard list suggests, or choosing a sleeping bag rated several degrees colder than the trek’s average conditions would otherwise require. This additional gear adds a small amount of extra weight and cost, but for trekkers who know cold genuinely affects their trip enjoyment more than average, this is a worthwhile adjustment rather than an unnecessary indulgence, and it is far easier to plan for this in advance than to discover the mismatch already partway up the trail.
A Note on Sustainable and Responsible Gear Choices
Trekkers increasingly ask about more sustainable gear options, and a few practical choices genuinely align both environmental consciousness and trek specific practicality. Renting bulky, infrequently used items like a heavyweight down jacket or sleeping bag, rather than purchasing gear that may only be used once, reduces unnecessary consumption while still meeting the trek’s genuine gear requirements. Bringing a reusable water bottle rather than relying on purchased bottled water, combined with water purification tablets or a filter, meaningfully reduces plastic waste along a route that, given its popularity, already faces real waste management challenges. Choosing durable, quality gear built to last across multiple future trips, rather than the cheapest available option intended for single use, also represents a more genuinely sustainable long term approach for trekkers who anticipate future high altitude trips.
How This List Compares to Generic Cold Weather Trekking Lists
A meaningful number of generic packing lists circulating online are written for cold weather trekking broadly, rather than specifically for Everest Base Camp’s particular altitude profile, duration, and porter supported logistics. These generic lists sometimes underweight the importance of a genuinely warm sleeping bag, since many general cold weather hikes do not involve unheated overnight accommodation at high altitude the way teahouse trekking does. They also sometimes overweight technical mountaineering gear entirely unnecessary for this standard, non technical route. This guide has been built specifically around Everest Base Camp’s actual conditions rather than adapted from a more generic template, which is why it places particular emphasis on the sleeping bag rating, the pre dawn Kala Patthar cold specifically, and the porter supported duffel system that shapes how you should think about weight and distribution differently than you would for a fully self carried backpacking trip.
A Realistic Sample Packing Checklist to Work From
Bringing everything covered in this guide together, a genuinely realistic starting checklist looks roughly like this: two to three base layer tops, two base layer bottoms, one fleece midlayer, one heavyweight down jacket, one waterproof shell jacket and pants, two trekking pants, five to seven pairs of trekking socks with liner socks, one properly broken in pair of waterproof trekking boots, one pair of camp shoes, a warm insulated hat and a sun hat, lightweight and heavyweight gloves, UV protective sunglasses, a sleeping bag rated to at least minus 15 Celsius with a liner, a personal first aid kit, sunscreen and lip balm with SPF, a headlamp with spare batteries, a power bank, trekking poles, and your full set of travel documents including passport photocopies and passport sized photos. Use this as a genuine starting point, then adjust based on your own cold sensitivity, the specific season you are traveling in, and whether you plan to rent or buy the bulkier items covered earlier in this guide.
Related Planning Guides
A few more guides worth reading before departure: our honest look at whether Everest Base Camp is worth it, our complete Nepal Trekking Permits guide covering fees and the 2026 rule changes, and our Altitude Sickness Prevention and Safety Guide for staying healthy at elevation.
Final Word on Packing for Everest Base Camp
Take the time to pack thoughtfully well before departure day, since a genuinely well thought out packing list is one of the more controllable factors in how comfortable and safe your Everest Base Camp trek actually feels, and it is worth genuine care rather than a last minute scramble. Prioritize a properly broken in pair of boots, a genuinely warm sleeping bag and down jacket, and layered clothing built around the trek’s real temperature range, and keep the rest of your list practical and minimal, trusting your porter to carry the bulk of your gear rather than trying to carry everything yourself. Trekkers who pack this way consistently report feeling genuinely prepared rather than either uncomfortably cold or unnecessarily weighed down, which is precisely the right, well calibrated balance a genuinely well built packing list should always aim to achieve for this specific trek, rather than either leaving you dangerously underprepared for the coldest nights or so heavily loaded that the walking itself becomes needlessly exhausting long before you ever reach Base Camp.