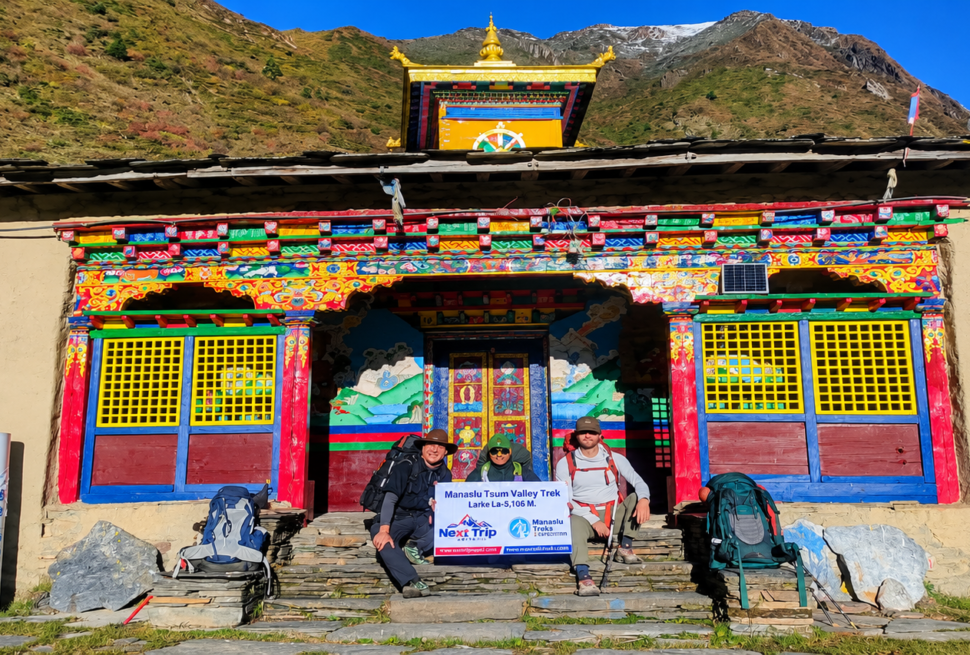
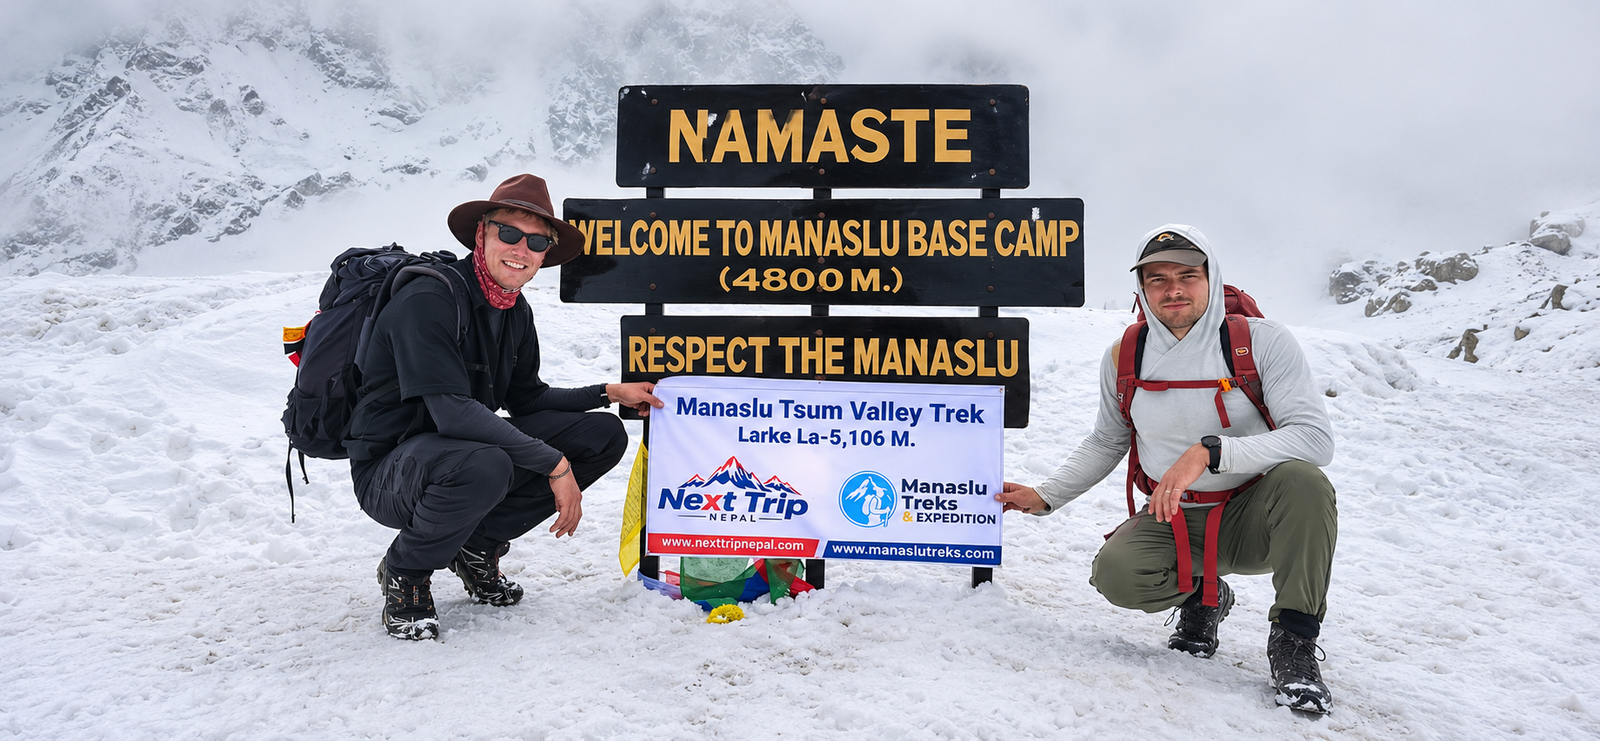
Getting the itinerary, permits, and cost sorted is only half the job before you fly to Kathmandu for the Manaslu Tsum Valley Trek. The other half, the part that actually decides whether you are warm, dry, and healthy for 20 days on the trail, is what goes into your duffel bag. If you have already read our Manaslu Tsum Valley Trek Guide for the day by day route, permit rules, and cost breakdown, this article picks up right where that one left off. Here we go deep on gear: what to bring, what to leave at home, how much it should all weigh, and why a packing list built for Everest Base Camp or the Annapurna Circuit will leave you cold and uncomfortable on this particular route.
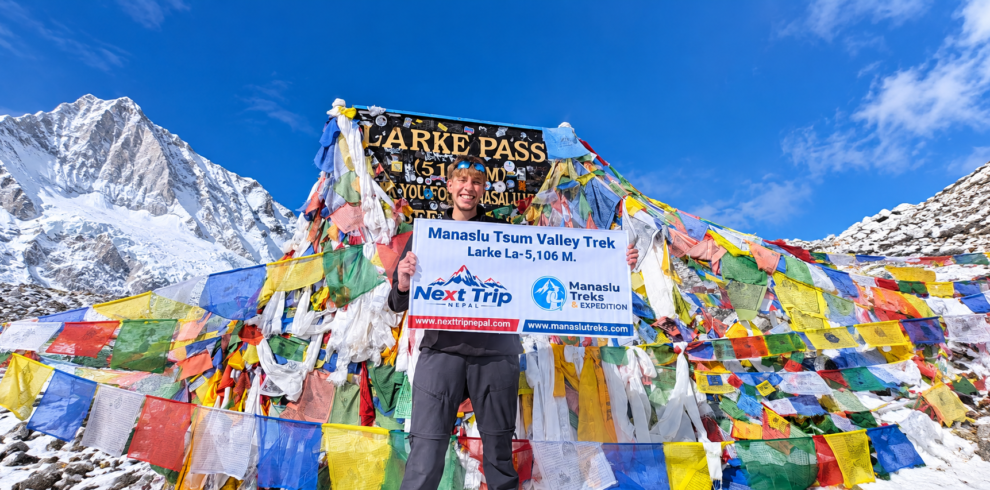
This trek covers an unusual amount of climatic ground. You start low, in warm, humid hill country above the Budhi Gandaki river at around 900 meters, and roughly three weeks later you are standing on a wind scoured pass at 5106 meters with ice underfoot and your breath freezing on your buff. In between you pass through terraced farmland, pine and rhododendron forest, high desert style villages that feel more Tibetan than Nepali, and glacier moraine below towering peaks. No single jacket, no single sleeping bag rating, and no single pair of socks will carry you comfortably through that whole range. That is exactly why we have written this guide the way we have: as a complete layering and gear system, not just a shopping list copied from another trek.
Why Packing Right Matters on This Specific Trek
Most general Nepal packing advice assumes a fairly standard altitude curve. The Manaslu Tsum Valley Trek is not standard. It combines a long, warm, low altitude approach through the Budhi Gandaki gorge with the high alpine drama of the Larke La crossing, plus the detour into Tsum Valley, a remote valley close to the Tibetan border that holds cold air in its upper reaches even in otherwise mild months. Trekkers who pack only for “the Himalaya” in a generic sense often end up either hauling far too much heavy gear through the hot lower valley, or shivering through the nights above Samdo and Dharamsala because they underestimated just how cold a restricted area trek at this altitude gets once the sun goes down.
Four practical realities shape everything on this list, and we want to walk through them before handing you a single checklist, because understanding the why makes the what much easier to decide on your own when you are standing in a gear shop in Thamel or packing at home.
A Genuinely Wide Temperature Range
Daytime temperatures near Machha Khola and Jagat, down in the subtropical lower valley, commonly sit in the comfortable range of 20 to 28 degrees Celsius for much of the year, and the walking there is sweaty, humid work through farmland and river valleys. By the time you reach Samagaon, Samdo, and the approach to Larke La, nighttime temperatures regularly fall well below freezing, and on a cold, clear, windy night close to the pass itself, temperatures of minus 10 to minus 20 degrees Celsius are realistic rather than exaggerated. The crossing of Larke La itself typically happens before dawn, specifically because the snow underfoot is firmer and the weather tends to be calmer in the early morning hours, which means you are often starting your summit style push for the pass at an hour when it is at its coldest. Our Best Time to Trek Manaslu Tsum Valley guide goes into how this shifts by season, but even in the warmer trekking months of spring and autumn, the pass morning is a genuinely cold, high mountain experience and needs to be treated as one.
Teahouses With Limited Heating
Teahouses along the Manaslu and Tsum Valley route are simple, family run lodges, and heating is far more limited than most first time trekkers expect. In the lower villages you may not need any heating at all. Higher up, most dining rooms have a central wood or dung burning stove that the lodge owners light in the evening, and that single room is genuinely warm while the fire burns and genuinely cold within an hour of it going out. Bedrooms are almost never heated. You sleep in the same temperature as the unheated hallway, often with a single pane window and gaps around the door frame. This is normal for teahouse trekking in Nepal and not a sign of a bad lodge, but it does mean your sleeping bag, base layers, and hat are doing real work overnight, not just sitting in your pack as backup.
Multi Week Duration
At around 20 days door to door, this is a long trek by Nepal standards, longer than Everest Base Camp and considerably longer than most Annapurna routes. That duration changes packing logic in two ways. First, you cannot simply overpack and grin through it, because you will be wearing and washing the same limited set of clothing for three weeks, so fabric choice, durability, and how quickly something dries matter more here than on a one week trip. Second, a 20 day trek gives weather more chances to turn against you. You are statistically more likely to hit at least one genuinely wet, windy, or unexpectedly cold day somewhere on a three week trek than on a five day one, so the margin built into your gear choices should reflect that.
Porter Weight Limits
Because Manaslu and Tsum Valley are restricted areas with a requirement to trek with a licensed guide, most trekkers hire porters to carry the bulk of their gear, which is a huge comfort advantage, but it is not an unlimited one. Porters have real weight limits for their own safety and longevity in this job, and every agency, including us, enforces a cap per trekker’s duffel. That cap shapes almost every decision further down this list, right down to whether you bring one fleece or two. We cover the actual numbers in detail below.
The Layering System Explained
If there is one single idea we want you to take from this article, it is this: pack a layering system, not a single heavy coat. A huge down parka feels like the safe, simple choice when you are shopping at home, but on a trek that spans subtropical farmland and a glaciated pass, one thick jacket is either far too hot or not warm enough almost everywhere except the final morning. A proper layering system lets you add and remove warmth in small increments as the trail climbs, drops, gets windy, or gets wet, and it packs down smaller and lighter than people assume.
Base Layers
Base layers sit against your skin and their job is moisture management, not warmth on their own. Merino wool and synthetic base layers both work well; merino has the advantage of resisting odor over multiple days of wear without washing, which matters a great deal on a three week trek with limited laundry access, while synthetics tend to dry faster after washing. Cotton is the one fabric we would steer you away from for any layer that touches your skin on this trek. Cotton holds moisture, dries slowly, and loses almost all of its insulating value once damp, which is a real problem when you are sweating on a climb one hour and standing still in cold wind the next. Bring at least two lightweight base layer tops and bottoms in a mid weight fabric, enough to rotate while one dries.
Mid Layers
Mid layers add the bulk of your active warmth and typically come in two forms: fleece and synthetic insulated jackets. A midweight fleece is breathable and forgiving while you are moving and generating heat, which makes it the right choice for most hours of actual walking once you are above the warm lower valley. A thin synthetic insulated jacket is a useful addition for breaks, lower camp evenings, and the colder villages, since synthetic insulation (unlike down) keeps some of its warmth even if it gets slightly damp from sweat or light drizzle. Many trekkers bring one of each rather than two of the same thing, which gives more flexibility across the temperature range than two identical layers would.
Down Jacket
A good quality down jacket is the layer that gets you through cold evenings in the high villages and the pass morning itself. Look for fill power in a reasonably high range, since higher fill power down traps more warmth for the same weight, which matters when porter weight limits are tight. A hood is genuinely useful rather than a luxury, since a huge amount of body heat is lost through an uncovered head and neck once the sun sets above 3000 meters. This jacket will likely spend most of the first week of the trek compressed in your bag doing nothing, which is fine. It earns its place entirely in the final third of the route, from Samagaon through the pass crossing and on the cold mornings in Tsum Valley.
Waterproof and Windproof Shell
Your outer shell is not primarily for staying warm, it is for staying dry and blocking wind, both of which make an enormous difference to how warm your inner layers feel. A breathable waterproof and windproof jacket with a hood that fits over your other layers (including your down jacket) is worth prioritizing over almost anything else on this list. Wind alone, even on a dry day, can strip heat from your body shockingly fast on an exposed ridge or the open approach to Larke La, and a proper shell cuts that wind chill effect dramatically. We would also recommend waterproof shell pants, lighter than you might expect, for the same reason: wet, windblown legs on a long exposed stretch are miserable and genuinely risky in cold conditions.
Why Layering Beats One Heavy Coat
Put the whole system together and the logic becomes obvious. On a hot, humid morning near Jagat you wear a base layer alone. On a cool afternoon in Deng or Namrung you add the fleece. On a cold evening in Samagaon you add the down jacket over the fleece. On the pass morning, in wind and possibly snow, you wear nearly everything at once under a windproof, waterproof shell. That same system, reduced to its separate pieces, weighs less than one heavy four season expedition coat, packs down smaller, and actually works across the trek’s entire range rather than being right for only one part of it.
Full Packing List by Category
Below we break the complete gear list into the categories that matter for this specific route, with the reasoning behind each choice rather than just a bare list. A genuine checklist version, formatted for printing or ticking off while you pack, follows in its own section further down.
Head and Hands
Your extremities lose heat fast, and on this trek you need gear for two quite different climates: sun exposed lower valley walking and the cold, possibly windy, high pass crossing.
- A wide brimmed sun hat or cap for the hot, exposed lower valley days
- A warm fleece or wool hat that covers the ears, for high villages and the pass
- A buff or neck gaiter, genuinely multi purpose for sun protection, dust, wind, and warmth around the neck and face
- Lightweight gloves or glove liners for general cold weather walking
- Insulated, windproof mittens or heavier gloves for the Larke La crossing and the coldest mornings
Upper Body Layers
This is the heart of the layering system described above, so plan on bringing enough to rotate through roughly a week of wear between proper laundry opportunities.
- Two to three base layer tops, merino wool or synthetic, long sleeve
- One or two short sleeve or light shirts for the warm lower valley
- A midweight fleece jacket
- A lightweight synthetic insulated jacket
- A quality down jacket with a hood
- A waterproof, windproof shell jacket with a hood, sized to fit over the down jacket
Lower Body Layers
Legs need less dramatic layering than the upper body on most treks, but this route’s cold mornings and pass crossing still deserve proper attention.
- Two to three pairs of trekking trousers, convertible or regular, quick drying fabric
- One pair of lightweight base layer or thermal leggings for cold nights and the pass
- Waterproof, windproof shell pants, lightweight, worn over other layers when needed
- Comfortable shorts for the warm lower valley, if you prefer them for walking
- Underwear in a quick drying fabric, enough for several days between washes
Footwear
Footwear is arguably the single most important gear decision on this whole trek, since blisters or wet, cold feet can genuinely end a trip. Your boots need to handle river crossings, rough trail, mud, dust, and snow near the pass, which is a wide range for one pair of shoes to cover.
- A pair of broken in, waterproof trekking boots with good ankle support, already comfortable from previous wear, never brand new out of the box
- Lightweight camp shoes or sandals for evenings at the teahouse, giving your feet and boots a chance to breathe and dry out
- Gaiters, useful for keeping snow and scree out of your boots near the pass and in muddy sections lower down
- A full sock system: thin liner socks to reduce friction and wick moisture, plus thicker wool or wool blend trekking socks over them for cushioning and warmth
- At least four to five pairs of trekking socks, since wet or sweaty socks are one of the most common causes of blisters on long treks
Sleeping Gear
Because teahouse rooms are unheated and nighttime temperatures near the pass can realistically drop to minus 15 or 20 degrees Celsius, your sleeping bag is not a place to cut corners or borrow something marginal.
We generally recommend a sleeping bag rated to at least minus 15 to minus 20 degrees Celsius comfort rating for this route, keeping in mind that manufacturer temperature ratings, including the standardized EN 13537 testing used by many reputable brands, usually list a comfort rating for a typically warm sleeping person and a separate, colder lower limit rating. The comfort figure is the more realistic number to plan around, since individual tolerance to cold varies a lot and tired, dehydrated trekkers at altitude tend to sleep colder than they expect. A bag rated at minus 20 comfort will feel genuinely cozy at minus 10 in the lower villages, whereas a three season bag rated only to around freezing will leave you cold and sleepless for a significant stretch of the high altitude nights on this trek.
- A down sleeping bag rated to roughly minus 15 to minus 20 degrees Celsius comfort, or warmer if you tend to sleep cold
- A sleeping bag liner, silk or fleece, which adds several extra degrees of warmth, keeps the bag itself cleaner over three weeks of use, and is genuinely useful on its own in warmer, lower villages when the full bag is too hot
- A compression sack for the sleeping bag, to keep its packed size manageable inside the duffel
Most reputable trekking agencies in Kathmandu, including ourselves, can rent a suitable rated sleeping bag locally if you prefer not to buy or fly with one, and we discuss that tradeoff fully in the rental section below.
Backpack and Duffel
You are effectively packing for two different bags on this trek: a large duffel that your porter carries, and a smaller daypack that you carry yourself.
- A sturdy, durable duffel bag, roughly 70 to 90 liters, for everything carried by your porter, ideally with a lockable zipper and a rain cover or dry bag liner inside it
- A daypack of around 30 to 40 liters for yourself, big enough for your water, rain shell, camera, snacks, documents, and anything else you want access to during the day
- A rain cover for the daypack, or a waterproof pack liner, since teahouse trekking means your daypack is exposed to the weather on the trail every single day
- Dry bags or sturdy stuff sacks inside the duffel to keep clothing, electronics, and sleeping gear separated and dry even if the duffel itself gets rained on during transport
Trekking Poles
Trekking poles are genuinely useful rather than optional extras on this route, particularly given the steep, loose, and sometimes icy terrain on the approach to and descent from Larke La, plus the many river crossings and suspension bridges lower down. A collapsible pair of adjustable poles reduces strain on your knees on long descents, especially the long drop from the pass down toward Bimthang, and gives extra stability on scree, mud, and the icy sections near the top. We recommend bringing a pair rather than a single pole for this particular trek.
Headlamp
You will need a reliable headlamp on this trek, both for the predawn start on pass crossing day, which typically begins hours before sunrise, and for simple evening use around teahouses that often have limited or no electric lighting after a certain hour. Bring spare batteries, since cold temperatures drain batteries faster than usual, and a headlamp rather than a hand held torch, since you want both hands free on uneven or icy ground in the dark.
Sun Protection
Sun exposure at altitude is far more intense than most trekkers expect, both from direct sunlight and from reflection off snow near the pass, and it catches a lot of first time Himalayan trekkers off guard.
- Sunglasses with genuine UV protection and good side coverage, ideally wraparound or glacier style with high protection, since sun reflecting off snow near Larke La can cause painful, temporary snow blindness if your eyes are not properly shielded
- A high SPF sunscreen, since UV exposure increases with altitude and the lower valley sun is also intense in open, unshaded sections
- Lip balm with SPF, since lips crack and burn easily in the dry, cold, high altitude air and this is one of the most common small discomforts trekkers report on long treks
Hydration
Staying properly hydrated matters for comfort and for reducing your risk of altitude related symptoms, and the gear you choose affects how easy that is to keep up with over 20 days.
- At least two water bottles, roughly one liter each, or a hydration bladder plus one backup bottle
- A reliable water purification method, since bottled water becomes increasingly expensive and environmentally wasteful the higher you go, and is not always available in the more remote sections of Tsum Valley
- Water purification tablets, a UV purifier pen, or a filtration system are all reasonable choices; whichever you pick, bring a backup method or extra supplies given the trip length
- Note that in cold temperatures, bladder tubes can freeze near the pass, so a simple bottle, kept inside your jacket rather than an external pocket on the coldest mornings, is often more reliable than a bladder on pass day itself
First Aid and Personal Medication
A basic personal first aid kit is sensible on any long trek, and this route’s remoteness and altitude make it more important than usual.
- Blister treatment, including plasters or tape designed specifically for blisters, and a small supply of basic bandages and antiseptic
- Pain and fever relief medication, and any personal prescription medication you take regularly, packed with some extra in case of delays
- Diarrhea and rehydration medication, since digestive upsets are common on long Nepal treks due to changes in diet, water, and hygiene conditions
- Basic altitude medication, most commonly acetazolamide (often known by the brand name Diamox), which some trekkers use to help acclimatization; this is a prescription matter and should absolutely be discussed with your own doctor before the trip, including dosage and whether it is appropriate for you personally, rather than decided based on advice from other trekkers or a packing list
- Any personal medication for existing conditions, carried in original packaging with enough supply for the full trip plus a buffer for delays
Our guides carry a more comprehensive group first aid kit and oxygen saturation monitoring equipment, and are trained to recognize and respond to symptoms of altitude illness, but your personal kit covers the smaller, everyday issues that come up on any long trek and gives you your own trusted medication on hand.
Electronics and Power
Charging is one of the more frustrating realities of remote teahouse trekking, and it is worth planning for honestly rather than assuming you will always find an outlet.
- A power bank, ideally a reasonably large capacity one, since many teahouses either charge a fee per device for charging or have genuinely limited solar or hydro power, especially the higher and more remote you go
- A universal travel plug adapter, since Nepal generally uses a round pin plug type, and voltage fluctuations in rural micro hydro systems are common, so a basic surge protected adapter or power strip is a reasonable extra precaution for sensitive electronics
- A solar charging panel is genuinely useful as a backup on this trek, since clear mountain days are common and some of the more remote Tsum Valley villages have limited reliable electricity
- Your camera, phone, and any other devices, plus their cables, kept in a dry bag or ziplock style pouch given the dust and occasional rain
- Be aware that charging availability drops the higher and more remote you go, and that WiFi, where available at all, is often slow, limited, or sold separately as a paid card rather than being automatically included
Documents and Money
- Your passport, with photocopies kept separately from the original
- Passport photos, several spare copies, since these are commonly required for permits
- Printed permit documents and any paperwork your agency provides for the restricted area permits specific to Manaslu and Tsum Valley
- Travel insurance documents, including proof of coverage for high altitude trekking and emergency evacuation, which is genuinely important given the remoteness of this route
- Nepali rupees in cash, since there are no ATMs once you leave the main towns, and card payment is essentially nonexistent along the trail; budget enough cash for extra snacks, drinks, hot showers, charging fees, and tips for your guide and porters
Snacks and Personal Comfort Items
Teahouse food is generally decent and plentiful, but three weeks of dal bhat and basic trekking menus gets repetitive, and a few personal comfort items make a noticeable difference to morale on a long trip like this.
- Energy bars, nuts, dried fruit, electrolyte powder, and other familiar snacks from home, since variety and personal taste matter more than people expect after two weeks on the trail
- A small amount of your preferred tea, coffee, or hot drink mix, if you have strong preferences, since teahouse options are fairly basic
- Earplugs, genuinely useful in thin walled teahouse rooms with shared walls
- A travel pillow or small inflatable pillow, if you prefer more cushioning than a stuffed jacket provides
- A small notebook, book, or downloaded entertainment for the long evenings, since electricity and WiFi for charging devices or streaming are unreliable at best
Toiletries Suited to Limited Washing Facilities
Washing facilities become more basic the higher you go, so your toiletry kit should be realistic rather than based on home bathroom habits.
- Biodegradable soap or shampoo, usable for both body washing and light laundry
- A quick drying microfiber towel
- Hand sanitizer, used often, since it is the most reliable hygiene tool when running water is cold, limited, or simply unavailable
- Wet wipes, genuinely valuable on days without a proper wash, and particularly appreciated in the colder high villages where a full wash in icy water has little appeal
- Toothbrush, toothpaste, and any basic personal care items you use daily
- A small quick drying cloth or bandana for general use
- Toilet paper, and a few spare rolls, since it is not always provided in teahouses or is sold at a premium
Porter Weight Limits and Duffel Packing Strategy
Because Manaslu and Tsum Valley require a licensed guide and most trekkers also hire porters, weight limits are a genuinely practical constraint, not a theoretical one. Agencies set porter weight limits for good reason: porters carry loads over long days on rough, high altitude terrain for weeks at a time, and overloading them is both unsafe for the porter and, frankly, something a responsible trekking company should never allow. Typical practice across reputable agencies, ours included, caps each porter’s load at somewhere in the range of 15 to 20 kilograms per trekker’s duffel, and on some trips two trekkers share one porter, who then carries a combined load usually kept to somewhere around 20 to 25 kilograms total between the two bags. These figures vary somewhat by agency and by specific trip, so always confirm the exact limit for your booking rather than assuming.
That weight limit is exactly why the layering system described earlier matters so much. A single duffel with one of everything from our full category list above, rather than duplicate heavy items, comfortably fits within a typical porter limit. The trekkers who struggle are usually the ones who pack two of every mid layer “just in case,” bring full size toiletries rather than travel sizes, or throw in a second pair of heavy boots as backup. None of that is necessary, and extra weight either gets left behind at the start or becomes a genuine problem to manage partway through the trek.
Practical Duffel Packing Strategy
A few practical habits make a real difference once you are actually packing the duffel:
- Pack heavier, bulkier items like your sleeping bag and down jacket in compression sacks to save space and keep weight manageable
- Use smaller dry bags or stuff sacks inside the duffel to separate categories (base layers, sleeping gear, toiletries), which also makes it faster to find things without unpacking the whole bag at each teahouse
- Keep anything you need during the actual walking day, such as your rain shell, snacks, water, sunscreen, and camera, in your own daypack rather than the porter’s duffel, since you will not see that duffel again until the end of the day’s walk
- Weigh your packed duffel at home on a luggage scale before you leave, and again in Kathmandu before the trek starts, so there are no surprises or last minute repacking scrambles at the trailhead
- If you are close to or over the limit, the first things to remove are usually duplicate layers, excess toiletries, and any “just in case” item you have never actually needed on a previous trek
Sample Packing Checklist
Here is the full list in one place, organized by category, formatted so you can work through it while actually packing.
Clothing
- Two to three long sleeve base layer tops
- One pair of thermal base layer leggings
- One or two light, short sleeve shirts
- Midweight fleece jacket
- Lightweight synthetic insulated jacket
- Quality down jacket with hood
- Waterproof, windproof shell jacket with hood
- Waterproof, windproof shell pants
- Two to three pairs of trekking trousers
- Comfortable shorts (optional, for lower valley days)
- Underwear, several pairs, quick drying fabric
- Four to five pairs of trekking socks
- One or two pairs of liner socks
- Warm fleece or wool hat
- Wide brimmed sun hat or cap
- Buff or neck gaiter
- Lightweight gloves or glove liners
- Insulated windproof mittens for the pass
Footwear
- Waterproof trekking boots, already broken in
- Camp shoes or sandals
- Gaiters
Sleeping and Bags
- Sleeping bag rated to roughly minus 15 to minus 20 degrees Celsius comfort
- Sleeping bag liner
- Duffel bag, 70 to 90 liters, lockable and ideally with a rain cover
- Daypack, 30 to 40 liters
- Daypack rain cover or waterproof liner
- Dry bags or stuff sacks for organizing the duffel
Gear and Equipment
- Trekking poles
- Headlamp with spare batteries
- Sunglasses with high UV protection, wraparound or glacier style
- Sunscreen, high SPF
- Lip balm with SPF
- Two water bottles or a hydration bladder plus backup bottle
- Water purification tablets, UV pen, or filter, plus backup supplies
- Trekking towel, quick drying
Health and Documents
- Personal first aid kit, including blister care
- Diarrhea and rehydration medication
- Personal prescription medication, with extra supply
- Altitude medication discussed in advance with your doctor
- Passport, photocopies, and spare passport photos
- Permit paperwork provided by your agency
- Travel insurance documents with evacuation coverage
- Nepali rupees in cash for the full trip
Electronics
- Power bank, large capacity
- Universal plug adapter
- Solar charger (optional but useful)
- Phone, camera, and cables in a dry pouch
Personal Items
- Snacks and electrolyte powder from home
- Earplugs
- Travel pillow (optional)
- Biodegradable soap and shampoo
- Hand sanitizer and wet wipes
- Toothbrush, toothpaste, basic toiletries
- Toilet paper, extra rolls
- Book, notebook, or offline entertainment
Laundry and Washing Realities on the Trail
With a trip this long, laundry comes up for almost every trekker, and it is worth setting realistic expectations before you go. Lower down, in the warmer villages, some teahouses offer paid laundry service, and a hot, sunny afternoon in a place like Jagat or Deng can be a genuinely good opportunity to wash a few items and have them dry by evening. Higher up, laundry gets harder for two simple reasons: water is colder, and the thinner air and lower temperatures mean wet clothing dries far more slowly, sometimes not drying at all overnight.
Our practical advice is to plan around minimal washing rather than expecting to launder as you would at home. A small bar of biodegradable soap lets you hand wash base layers or socks in a sink when the opportunity and weather allow, and merino wool base layers genuinely do resist odor better than synthetics over several days of wear without washing, which is part of why we recommend them above. Hang washed items on the outside of your pack during a sunny walking day if you need to dry something on the move, since direct sun and moving air dry clothing faster than sitting still in a teahouse room.
A few practical habits that make laundry easier on this specific trek:
- Wash small, quick drying items like underwear and liner socks more often, and save bulkier items like fleece layers for proper laundry days in the warmer lower villages
- Avoid washing anything the evening before a cold, high altitude day, since it is unlikely to dry overnight and you do not want to start walking in damp clothing
- Bring enough underwear and socks to go five to seven days without washing at all, as a buffer for stretches where washing simply is not practical
- Do not expect laundry service at all once you are above Samagaon or deep into Tsum Valley; plan your washing around the lower, warmer villages on both the way in and the way out
Common Packing Mistakes First Time Himalayan Trekkers Make
We see the same packing mistakes repeated often enough on this route that they are worth calling out directly, since most are easy to avoid once you know they are coming.
Bringing Brand New, Unbroken In Boots
This is the single most common and most avoidable mistake. Boots that have never been worn on a real trail will find your blisters for you, usually within the first two or three days, right when you are also adjusting to the general demands of long daily walking. Wear your boots on multiple real walks, ideally with a loaded daypack, well before your flight to Kathmandu.
Underestimating the Cold Near the Pass
Trekkers who research “Nepal in spring” or “Nepal in autumn” online and pack for generally mild weather are frequently caught out by just how cold the pass morning and the nights around Samdo and Dharamsala actually get. The lower valley’s warmth is not representative of conditions three weeks later at 5000 meters, and packing for the average rather than the extreme end of this trek’s range is a genuine risk to comfort and safety.
Overpacking for the Warm Lower Valley
The opposite mistake also happens: trekkers who focus entirely on cold weather gear and bring too much heavy clothing for a trek that actually starts in genuinely warm, humid conditions. The first several days near Machha Khola and Jagat can be hot, sweaty walking, and lugging unnecessary heavy layers through that section for no reason adds up to real, avoidable fatigue, especially once you consider the porter weight limits discussed above.
Ignoring Porter Weight Limits
Some trekkers pack as though they are carrying their own bag the whole way and end up well over the agreed porter weight limit, which creates an awkward, last minute problem at the trailhead when bags actually get weighed. Pack to the limit from the start, not as an afterthought.
Skipping Proper Sun Protection for the Pass
Snow glare near Larke La is intense, and trekkers who bring only basic sunglasses, rather than genuinely high protection, wraparound style eyewear, sometimes end up with painful temporary snow blindness on pass day, which is an entirely preventable problem with the right gear.
Underestimating Fitness Demands and Packing Accordingly
This is slightly outside pure gear, but it affects packing too: trekkers who have not honestly assessed the physical demands of a 20 day restricted area trek sometimes overpack “comfort” items while skipping genuinely useful gear like proper trekking poles, which reduce strain on long descent days. Our separate Manaslu Tsum Valley Trek Difficulty guide covers the fitness and training side in depth, and reading it before you pack tends to produce a more realistic, better prioritized gear list.
Forgetting a Backup Power and Light Source
Relying on a single headlamp with no spare batteries, or a single phone as your only light source, becomes a real problem the one time it matters, typically on the predawn pass crossing. Always carry a backup.
Gear Rental Versus Buying in Kathmandu
You do not need to own every item on this list before you arrive in Nepal. Kathmandu, and specifically the Thamel district, has long been one of the main hubs in Asia for trekking gear, with dozens of shops selling and renting everything from down jackets to trekking poles to sleeping bags, many at prices noticeably lower than buying equivalent gear at home. This is a genuinely practical option worth considering for certain items, and most trekkers end up doing a mix of bringing some gear from home and renting or buying some locally.
What Makes Sense to Rent
Bulky, expensive, cold weather specific items are the best candidates for renting in Thamel rather than buying or flying with from home, particularly if this is a one time trip for you rather than the start of a regular trekking habit.
- A rated sleeping bag, since a good cold weather bag is expensive to buy for a single trip and takes up significant space in your luggage on the flight over
- A down jacket, for the same reasons, especially if you do not already own one suited to genuinely cold temperatures
- Trekking poles, which are heavy and awkward to fly with and widely available to rent at low cost
- Gaiters and some cold weather accessories
What Makes Sense to Buy or Bring From Home
Items that touch your skin directly, or that depend heavily on proper fit, are generally better brought from home or bought well in advance, so you have time to test them.
- Trekking boots, which absolutely need to be broken in before the trek, making last minute rental or purchase in Kathmandu a genuine risk for blisters
- Base layers and socks, for fit, fabric preference, and basic hygiene reasons
- Your own backpack, if you already have one that fits you well, since a poorly fitted daypack causes real discomfort over many walking days
If you do plan to rent gear in Kathmandu, check it carefully before you leave the shop: zippers, down fill, and overall condition vary quite a bit between rental items that have been used by many previous trekkers. Most reputable shops in Thamel are used to trekkers doing exactly this kind of check, and a reasonable deposit, refunded on return, is standard practice. We are also happy to advise on reliable gear rental options in Kathmandu as part of booking your Manaslu Tsum Valley Trek with us, since our guides know which shops are consistently reliable for cold weather equipment.
Frequently Asked Questions
What temperature rated sleeping bag do I need for the Manaslu Tsum Valley Trek?
We generally recommend a sleeping bag with a comfort rating of roughly minus 15 to minus 20 degrees Celsius for this route, given realistic nighttime temperatures near Samdo, Dharamsala, and the Larke La approach. A liner adds a few extra degrees of warmth and is worth bringing regardless of your bag’s rating.
Do I need crampons or microspikes for the Larke La pass?
Under normal trail conditions, sturdy waterproof trekking boots with good tread and trekking poles are generally sufficient, and most trekkers cross without any additional traction devices. In heavier snow years or after a fresh snowfall, your guide may recommend lightweight microspikes, which some agencies and rental shops in Kathmandu can provide; this is a judgment call your guide makes based on actual conditions at the time, not something to decide from home months in advance.
Can I rent trekking gear in Kathmandu instead of buying it before I fly?
Yes. Thamel in Kathmandu has a long established trekking gear rental and retail scene, and items like sleeping bags, down jackets, and trekking poles are commonly and affordably rented there. Items that depend on personal fit, like boots and base layers, are better brought from home or bought well before the trip so you have time to break them in.
How many layers do I actually need for the pass crossing morning?
Most trekkers wear nearly their full layering system on pass day: a base layer, a fleece mid layer, a down jacket, and a waterproof windproof shell on top, plus thermal leggings under shell pants, a warm hat, and insulated mittens or heavy gloves. You will likely remove a layer or two once the sun is fully up and you are moving steadily, but starting warm before dawn matters more than being able to adjust later.
What is the porter weight limit on the Manaslu Tsum Valley Trek?
Typical practice among reputable agencies caps each porter’s load at somewhere around 15 to 20 kilograms per trekker’s duffel, sometimes with two trekkers sharing one porter at a slightly higher combined limit. Always confirm the exact figure with your specific agency when booking, since practices do vary.
Is there WiFi and phone charging available in the teahouses?
Some teahouses, mostly in the lower and more frequently visited villages, offer paid WiFi cards and charging, usually for a fee per device or per hour. The higher and more remote you go, especially into Tsum Valley, the less reliable this becomes, and some lodges have no charging or internet at all. A power bank and, ideally, a small solar charger are worth carrying as backup rather than relying on teahouse power.
Should I wear trekking boots or lightweight trail shoes on this route?
We recommend proper waterproof trekking boots with ankle support for this specific trek, rather than lightweight trail shoes, given the combination of river crossings, rough and sometimes muddy trail in the lower valley, and snow and ice near the pass. Trail shoes work well on some shorter, drier Nepal treks, but the range of terrain and conditions here favors a more supportive, fully waterproof boot.
How do I manage laundry on a trek this long?
Plan around minimal washing rather than daily laundry. Some lower, warmer villages offer paid laundry service, and hand washing small items like underwear and socks is possible when there is sun and time to dry them. Bring enough clothing, particularly socks and underwear, to go roughly five to seven days without any washing at all, since higher villages rarely offer practical laundry options and clothing dries slowly in cold air.
Packing well for the Manaslu Tsum Valley Trek is really about respecting how much the trek’s conditions change over three weeks, from warm valley floor to glaciated high pass, rather than about buying the single most expensive piece of gear you can find. Build the layering system, respect the porter weight limit, bring a sleeping bag genuinely rated for the cold nights ahead, and fill in the smaller details from the checklist above, and you will be comfortable through almost everything this route throws at you. If you have not already, take a look at our Manaslu Tsum Valley Trek Guide for the full itinerary and permit details, our Manaslu Tsum Valley Trek Difficulty guide if you are still assessing your own fitness for this route, and our Best Time to Trek Manaslu Tsum Valley guide for help choosing the right season. When you are ready to lock in dates, our team is glad to help you book the Manaslu Tsum Valley Trek and answer any last gear questions before you fly.