Most articles about the Everest mountain flight read the same way. They name four or five peaks, call the whole thing spectacular, and move on. That is not very useful if you are actually trying to picture what will happen when you are strapped into a window seat at six in the morning climbing out of Tribhuvan International Airport. So this is a different kind of article. It walks through the mountain flight by ATR plane the way it is actually flown, leg by leg, peak by peak, telling you which side of the aircraft matters on which stretch of the route and why, and what you can realistically expect your photos to look like when you get home.
A quick note before we start. This article is about the fixed wing mountain flight, flown in an ATR 72 or ATR 42 turboprop out of Kathmandu, that climbs to cruising altitude and flies a route parallel to the Himalaya without landing anywhere. It is a completely different product from the helicopter tours that land at Everest base camp or at a lodge in the Khumbu for tea and photos on the ground. Nothing here applies to those. If you want the full rundown on the aircraft, the airlines, and how the whole experience fits together, we have covered that in a complete guide to the mountain flight by ATR plane. This piece goes narrower and deeper: what you actually see out the window, in order, and how to see it well, using the same route flown on the Everest Scenic Flight trip offered out of Kathmandu most mornings of the flying season.
The Mountain Flight by ATR Plane Route, Leg by Leg
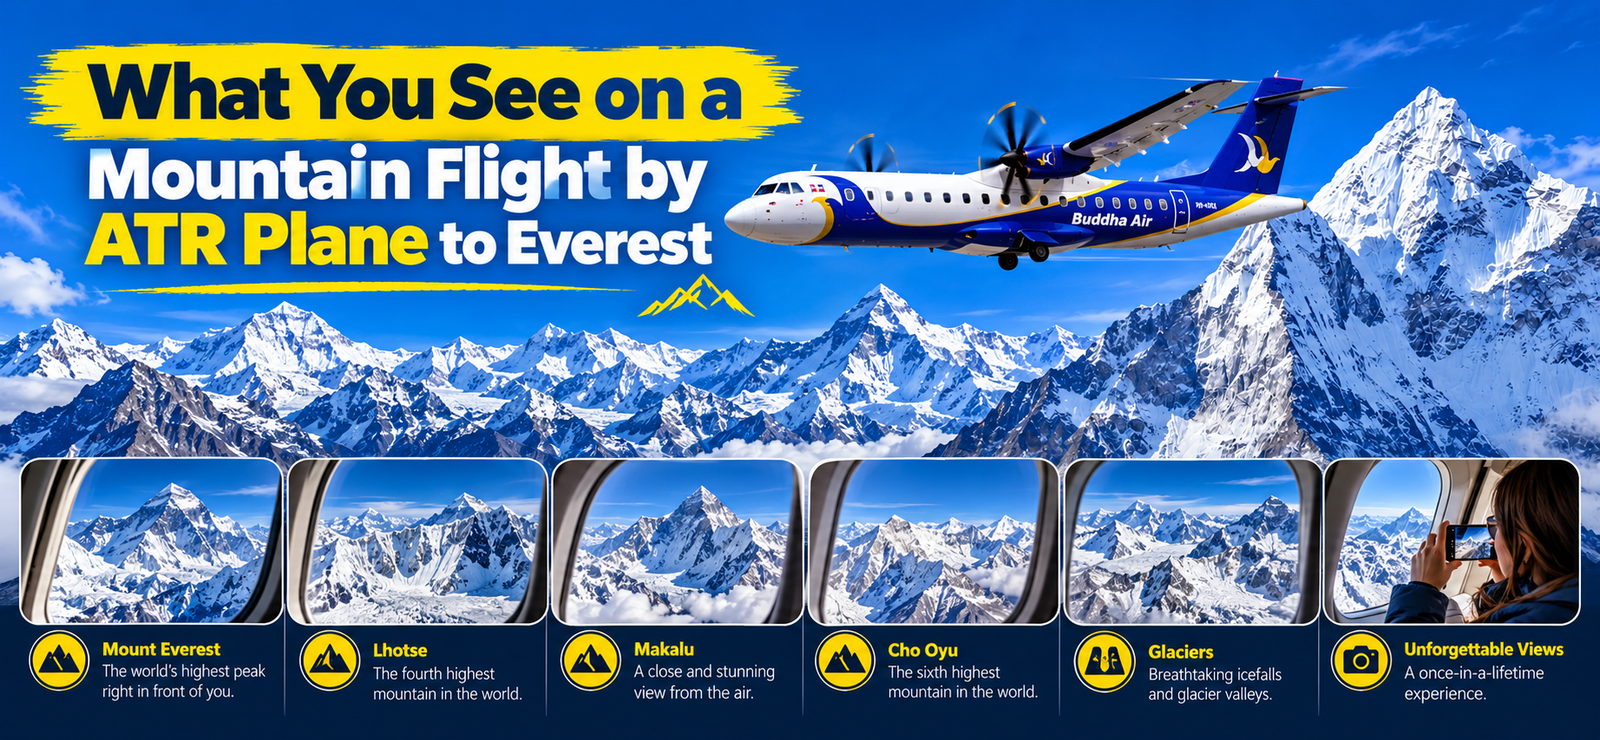
The route flown on the Everest mountain flight is not random sightseeing. It follows a fairly fixed corridor along the southern side of the Himalaya, and the order in which peaks appear is predictable enough that you can actually plan around it. Buddha Air, which operates one of the most established versions of this flight, flies a published route that starts at Langtang Lirung in the west, runs east along the range past Everest, continues to Chamlang, and then turns the aircraft back toward Kathmandu. Other operators flying the same general corridor follow a very similar sequence, since they are all constrained by the same mountains and the same airspace. Knowing this order in advance changes how you experience the hour in the air. Instead of a blur of white peaks with a name shouted over the intercom, you get a sequence you can follow on the ground before you even board.
Kathmandu Valley and the Climb Toward the Foothills
The flight begins on the ground in the Kathmandu Valley, and the first several minutes are not about mountains at all. After takeoff the ATR climbs over the valley itself, and if the morning is clear you get a good look at the bowl shaped valley floor: the dense grid of Kathmandu and Patan, the terraced fields on the valley’s edges, and the ring of forested hills that separate the valley from the rest of the country. This part of the flight is worth paying attention to even though it has nothing to do with Everest, because it gives you a sense of scale for everything that follows. The valley floor sits at roughly 1,300 meters above sea level. By the end of the flight you will be looking at summits more than six and a half kilometers higher than the ground you just left, and that climb in elevation, more than the horizontal distance covered, is what makes the second half of the flight feel so different from the first.
As the plane continues to climb, the terrain below changes character. The thick, humid green of the valley gives way to steeper, more folded hill country, the kind of landscape locals call the middle hills, with terraced slopes cut into nearly every surface that will hold soil. Villages here are smaller and the roads thin out to tracks. You are now flying over the first real foothills of the Himalaya, still well short of the high peaks, but already a different Nepal than the one you took off from. This transition usually takes somewhere around ten to fifteen minutes depending on the aircraft and the exact departure routing, and it is the part of the flight where people who expected mountains immediately sometimes get restless. Be patient. The foothills are doing their job, which is gaining you the altitude you need before the real show starts.
Langtang Lirung, the First Giant on the Everest Mountain Flight View
Langtang Lirung, at 7,227 meters, is the first major peak the flight brings into view, and it is a good one to start with because it looks nothing like the rounded, glaciated domes you will see later in the flight. Langtang Lirung is steep and heavily fluted, with ridgelines that drop almost straight down from the summit into the Langtang valley below. From the aircraft it tends to stand apart from its neighbors rather than blending into a ridge of similar looking peaks, which makes it easy to pick out even if you have never seen a photo of it before. It also sits noticeably closer to Kathmandu than the rest of the range you are about to see, which is part of why it opens the route. On a clear morning this is often the first moment of the flight where passengers who have been looking at hill country suddenly realize they are looking at a genuinely high mountain, not a tall hill with snow on it.
Because Langtang Lirung appears early, while the aircraft is still climbing and settling into its cruise altitude, the view of it can be a little less steady than later peaks. This is normal. The crew is finishing the climb and leveling off, and the smoothest, most stable viewing conditions of the whole flight come a few minutes later once the aircraft has settled at altitude. Use this first peak to get oriented, figure out your window, test your camera settings, and get ready for the stretch that follows, rather than treating it as your one shot at a perfect photograph.
Gauri Shankar and Melungtse, the Middle Ground
East of Langtang Lirung the route passes two peaks that rarely get mentioned in generic lists but are genuinely distinctive once you know to look for them: Gauri Shankar, at roughly 7,135 meters, and Melungtse, at roughly 7,181 meters. Gauri Shankar is sacred in both Hindu and Buddhist tradition, considered by some to represent Shiva and Parvati together, and it has a sharp, twin horned profile that sets it apart from the broader massifs around it. Melungtse sits nearby and has a similarly steep, almost knife edged summit ridge, with a dramatic drop on its northern face into Tibet.
What makes this stretch of the mountain flight by ATR plane route interesting is the contrast. You go from the single dramatic spike of Langtang Lirung to this paired set of sharper, narrower peaks, and the valleys between them give you a real sense of the vertical relief involved. These are not peaks you are flying directly at. You are flying past them, roughly parallel to the range, so they appear and recede along the horizon over a span of a few minutes rather than growing larger directly in front of the aircraft. That parallel geometry matters a lot for where you should be looking, and we will come back to it in the seating section below.
Shishapangma, Cho Oyu and Gyachung Kang
This is where the flight starts to feel like it is building toward something. Shishapangma, at 8,027 meters, is the first peak above 8,000 meters that the flight typically brings into view, and it is also the only one of the fourteen 8,000 meter peaks on Earth located entirely within Tibet rather than straddling the border. From the Nepal side you see its long, broad summit plateau rather than a single sharp point, which is a useful visual cue: Shishapangma reads as a wide, table like massif rather than a classic pointed summit.
Not far beyond it comes Cho Oyu, at 8,188 meters, which has a genuinely different character again. Cho Oyu is famously one of the more gently sloped 8,000 meter peaks when approached from certain routes on the ground, and from the air that gentler profile is visible too: broad shoulders, a rounded summit dome, and less of the knife edge drama you saw at Gauri Shankar and Melungtse. Next to it sits Gyachung Kang, at roughly 7,952 meters, technically just short of the 8,000 meter club but visually part of the same cluster, standing between Cho Oyu and the approach to Everest. Gyachung Kang tends to get overlooked by passengers scanning for the famous names, but its position right next to Cho Oyu in the window makes it a useful landmark: once you see Cho Oyu’s broad dome followed immediately by a somewhat sharper peak next to it, you know the Everest cluster is only a few minutes away.
This stretch is also where the ground below finally stops looking like anything you would call a valley. By this point in the Everest mountain flight view, the terrain beneath the aircraft has shifted from forest and terraced field to bare rock and permanent ice, with glaciers visible feeding down from the ridgelines into long, debris streaked tongues of ice at the valley bottoms. That transition from green terraced country to glacier carved rock and ice is one of the more striking parts of the flight in its own right, independent of the named peaks, and it is worth looking down at the ground, in addition to out at the horizon, to catch it.
The Everest Cluster: Pumori, Nuptse, Everest and Lhotse
Here is the section everyone booked the flight for, and it rewards knowing exactly what you are looking at, because the peaks in this cluster are close together and easy to mix up if you are not prepared. Pumori, at roughly 7,161 meters, is the first of this group to appear, a strikingly symmetrical pyramid that sits just southwest of Everest itself. Pumori is actually closer to the aircraft’s flight path than Everest is in some respects, and its clean, triangular shape makes it a strong photographic subject on its own, well beyond its role as a marker for what is coming next.
Behind and to the side of Pumori, the long wall of Nuptse rises to roughly 7,861 meters. Nuptse is important here for a reason that has nothing to do with its own height: from certain ground viewpoints in the Khumbu, Nuptse’s ridge actually blocks the view of Everest’s summit, which is part of why Everest looks smaller than expected from some famous trekking viewpoints. From the air, at cruising altitude, you are above that problem. Nuptse’s long summit ridge becomes a foreground element rather than an obstruction, and Everest’s summit pyramid rises clearly behind and above it.
And then there is Everest itself, at 8,849 meters, the official elevation confirmed by a joint Nepal and China survey. From the aircraft window, Everest does not look like the single, isolated spike you might expect from photographs taken from much closer on the ground. It looks like the highest point in a crowded skyline, flanked immediately by Nuptse and Lhotse, with its summit pyramid often slightly darker and more exposed than its neighbors because high winds at that altitude scour snow off the upper rock faces even when everything around it is heavily plastered in white. Many first time passengers actually have trouble immediately identifying which peak is Everest without the crew’s help, precisely because it is not the most visually dramatic shape in the window. It is simply the tallest, and in a cluster this dense, tallest is not always the same as most eye catching.
Lhotse, at 8,516 meters, sits immediately next to Everest and is connected to it by the South Col, the high saddle between the two mountains that climbers use as a final camp before summit attempts. From the air Lhotse presents a huge, steep southern face, one of the largest continuous rock and ice walls in the Himalaya, and it often reads as visually larger and more imposing than Everest itself from this angle, simply because more of its bulk and vertical relief is facing the aircraft directly. This is one of the more counterintuitive things about the whole route: the tallest mountain on Earth is not necessarily the most visually dominant mountain in the window at any given moment.
Given the realities of the sightseeing pass, it is worth being honest about distances here rather than letting the marketing language oversell it. This is not an up close flyby. The aircraft maintains a safe cruising altitude and lateral distance from the terrain throughout, and depending on the exact flight path and the day’s conditions, the closest point of approach to these summits is typically somewhere in the range of 20 to 30 kilometers. That is still an extraordinary, clear view of the highest point on Earth from a comfortable cabin seat, and on a clear day the detail you can pick out, down to visible rock bands, snow plumes, and ridge lines, is genuinely impressive. It is just not the same as a helicopter landing at base camp, and setting that expectation correctly before you board makes the experience better, not worse, because you are not waiting for something closer that is never going to happen.
Makalu and the Turn at Chamlang
East of the Everest cluster, the route brings Makalu into view, at 8,485 meters the fifth highest mountain on Earth and, in the opinion of a lot of people who have flown this route many times, one of the most visually dramatic peaks on the entire circuit. Where Everest reads as a crowded summit among neighbors, Makalu stands much more clearly on its own, a steep, four sided pyramid with a distinctly isolated look even though it is only a relatively short distance from Everest and Lhotse as the crow flies. Its isolation is partly real geography and partly an accident of the angle: by the time Makalu comes into the window, the aircraft has moved far enough east that Everest and Lhotse have started to recede behind, giving Makalu a clear stage of its own.
Chamlang, at roughly 7,319 meters, marks the eastern limit of the published Buddha Air route and the point where the aircraft typically begins its turn back toward Kathmandu. It is a lower profile peak than its immediate neighbors and does not have the same instant recognizability as Makalu or Everest, but it is worth watching for because the turn itself is a notable moment in the flight. You can usually feel the aircraft bank as it reverses course, and this is actually one of the best photographic opportunities of the entire trip, which we will get into in the photography section, because a banking turn briefly tilts the whole cabin and can open up a view out one side of the plane that was not available moments before.
Kangchenjunga and the Eastern Edge of the View
Kangchenjunga, at 8,586 meters the third highest mountain in the world, sits further east again, on the border between Nepal and the Indian state of Sikkim. Whether you actually see it clearly on a given flight depends heavily on the exact route flown that day and on visibility, since it sits toward the eastern edge of what this flight typically covers and is often seen at a greater distance than the Everest cluster, if it is visible at all. On exceptionally clear mornings, usually in the cooler months when haze is minimal, Kangchenjunga appears as a distant, pale shape well out toward the horizon rather than a close, detailed view. Do not plan your whole flight around seeing it. Treat it as a bonus on a good day rather than a guaranteed stop on the itinerary, and you will not be disappointed if the day’s conditions do not cooperate.
Across the whole route, on a genuinely clear day, Nepal’s tourism operators and pilots commonly describe something like 20 Himalayan giants above 8,000 meters as visible from the aircraft windows along this general stretch of the range, counting peaks seen at varying distances and clarity rather than all at close range. That number depends enormously on the day. A hazy morning, which does happen even in the main flying season, can reduce what is visible to the closer, larger peaks like Everest, Lhotse, and Makalu, while cutting out the more distant shapes toward Shishapangma in the west or Kangchenjunga in the east.
The Return Leg to Kathmandu
Once the aircraft turns back near Chamlang, you fly the same general corridor in reverse, which means you see the same mountains again, but from a different angle and with different lighting on their faces. This return leg is not simply a repeat of the outbound leg, and it is one of the most underrated parts of the entire mountain flight by ATR plane experience. Because the sun has moved slightly higher in the sky since takeoff, and because you are now approaching peaks you previously saw receding away from you, the shadows and highlights on the same mountains look noticeably different. Faces that looked flat and shadowed on the way out can show more texture and detail on the way back as the light angle shifts.
This is also, as covered in the next section, generally considered the better half of the flight for photography, because the viewing angle on the return leg tends to bring the aircraft closer past the detail of the peaks rather than approaching them more obliquely. By the time Langtang Lirung reappears in the window for the second time, marking the final stretch back toward the Kathmandu Valley, most passengers have a far better sense of the geography than they did an hour earlier, and the last few minutes of descent back over the terraced hills and into the valley feel almost like a different, calmer flight compared to the climb out.
Left Side or Right Side: Where to Sit on the ATR Plane Route
This is probably the single most practical question anyone researching this flight actually wants answered, and it deserves a specific, non generic answer rather than the usual “just book a window seat” advice you see everywhere. On the ATR 72 and ATR 42 aircraft used for this route, the cabin is configured with two seats on each side of a single aisle, so every seat in the cabin is a window seat. There is no middle seat to avoid in the first place. That part of the usual advice simply does not apply here, which is worth knowing before you spend time agonizing over a seat map.
What does matter is which side of the plane you are on, and the answer is not the same for the whole flight, because the route runs roughly west to east along the Himalaya and then reverses. On the outbound leg, heading east toward the mountains, the left side of the aircraft typically has the clearer, broader view as the plane approaches and runs alongside the range. On the return leg, flying back west toward Kathmandu, the right side tends to offer a closer, more detailed view of the same peaks as the plane banks past them again on the way home. This is a direct consequence of the geometry of a west to east route flown out and back along a range that lies mostly to the north of the flight path: the side of the cabin facing the mountains swaps when the aircraft reverses direction.
If you can only choose one side for your whole seat and have to commit when booking, the honest answer is that both sides see essentially the same set of named peaks over the course of the full flight, because the aircraft is flying parallel to, not directly at, the range for most of the route, and it reverses course specifically so that passengers get a second pass. The left versus right difference is really about which leg gives you the sharper, more satisfying version of the view, not about missing peaks entirely on one side. That said, if forced to pick a single preference, a lot of frequent flyers of this route lean slightly toward the right side specifically because of the return leg advantage, reasoning that the closer, more detailed pass on the way home is worth more than the broader initial view on the way out, especially for photography.
A trick that works well if you are traveling with a companion and really want to see both angles without compromise: book seats on opposite sides of the same row, and simply trade places with each other partway through the flight, during the calm cruising stretch once the aircraft has leveled out past the early climb. The cabin crew on these flights are used to passengers moving around for photos during the viewing portion, so a quick, polite seat swap mid flight is a completely normal thing to do and does not require special permission beyond common courtesy to anyone else sitting nearby.
Seating Strategy Beyond Just a Side
Left or right is only half of the seating question. The other half, which gets mentioned far less often, is where you sit along the length of the cabin, and it matters more than most people expect. Seats positioned directly over the wing have part of the wing itself in frame through the window, which can intrude into your photos and, depending on the exact seat, your direct line of sight to the horizon. On a turboprop like the ATR, the wing sits roughly mid cabin, so seats clearly forward of the wing or clearly behind it give you a cleaner, more unobstructed view out the window than seats positioned right over it.
If you are booking individual seat assignments rather than being assigned a seat at check in, ask specifically for a row toward the front of the cabin or toward the rear, rather than a row in the middle third of the plane. Front rows have the advantage of a clean forward view and tend to be among the first seats attended to by crew during the in flight briefing, since the briefing generally starts from the front. Rear rows have the advantage of a clean view without wing interference and sometimes slightly more room to lean toward the window without disturbing a seatmate, though this varies by aircraft and operator.
Some passengers specifically ask the booking agent or the check in counter whether seats can be assigned away from the wing, and on a flight that is not fully booked, staff are often able to accommodate this. It is a small, concrete thing to ask for that makes a real difference to what ends up in your photos, and it costs nothing to request.
What the Crew Does During the Flight
Part of what makes the mountain flight by ATR plane work well as an experience, rather than just a scenic ride, is a fairly consistent set of things the crew does to help passengers actually identify what they are looking at. Shortly after the aircraft reaches cruising altitude and the first major peaks come into view, the cabin crew typically give a short briefing over the intercom identifying the peaks as they appear, usually naming them in the same order described above since that is the order the aircraft is actually flying. This briefing is genuinely useful and is one of the reasons it is worth paying attention to the cabin announcements rather than tuning them out the way you might on an ordinary commercial flight.
After landing back in Kathmandu, passengers on most of these flights receive a souvenir route map, usually a printed diagram showing the named peaks along the flight path in the order they were seen, which doubles as a nice keepsake and a way to double check which peak was which after the fact if the names did not fully register in the moment. Some airlines also issue a personalized flight certificate, essentially a printed record confirming that you flew the Everest mountain flight on a specific date, which a surprising number of passengers frame or keep as a memento of the trip.
One more thing that happens on some flights, though it is genuinely not guaranteed and depends on the crew and conditions on a given day, is a brief invitation to visit the cockpit during the flight to see the instruments and speak with the pilots for a minute or two. This is entirely at the discretion of the crew and the airline’s own policies on a given day, and it is not something you should book the flight expecting as a certainty. If it happens, treat it as a genuine bonus. If it does not, it has no bearing on the quality of the mountain view itself, which is the thing you actually paid for.
Photography on a Mountain Flight by ATR Plane: What Actually Works
This is the part of the article that will probably save you the most disappointment, because the single biggest reason mountain flight photos come out worse than people expect has nothing to do with camera quality and everything to do with a handful of fixable habits.
Beating the Glare
The most common mistake is pressing the camera or phone lens flush against the window glass, on the theory that this eliminates shake and gets you as close to the view as possible. In practice this is almost always the wrong move. Pressing the lens directly against the glass tends to pick up every scratch, smear, and reflection on the window’s interior surface, and it also increases glare from the cabin’s own interior lighting bouncing back into the lens at a steep angle. The better approach is to hold the camera or phone a few centimeters away from the glass, angled so the lens is pointed slightly away from any interior light source, rather than dead flat against the window. This small gap does more to reduce glare and reflection than almost anything else you can do, and it is the single easiest fix available to every passenger regardless of what equipment they brought.
If you are using a phone, cup your free hand around the edge of the lens and the window to block stray cabin light from above or behind you, essentially making a small shade with your hand. This sounds minor but makes a noticeable difference in contrast and color, especially on the side of the cabin facing the morning sun.
The Windows Themselves
It is worth being realistic about the windows on these aircraft. The ATR 72 and ATR 42 cabin windows are relatively small compared to the windows on larger commercial jets, and after years of service in a mountain flying environment, many of them show a degree of scratching, haze, or micro pitting on the outer pane that affects image clarity more than most first time passengers expect. This is not a defect specific to any one airline. It is simply the reality of operating smaller turboprops on frequent short flights for years. Bring a lens cloth and wipe the inside of the window near your seat before the flight gets going, since condensation and fingerprints from previous passengers are common and easy to clean off. If your first few shots through a given window look soft or hazy, do not assume it is your camera. Try a slightly different angle, or wait for the next good peak if your seatmate will tolerate a brief lean across, since window clarity genuinely varies from seat to seat and aircraft to aircraft.
Timing Shots to the Calm Part of the Flight
Takeoff and landing involve more vibration and movement than the main cruising portion of the flight, and that cruising stretch, once the aircraft has leveled off at altitude and settled into a steady speed, is genuinely the best window for sharp handheld shots. If your camera or phone allows manual control, a slightly faster shutter speed than you might default to helps freeze any residual engine vibration that does transmit through the cabin even at cruise, but the real gain comes simply from timing your best shots to the calm middle of the flight rather than trying to capture the sharpest images during the climb out or the final turn home, when the aircraft is actively maneuvering.
A short checklist worth running through once you are settled at cruise, before the main peaks start appearing:
- Wipe the inside of your window and check for condensation or smudges
- Set your camera or phone to a faster shutter speed or a sports and action mode if available
- Angle the lens a few centimeters off the glass rather than pressed against it
These three small steps take under a minute and address the three most common causes of disappointing photos from this flight.
Morning Light and What It Does to the Peaks
Because this is always a morning flight, the lighting on the peaks has a specific and fairly predictable character. Morning side lighting rakes across the mountains at a low angle, which is generally good news for photography because it brings out texture, ridge lines, and snow detail far better than the flat, shadowless light you get around midday. The tradeoff is that this same low angle light means some faces of a given peak, specifically those oriented away from the sun’s position at that hour, remain in shadow while the sun facing side is brightly lit. This is simply a function of each mountain’s orientation relative to the sun at that time of morning, and it explains why the same peak can look dramatically different depending on which leg of the flight, outbound or return, you are seeing it on, since the sun’s angle relative to the peak shifts as both the sun climbs and the aircraft’s position relative to the peak changes.
Practically, this means a peak that looked flat or underexposed on the way out may show much more striking texture and contrast on the return leg, and vice versa. If a particular peak matters a lot to you, Everest especially, do not assume your first pass is your only chance. Keep your camera ready on the return leg as well, since the changed light alone can produce a noticeably better photograph of the exact same mountain less than an hour later.
The Ground Below: From Terraced Valleys to the Khumbu
It is easy to fixate entirely on the skyline during this flight and forget to look straight down, but the terrain passing beneath the aircraft tells its own story and is worth paying attention to in its own right. The Nepal Himalaya forms the southern edge of the Tibetan Plateau, and the change in terrain character as the flight moves from the Kathmandu Valley northeast toward the high peaks traces that geology directly. Near Kathmandu the ground is forested and intensively terraced, reflecting centuries of hillside farming on every slope that can hold a field. Moving further along the route, forest cover thins, settlements become sparser, and the terrain steepens into bare rock faces and permanent snow and ice fields above the tree line.
During the central part of the route, around the Everest cluster, the ground below falls within the Khumbu region, home to Sagarmatha National Park, the protected area surrounding Everest that has been recognized as a UNESCO World Heritage Site since 1979, a designation that reflects both the exceptional scenery and the ecological and cultural significance of the area, including Sherpa settlements and monasteries within the park. You can read the official listing directly from UNESCO’s World Heritage listing for Sagarmatha National Park for more on why the area carries that status. From the air, the park’s boundaries are not marked by any visible line, obviously, but the shift into heavily glaciated terrain, with long debris covered glacier tongues feeding down from the high peaks into the valleys below, is a reasonably good visual proxy for where the protected high country begins.
Looking down rather than only out at the horizon also gives you a better sense of just how much vertical relief is involved in this landscape. From cruising altitude you can often trace a single glacier from its source near a peak’s upper slopes down through several kilometers of moraine and ice before it disappears around a bend in the valley, a scale of terrain that is genuinely hard to appreciate from ground level trekking, where you only ever see a small slice of any one glacier at a time.
What This Flight Is, and What It Isn’t
It is worth being plain about this, because managing expectations correctly is most of what separates a passenger who comes off this flight thrilled from one who comes off mildly let down. The Everest mountain flight is a sightseeing pass at a safe cruising altitude and lateral distance from the terrain, not a close approach and definitely not a landing anywhere near the mountains. The closest point of approach to the summits along the route is typically somewhere in the range of 20 to 30 kilometers, depending on the day’s exact routing and conditions. That is a genuinely clear, detailed view of the highest peaks on the planet from the comfort of a pressurized cabin seat, with visible rock detail, glacier structure, and snow texture on a good day. It is not the up close, hovering view you get from a helicopter landing at base camp, and this flight was never designed to replicate that experience.
If you want the ground level, landing based experience, that is a different product entirely, offered by the same operators as separate helicopter tours, and comparing the two side by side on price or on “closeness” misses the point of each. The ATR mountain flight exists because it is affordable, reliable, flies on a fixed schedule most mornings of the flying season, and gives a huge number of passengers, including people who could never attempt a trek to Everest base camp on foot, a real, verified look at Everest and its neighbors in about an hour, round trip from Kathmandu, without the cost, altitude risk, or time commitment of a trek or a helicopter charter. Understood on those terms, it delivers exactly what it promises. Understood as a substitute for a landing based tour, it will inevitably disappoint, not because anything went wrong, but because that was never what was being sold.
For a closer look at the aircraft itself, including why the ATR 72 and ATR 42 are specifically suited to this kind of high altitude mountain flying and how the cabin layout came to have no true middle seat, see our separate piece on the ATR aircraft used on the Everest mountain flight explained.
Booking an Everest Mountain Flight by ATR Plane
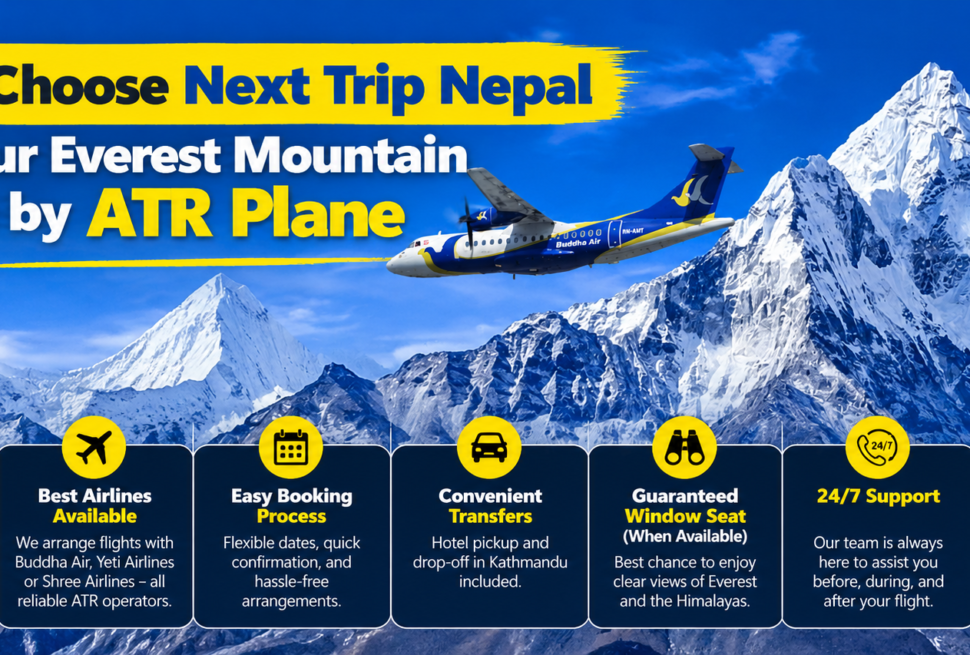
If everything above has you picturing yourself in that window seat, the practical next step is straightforward. Next Trip Nepal, a Kathmandu based tour operator, runs the Everest Scenic Flight on the same morning departures described throughout this article, with the same leg by leg route past Langtang Lirung, Gauri Shankar, Melungtse, Shishapangma, Cho Oyu, Gyachung Kang, Pumori, Nuptse, Everest, Lhotse, Makalu, and on to Chamlang before the turn home. Because this is a morning flight dependent on clear visibility, bookings are generally confirmed a day or two in advance and flights can be rescheduled, rarely cancelled outright, if weather at altitude does not cooperate on a given morning, which is simply the nature of flying this close to the world’s highest peaks.
For the full breakdown of what this flight costs across different operators, how pricing compares to the helicopter alternative, and what the actual booking process looks like step by step, our dedicated piece on mountain flight by ATR plane cost and booking for 2026 covers all of that in detail. And if you are still weighing this flight against other ways to see the Himalaya during a Nepal trip, whether a short add on flight, a full trek, or a helicopter day tour, it is worth starting from the main Next Trip Nepal site, where all of these options are laid out together for comparison rather than sold in isolation.
Whichever operator and date you end up booking, the fundamentals described in this article do not change much from one flight to the next: the same peaks in roughly the same order, the same left to right seating logic reversing on the return leg, the same small photography habits that separate a sharp, clear shot of Everest from a hazy, glare streaked disappointment. Go in knowing the route, pick your seat with intention rather than guessing, keep that lens a few centimeters off the glass, and the hour you spend at altitude above the Himalaya will match, reasonably closely, everything described above.