Most people planning their first teahouse trek in Nepal build their packing list from Everest Base Camp blogs, because that is what the algorithm serves up first. Then they apply that same list to the Helambu Trek and show up with a minus 40 rated expedition sleeping bag, insulated mitts, and a duffel so heavy their porter asks for a raise. None of that is needed here, and some of it will just sit in the bottom of your bag for a week while you carry the weight for nothing.
Helambu is a genuinely different trek from Everest Base Camp or the Annapurna Circuit, and your gear list should reflect that. It starts an hour from Kathmandu at Sundarijal, tops out somewhere around 3,600 to 3,650 meters on the Tharepati ridge depending on which source you check, and is usually walked in five to nine days. Compare that to Everest Base Camp at 5,364 meters or the Thorong La pass on the Annapurna Circuit at over 5,400 meters, and you can see why the cold weather gear that is non negotiable on those routes becomes optional, or outright unnecessary, here. But “lower and shorter” does not mean “warm.” Helambu still gets properly cold at night, particularly from November through February, and particularly once you climb onto the open ridge around Tharepati where there is no forest cover to block the wind. This guide walks through what to actually put in your bag, season by season, and what you can leave at your hotel in Kathmandu.
How Packing for Helambu Differs From a High Altitude Trek
The single biggest difference is altitude ceiling. On Everest Base Camp or Annapurna Circuit you are dealing with real high altitude cold, thin air, and the genuine possibility of subzero daytime temperatures at your highest camps. On the Helambu Trek, your maximum altitude is roughly comparable to the mid points of those bigger treks, not their summits. You never spend a night above 3,700 meters unless you extend the route toward Gosainkunda, which pushes you up to around 4,380 meters and changes the calculation considerably. For a standard Helambu itinerary, you are mostly sleeping between 1,500 and 2,600 meters, with one or two nights near or just above 3,000 meters at Tharepati or Mangengoth.
That lower ceiling changes three things about your packing. First, you do not need an expedition grade down jacket or a sleeping bag rated to minus 20 or colder. Second, altitude illness is a smaller concern than it is on EBC or Annapurna, so you are not packing a stack of Diamox and a pulse oximeter as the centerpiece of your first aid kit, though basic awareness is still worth having, which we cover in more depth in our Helambu Trek Difficulty and Altitude Guide. Third, because the trek is short, close to Kathmandu, and passes through villages fairly regularly, you have more flexibility to pack slightly lighter and rely on resupply or a quick turnaround if something goes wrong, which is a luxury you do not have three days deep into the Khumbu.
None of that means you can pack like you are going for a day hike near a city. The trek still climbs through genuine mountain terrain, the weather on the open ridge sections can turn fast, and teahouses at altitude are unheated. A lot of guides and operators undersell how cold Helambu gets in winter because they are comparing it to Everest, not because the nights are actually mild. Treat it as a cold weather trek with a lower ceiling, not a warm weather trek with a short walk.
What the Nights Actually Feel Like on the Trail
Temperature data specific to small villages like Kutumsang, Tarkeghyang, and Tharepati is thin. There is no weather station up there feeding live data to forecast apps, so most of what you will find online is either a rough seasonal description from a trekking company or a single trekker’s memory of one trip. We cross checked several independent sources, including altitude specific temperature tables for other Nepal routes at comparable elevations, village altitude figures published by multiple trekking operators, and our own cost and permits guide for this trek, and the picture that emerges is consistent enough to work with, even if exact numbers vary slightly by source and by year.
At the lower villages on the route, Sundarijal, Chisapani, and Kutumsang sit between about 1,460 and 2,470 meters. At that band, autumn and spring nights typically sit somewhere around 5 to 10 degrees Celsius, occasionally dropping close to freezing on a clear, calm night. Daytime temperatures in the sun are comfortable, often in the high teens to low twenties Celsius in the shoulder seasons. Winter nights at this lower band drop further, commonly into the low single digits, and can brush zero on a still, clear night, though actual freezing is unusual this low.
Higher up, at Tarkeghyang, Sermathang, and the approach to Tharepati, you are working around 2,540 to 2,620 meters for the mid section, then up to roughly 3,600 to 3,650 meters at Tharepati itself, the trek’s highest point on most itineraries. This is where the real cold shows up. Comparable altitude data from other Nepal treks puts autumn nights at this elevation band around 0 degrees Celsius or just below, with the figure commonly cited for Tharepati in winter sitting around minus 3 to minus 8 degrees Celsius. That range lines up reasonably well with general altitude temperature tables for similar elevations elsewhere in Nepal during December and January, where 3,000 meter villages often see winter lows around minus 2 to minus 3 degrees, and the extra few hundred meters plus the exposed, treeless character of the Tharepati ridge plausibly pushes it colder still. Spring nights at this altitude are milder, typically somewhere in the low single digits above freezing, occasionally dipping to zero.
During the June to August monsoon, actual freezing temperatures are rare anywhere on this route because cloud cover traps warmth overnight, but the humidity makes everything feel damp and clammy, and a wet set of clothes at 2,600 meters at night will feel colder than the thermometer suggests. We go into the month by month breakdown of what each season actually looks like, including rainfall and visibility, in Best Time to Trek Helambu, which is worth reading alongside this guide if you are still choosing dates.
The honest summary: expect genuinely cold nights, not brutal ones. You want gear that handles temperatures hovering around freezing and occasionally a bit below it at your highest stop, not gear built for minus 20.
| Section of the trek | Typical elevation | Autumn or spring night temperature | Winter night temperature (Nov to Feb) |
|---|---|---|---|
| Sundarijal to Chisapani | 1,460 to 2,200 m | Roughly 8 to 12°C | Roughly 2 to 6°C |
| Kutumsang, Tarkeghyang, Sermathang | 2,470 to 2,620 m | Roughly 2 to 7°C | Roughly minus 1 to 3°C |
| Tharepati ridge (highest point) | Around 3,600 to 3,650 m | Roughly 0 to minus 3°C | Roughly minus 3 to minus 8°C |
Treat the numbers in that table as a realistic planning range rather than a guarantee. A clear, windless night can run warmer than the range, and an exposed, windy one on the ridge can run colder. Pack for the cold end of the range at your highest stop, and you will be comfortable everywhere else.
Building a Layering System That Actually Matches This Trek
A layering system is just a set of pieces you can add or remove as the temperature and your activity level change through the day. On Helambu you will move from sweating on a stone staircase climb in full sun to standing still at a cold, windy viewpoint, sometimes within the same hour. The fix is layers, not one heavy item.
Base Layers
One or two lightweight, moisture wicking base layers for hiking, in merino wool or a synthetic like polyester, worn next to skin. Merino is more expensive but handles several days without smelling nearly as bad, which matters when laundry is hand washed and slow to dry. Cotton is the one fabric to leave out of your hiking kit entirely. It holds sweat against your skin and takes forever to dry, which is uncomfortable when you are moving and genuinely risky if it gets cold and wet at the same time. For sleeping, pack a separate midweight long sleeve top and long underwear bottoms that you keep dry and only wear in the teahouse at night, particularly for the colder stretch around Tharepati.
Mid Layers
A midweight fleece or a light synthetic insulated jacket covers most of the trek’s walking hours in the shoulder seasons, when daytime temperatures are pleasant but mornings and evenings need something warmer than a base layer alone. In winter, bring a slightly heavier fleece and expect to wear it more of the day, especially on overcast stretches or once you are above Kutumsang.
Insulation
This is the layer where Helambu genuinely differs from Everest Base Camp or the Annapurna Circuit. On those treks you want a serious down jacket rated for well below freezing, because you are sleeping at elevations where that is the baseline. Here, a packable down or synthetic insulated jacket in the lightweight to midweight range is enough. Fill power in the 600 to 700 range, or a good synthetic equivalent if you would rather not deal with down in wet conditions, is plenty for sitting around a teahouse dining room in the evening or standing at Tharepati at sunrise in winter. You do not need an expedition parka, and you do not need insulated bibs or an eight hundred fill summit jacket. Save that weight and that money.
Shell and Rain Layer
A waterproof, breathable jacket is useful in every season here, not just monsoon. Spring brings occasional afternoon showers, autumn can surprise you with a passing system, and winter wind on the open ridge sections cuts through anything that is not windproof. If you are trekking June through August, your rain shell stops being an occasional backup and becomes something you wear or carry ready to go every single day, paired with waterproof rain trousers if you want to stay properly dry on a multi hour downpour day. A lightweight rain cover for your daypack, or a simple dry bag liner inside it, matters just as much as the jacket on your own back, since a soaked sleeping bag or electronics pouch ruins your evening fast.
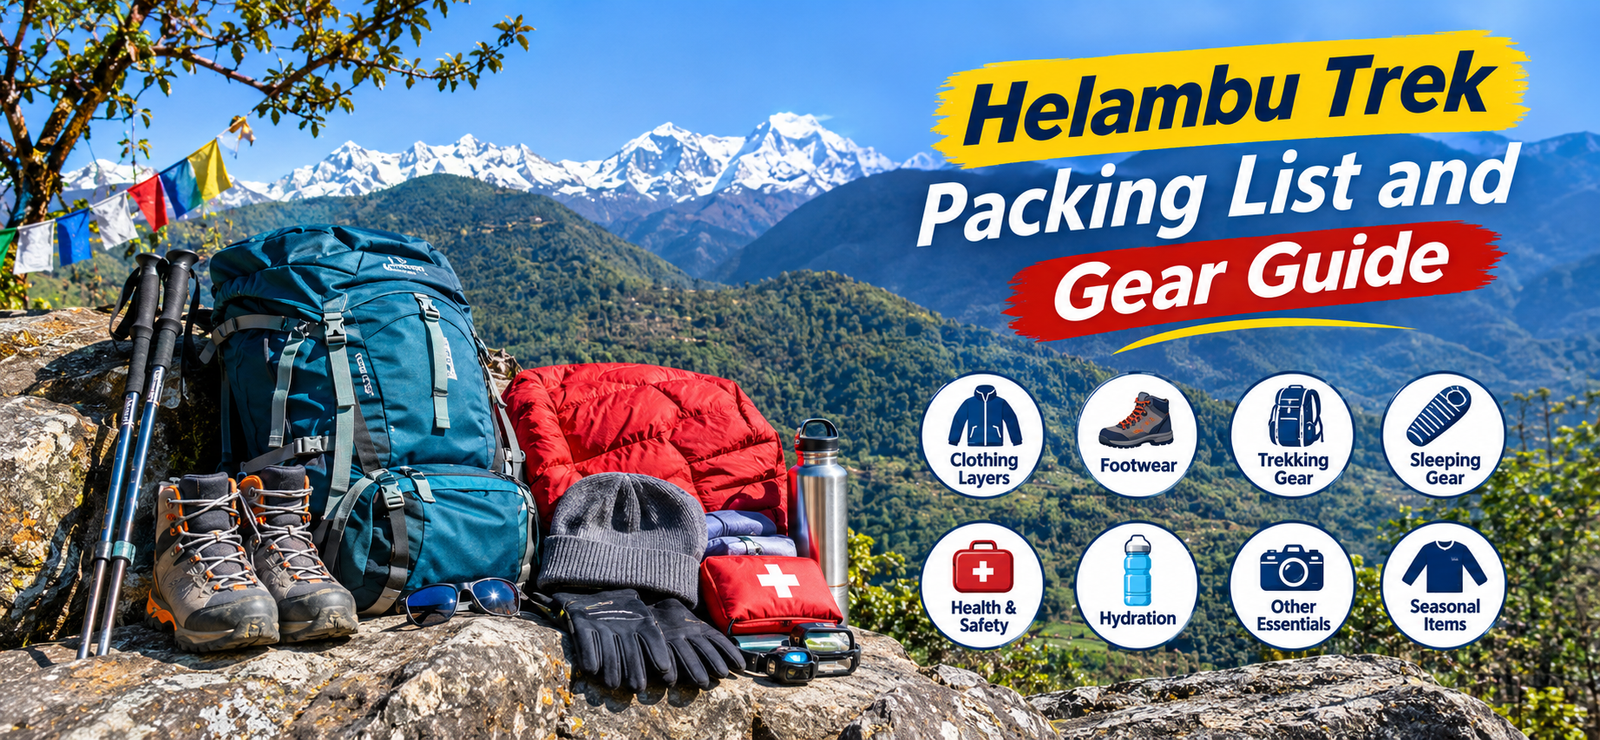
Put together, a sensible four piece system for Helambu looks like this: a wicking base layer, a fleece or light insulated mid layer, a packable down or synthetic jacket for evenings and the Tharepati stretch, and a waterproof shell on top of all of it when needed. Swap the mid layer for something heavier and add a warm hat and liner gloves for the November to February window, and you have covered the realistic temperature range this trek actually produces.
Footwear: What Actually Works on Stone Steps and Muddy Forest Trail
Helambu’s trail surface is distinctive. You spend a lot of time on old stone staircases built into hillsides, connecting villages that have used these same paths for centuries, and a lot of time on dirt and leaf litter forest trail that turns muddy and slick whenever it rains, which in the lower, wetter sections can be more often than you expect even outside monsoon. This is not the rocky, loose scree of a high pass, so you do not need a stiff, heavy mountaineering boot. A well broken in pair of mid weight hiking boots or a sturdy pair of trail shoes with good ankle support and a grippy, deep lugged sole handles this terrain well. Waterproof or water resistant uppers are worth having given how often the trail is damp underfoot, especially on the forested stretches below Tharepati and anywhere you are walking in the shoulder of monsoon.
Whatever you choose, it needs to already be broken in before you land in Nepal. New boots and multi day stone staircases are how blisters happen, and there is no quick fix for a bad blister three days from the trailhead other than slowing down and suffering through it. Wear your boots on at least a few long walks at home first.
Pack a light pair of camp shoes as well, sandals, slip on shoes, or even just thick socks with simple slides, for evenings at the teahouse once your boots come off. Your feet will thank you, and it saves your boots from being worn indoors on wooden floors that can be as slick as the trail itself when damp.
Daypack or Full Duffel: Deciding What You Actually Carry
Most trekkers on Helambu hire a porter, either independently or as part of a guided package, which changes how you should pack entirely. If you have a porter, pack a duffel bag for everything you do not need during the actual walking day, your spare clothes, sleeping bag, toiletries, and anything else that lives at the bottom of your bag until you reach the teahouse. Porters on this route, like most teahouse treks in Nepal, typically carry somewhere in the range of 12 to 15 kilograms per trekker when working solo, or closer to 20 kilograms total when two trekkers share one porter, which is the more common and more affordable arrangement on a shorter trek like this. Check the specific limit with your guide or agency before you pack, and keep your duffel under that limit with some margin, since an overweight bag either gets left behind or costs extra.
Your own daypack carries what you need hour to hour: water, a rain shell, sunscreen, snacks, your camera or phone, a first aid kit, and your permits and documents. A 25 to 35 liter pack is generally enough for this trek, since you are not carrying your full kit yourself. If you are going without a porter and carrying everything yourself, which some fit, experienced trekkers do given how short and low this route is compared to the bigger circuits, a 50 to 60 liter pack is a reasonable ceiling, and you will want to be more disciplined about every item you add, since every extra kilogram is yours alone for the whole week.
Either way, resist the urge to pack for worst case scenarios you are unlikely to meet. Helambu does not demand the same self sufficiency as a remote, multi week circuit. You pass through inhabited villages with teahouses at the end of nearly every walking day.
Sleeping Bags and What Helambu Teahouses Actually Provide
Teahouses along this route generally provide a mattress and blankets, and that part is consistent across most trip reports and operator descriptions we checked. Where accounts differ is on how warm and how clean that bedding actually is. Several independent trekker accounts of teahouse treks in this general region note that the blankets provided are not washed between every guest, since laundry in a mountain village is hand done in cold water and takes time to dry, so some trekkers prefer their own sleeping bag for hygiene reasons alone, separate from warmth.
On warmth specifically, the blankets provided are usually enough at the lower, warmer villages in the shoulder seasons, but get noticeably less adequate as you climb toward Tharepati or trek in winter, when teahouse rooms themselves are unheated and built from thin wood or stone that does little to hold warmth once the dining room fire goes out for the night. For this reason a sleeping bag is still commonly recommended for Helambu specifically, not as a strict necessity in every season, but as a sensible piece of gear that costs little to carry on a trek this short.
A three season sleeping bag rated to around 0 degrees Celsius, roughly in the comfort range down to freezing, is the sensible choice for trekking in the spring or autumn shoulder seasons. For winter trekking from November through February, size up to a bag rated to around minus 10 to minus 15 degrees Celsius comfort, given the Tharepati figures above, or bring your shoulder season bag along with a liner and plan to sleep in your insulated layer on the coldest night. For monsoon trekking, warmth matters less than the bag simply being there as a dry, clean layer between you and a blanket that has likely been damp at some point that week. A lighter bag, or even just a liner over the teahouse blankets, is usually sufficient in June through August given how mild monsoon nights actually are.
If you would rather not carry a bag at all, renting one in Kathmandu before you start is common, cheap, and solves the weight question entirely for a trek this short.
Trekking the Monsoon: Leeches, Rain, and What Really Changes
If you are trekking Helambu between June and August, your packing list shifts more than it does for any other seasonal swing on this route. Rain falls most afternoons, trails that are dusty and firm in October turn to slick red clay, and sections of path can wash out or get diverted around small landslides, particularly on the lower, forested stretches. One independently published trip report of a Helambu trek specifically during monsoon described drizzle starting by day three, roughly two weeks of preceding rain softening the ground, and a group having to detour off the main track where monsoon rain had damaged the route. That same account is also useful for confirming the next point.
Leeches are a real and specifically reported issue on this route in wet season, not just a generic Nepal rumor. That same trip report described leeches waiting on bushes, rock steps, and piles of wet leaves in the forest sections of the Helambu Trek, and every member of that trekking group was bitten at least once, on ankles, an elbow, and even a neck. This matches the general pattern across Nepal’s lower, forested trekking routes. Nearby Langtang Valley, which we compare directly to this trek in Helambu Trek vs Langtang Valley Trek, reports a similar leech issue in its own lower forest zones during the same months, and most sources agree the leech season across this part of Nepal runs roughly June through early September, concentrated below about 2,500 to 3,000 meters, which covers a large share of Helambu’s forested lower and middle sections.
The fix is straightforward and well established among guides who work this terrain regularly. Leech socks, tight, tall socks with an elastic top that you tuck your trousers into, worn over your regular socks, are the single most effective piece of gear, and worth packing specifically for a monsoon trip even if you leave them home in dry season. Gaiters worn snugly over your boots close the remaining gap and add a layer of protection against mud as a bonus. DEET based repellent sprayed onto boots, socks, and the lower part of your trousers works and is what most independent accounts recommend, reapplied every couple of hours on a wet day. Some local guides use salt or a rough tobacco paste rubbed onto boot tops as a traditional method, which several sources describe as a real but less reliable backup to a proper repellent, not a replacement for it. Whatever method you use, get in the habit of checking your lower legs, socks, and boot tops every thirty minutes or so on a wet forest stretch, and resting in open, sunny spots rather than damp, shaded ones when you stop.
Beyond leeches, monsoon gear for Helambu is mostly about staying dry and drying out fast. A proper rain cover for your pack, ideally a dry bag liner inside it as well, keeps your sleeping bag and electronics safe through a multi hour downpour. Quick drying synthetic clothing beats cotton or heavy cotton blends by a wide margin, since you will likely be wet at some point every day and need clothes that do not stay soaked overnight. A second pair of hiking socks, rotated so one pair is always drying, is a small thing that makes a real difference. And a dedicated pair of camp shoes becomes even more valuable in monsoon, since your hiking boots may simply not dry out overnight and you do not want to walk around a teahouse in them.
Permits and Documents: Have Them Sorted Before You Pack a Single Bag
This is a packing guide, not a permits guide, so we will not re explain the fees and procedure here. What matters for your bag is simple: carry your TIMS card, your national park or conservation area permit, your passport, and printed or digital copies of your travel insurance, in a dry, accessible pocket of your daypack, not buried in the duffel your porter carries. Checkpoints along the route will ask to see these, and a soggy, illegible permit is a genuine hassle to deal with partway through a trek. For the actual costs, where to obtain each permit, and which one applies depending on your exact route, including the Gosainkunda extension, see our existing guide on Helambu Trek cost and permits.
Health and First Aid Essentials for a Trek This Length
Because Helambu stays well below the altitude where serious altitude illness becomes a major risk for most trekkers, your first aid kit can be lighter than what you would carry on Everest Base Camp or Annapurna Circuit, but a short, low altitude trek is still a trek, and a basic kit is still worth the small amount of extra weight.
- A blister kit: moleskin or specific blister plasters, and a small amount of tape, since stone staircases and new or slightly damp boots are a classic recipe for hot spots on your feet.
- General pain relief and anti inflammatory tablets, for sore knees on the steep stone descents as much as for headaches.
- Something for stomach upset, both a general antidiarrheal and oral rehydration salts, since a change in food and water is a common minor issue on any Nepal trek, Helambu included.
- A small supply of any personal prescription medication, carried in your daypack rather than your duffel in case your bags are separated from you for a stretch of the day.
- Basic altitude awareness, even though serious altitude sickness is less likely here than on a trek that reaches 5,000 meters. If you feel a genuine headache, nausea, or unusual breathlessness around Tharepati, treat it seriously, mention it to your guide, and do not push higher until it resolves.
- Antiseptic wipes or cream and a few adhesive bandages for minor cuts and scrapes, which happen more often than people expect on uneven stone steps.
- Sunscreen and lip balm with SPF. Several sections of the route, particularly the open ridge near Tharepati, have little tree cover, and the sun at this elevation is stronger than it feels.
- Insect repellent containing DEET, doing double duty against leeches in monsoon and ordinary biting insects at lower elevation in the warmer months.
- Hand sanitizer, since handwashing facilities in smaller teahouses can be basic.
If you are trekking with a guide, as most visitors to this region do, they typically carry a more complete kit and know the nearest options if something more serious comes up, but your own small personal kit should cover everyday issues without needing to ask.
Electronics and Power: What to Realistically Expect
This varies by exactly how remote the village you are staying in is, and it pays to set expectations village by village rather than assuming either extreme. Teahouses in the lower and middle sections of the route, places like Chisapani, Kutumsang, and the larger Helambu villages such as Tarkeghyang and Sermathang, generally have electricity, and charging a phone or camera battery is usually possible, though not guaranteed to be free. A charging fee somewhere in the range of roughly one to three US dollars per device per charge is commonly reported on comparable teahouse treks in this part of Nepal, and Helambu’s villages, being closer to Kathmandu and more regularly visited than some other regions, tend to be on the better resourced end of that range rather than the worst.
At the higher, more exposed stop around Tharepati, and at smaller, quieter teahouses generally, do not assume power will be available, or that it will be reliable if it is. Solar panels and small hydro or generator setups feeding a single building can go down, get overloaded when every trekker in the dining room plugs in at once, or simply not be turned on outside of peak hours.
The simple fix is to bring a power bank, ideally one with enough capacity to fully charge a phone two or three times over, and to charge it yourself whenever you do find reliable power rather than waiting until your phone is nearly dead. A head torch with spare batteries is essential regardless of charging access, both for the short walk to the bathroom at night in a teahouse with no interior lighting and for the rare case you are still on the trail as it gets dark. Wifi, where it exists at all on this route, tends to be slow and sometimes sold separately from charging, so treat any connectivity as a bonus rather than something to plan around.
Money: Why You Need Cash Before You Even Reach Sundarijal
The villages along the Helambu Trek run on cash. There are no ATMs once you leave Kathmandu, and card payment is not something to expect at a teahouse partway up a mountain. The nearest reliable ATMs are in Kathmandu itself, so your cash needs to be sorted and in hand before your taxi or jeep drops you at the trailhead. Even at the far end of the trek, at a larger town like Melamchi Pul Bazaar if that is part of your route, do not count on banking services being open, stocked with cash, or convenient to reach on your schedule.
How much to carry depends on your arrangement. If you are on a fully organized package where accommodation and meals are prepaid, you mainly need cash for drinks, snacks, hot showers, phone charging, wifi, tips for your guide and porter, and souvenirs, which for a trek of this length commonly adds up to somewhere in the range of a modest sum per day, though exact figures vary a fair amount by personal habits and we would rather describe this qualitatively than invent a precise number that does not hold up trip to trip. If you are trekking independently and paying for teahouse rooms and meals as you go, budget meaningfully more per day to cover lodging and three meals, and build in a buffer beyond your estimate, since running short on cash several days into a trek with no ATM in sight is a genuinely bad position to be in. Our cost and permits guide for this trek goes into the fuller cost breakdown if you want harder numbers to plan against.
Bring a mix of note sizes rather than all large bills. Smaller teahouses and shops in the villages do not always have change for a large note, and arriving with nothing but the equivalent of a big bill makes small purchases harder than they need to be.
Water Purification: Your Options on This Route
Bottled water is sold in most of the villages along the route, but relying on it for an entire trek creates plastic waste in places with no real way to deal with it, and it gets more expensive the further you get from Kathmandu. Most trekkers use one of a few standard purification methods instead, all of which work well for Helambu.
- Water purification tablets, chlorine dioxide or similar, are light, cheap, and simple, needing only time for the tablet to work before you drink.
- A UV purifier pen treats a bottle of water in under a minute, provided you keep spare batteries charged, which ties back to the power situation above.
- A squeeze or gravity filter removes sediment and biological contaminants without chemicals or batteries, and pairs well with refilling from a tap or tank at a teahouse.
- Simply asking your teahouse to boil water for you is common practice on this and most Nepal teahouse treks, and is a reliable fallback almost everywhere on the route.
Whichever method you choose, bring a reusable bottle of at least one liter, ideally closer to two liters of total carrying capacity between a bottle and a bladder, since you will be refilling throughout the day rather than buying fresh bottles at every stop.
Common Overpacking Mistakes on a Shorter, Lower Trek
Because so much of the readily available packing advice online is written for Everest Base Camp or the Annapurna Circuit, trekkers heading to Helambu routinely overpack for conditions they will never meet. Here is what you can leave behind, and why.
- An expedition weight down jacket or suit. The genuine cold on this trek sits well above what that gear is designed for. A packable midweight down or synthetic jacket covers you completely, including at Tharepati.
- A minus 20 or colder rated sleeping bag. Unless you are extending onto Gosainkunda, a bag rated around 0 degrees for shoulder season or around minus 10 to minus 15 for winter is enough, as covered above.
- Insulated mittens and a full balaclava. A warm hat and a pair of liner or light insulated gloves handle the cold on this route’s exposed sections. Save the serious hand and face protection for a trek that actually spends nights near or above 4,500 meters.
- Crampons or microspikes, except in an unusual heavy snow year. Snow is possible above 3,000 meters in deep winter, but it is not a given, and this is not a route where you are crossing a glaciated pass. Ask your guide or agency closer to your travel dates if conditions that year warrant them.
- A stack of altitude sickness medication as a precaution against something unlikely to occur at these elevations for most healthy trekkers. Basic awareness matters more than a pharmacy’s worth of Diamox here.
- An oversized, heavy duty trekking backpack built for a three week expedition. A daypack in the 25 to 35 liter range, paired with a duffel for your porter, is the right scale for a trek this length.
- Excess spare clothing “just in case.” Because you pass through villages regularly and the trek is short, you do not need the same depth of backup clothing as a remote, multi week circuit. Plan on being able to hand wash a layer or two along the way if needed.
The general rule: pack for a cold but short, accessible trek, not a high altitude expedition. Every item you cut is weight your porter does not carry, or weight you do not carry yourself if you are going without one.
The Complete Helambu Packing Checklist
Use this as a working list, then adjust up or down based on your trekking season from the guidance above.
Clothing
- 2 moisture wicking base layer tops, plus 1 dedicated warm sleeping top
- 1 pair long underwear bottoms for sleeping, particularly for autumn through winter travel
- 2 to 3 hiking trousers or a combination of trousers and quick drying shorts
- 1 midweight fleece or light insulated mid layer
- 1 packable down or synthetic insulated jacket
- 1 waterproof, breathable rain shell
- 1 pair waterproof rain trousers, especially for monsoon travel
- 4 to 6 pairs hiking socks, wool or synthetic blend, plus 1 pair warm sleeping socks
- 1 warm hat and 1 sun hat or cap
- 1 pair liner gloves, plus a slightly warmer pair for winter travel
- 1 buff or scarf for sun, wind, and dust
- 1 long sleeve shirt suitable for wearing inside a monastery or gompa, useful if you plan to visit the sites covered in Hyolmo Culture and Monasteries of Helambu
- Underwear for the full trip, synthetic or wool blend over cotton
Footwear
- 1 pair broken in hiking boots or sturdy trail shoes with good grip
- 1 pair lightweight camp shoes or sandals
- Gaiters, especially useful in monsoon and for mud generally
Sleeping and Shelter
- Sleeping bag rated to your season, roughly 0°C comfort for shoulder season, minus 10 to minus 15°C comfort for winter, or a light bag or liner alone for monsoon
- Sleeping bag liner, useful in every season for hygiene and a small warmth boost
- A small travel pillow or pillowcase if you prefer your own
Packs and Bags
- Daypack, 25 to 35 liters, with a rain cover
- Duffel bag for your porter, kept within your agency’s stated weight limit
- Dry bags or large zip lock bags to separate wet and dry items, and to waterproof your duffel’s contents from the inside
Health and Hygiene
- Basic first aid kit as detailed above
- Hand sanitizer and a small bar or bottle of biodegradable soap
- Quick dry towel
- Toothbrush, toothpaste, and other everyday toiletries in travel sizes
- Sunscreen and SPF lip balm
- Insect and leech repellent containing DEET, essential for monsoon travel, useful in other seasons too
- Toilet paper and a small amount of tissue, which is not always provided in smaller teahouses
Electronics
- Head torch with spare batteries
- Power bank, charged fully before you leave Kathmandu
- Phone or camera with charging cable, kept in your daypack rather than your duffel
- Universal adapter if traveling from outside Nepal’s plug standard
Documents and Money
- TIMS card and relevant national park or conservation area permit
- Passport and a photocopy kept separately
- Travel insurance details, printed or saved offline on your phone
- Enough Nepali cash in a mix of note sizes for the full trek, since there are no ATMs past Kathmandu
Water and Food
- Reusable water bottle or bladder, at least 1 to 2 liters capacity
- Your chosen water purification method, tablets, UV pen, or filter
- A small stash of energy bars or trail snacks for the trail between villages
Extras Worth the Small Weight
- Trekking poles, genuinely useful on the steep stone staircases in both directions
- Sunglasses, ideally polarized, for the exposed ridge sections
- A dry bag or waterproof pouch specifically for your phone and permits
- A paperback, journal, or offline downloaded entertainment for quiet teahouse evenings with little or no wifi
Pack this list against the season you are actually traveling in, not against a generic Nepal trekking list built for a bigger mountain. The Helambu Trek rewards a trekker who packs light, dry, and warm enough for the specific cold it actually produces, rather than one armed for an altitude this route never reaches. Get the layering system right, sort your cash and permits before you leave Kathmandu, respect the leeches in wet season, and you will spend far more of the trek enjoying the Hyolmo villages and the forest trail than fussing with your bag.