Every year a decent number of trekkers show up in Kathmandu with Everest Base Camp or the Annapurna Circuit on their mind, realize they only have five or six free days, and get pointed toward the Helambu Trek instead. It is usually sold to them as “the easy one,” the trek you do when you are short on time or short on big mountain experience. That reputation is mostly earned. But mostly earned is not the same as earned completely, and a lot of people who arrive thinking Helambu will feel like a long countryside walk are surprised by how much their legs ache on day three. This guide exists to give you a straight answer on how hard this trek actually is, what altitude you will really reach, where the route gets steep and slippery, and whether you personally should be doing it at all.
We are not going to repeat the village by village rundown or the permit costs here. If you want that groundwork, our Helambu cost and permits guide covers it. This article has one job: to tell you, honestly and in detail, how physically demanding this trek is, what the elevation profile looks like day by day, where the real altitude risk sits, and how to get your body ready for it.
How Hard Is the Helambu Trek, Really
Start with the comparison everyone actually wants. Against the Everest Base Camp trek, the Annapurna Circuit, or the Manaslu Circuit, Helambu is noticeably easier. You are not flying into a mountain airstrip at altitude, you are not crossing a glaciated pass above 5,000 meters, and you are not spending ten nights above 3,500 meters hoping your body adapts. Most Helambu itineraries top out somewhere in the 3,600 to 3,700 meter range for one or two nights at most, then drop back down into forest and farmland. The oxygen deficit that makes Everest Base Camp genuinely risky for unprepared trekkers simply is not a major factor here, at least not on the standard loop.
That said, “easier than Everest Base Camp” is a low bar, and it would be dishonest to call Helambu a walk in the park. Most operators and independent trekking guides rate it as easy to moderate, and if you forced that onto a 1 to 10 difficulty scale, it would land somewhere around a 4, occasionally touching 5 on the harder transition days. You are still walking for five to seven hours a day, for five to eight consecutive days, carrying a daypack, on trails that go up and down constantly rather than along one gentle gradient. There is a day in the middle of the route, usually the push from Kutumsang up to Tharepati, or the long descent off Tharepati toward Melamchigaon, that genuinely tests tired legs. People who treat this trek as an afterthought, something to squeeze in between sightseeing days with zero physical preparation, often end up miserable by day three even if they never get altitude sick.
Who This Trek Actually Suits
If you are a complete beginner to multi day hiking but you are reasonably active in daily life, walk regularly, climb stairs without getting winded, and you are willing to put in a few weeks of deliberate preparation beforehand, Helambu is a sensible first trek in Nepal. It is honestly one of the better entry points into Himalayan trekking precisely because it does not demand previous high altitude experience, does not require a domestic flight into a mountain airstrip, and keeps you close enough to Kathmandu that a problem on the trail is never more than a day or two from a road.
If you already have some hiking background, say you have done multi day treks at altitude elsewhere, or you regularly do long day hikes with elevation gain at home, you will likely find the walking itself comfortable and spend more of your attention on the villages, the Hyolmo culture, and the views rather than on your own fatigue. For this group, Helambu can also work well as a shorter add on trek, or as an acclimatization style warm up before something bigger.
Where it gets more complicated is the group that has done zero preparation and has zero hiking background at all. Helambu is forgiving compared to the big three treks, but it is not so forgiving that you can show up having never walked more than a shopping mall’s worth of distance and expect a comfortable week. You can finish it in that condition, plenty of unprepared people do, but you will suffer more than you need to, and the risk of a twisted ankle, blown knee, or simple exhaustion driven bad decision goes up.
The Day by Day Route, Elevation and Walking Times
Here is where things get genuinely inconsistent across operators, and it is worth saying that plainly rather than pretending there is one official itinerary. The classic Helambu loop begins at Sundarijal, just northeast of Kathmandu, and generally runs through Chisapani, Pati Bhanjyang, Gul Bhanjyang, Kutumsang, Tharepati (also spelled Thadepati), then down toward Melamchigaon, across to Tarkeghyang, on to Sermathang, and out via Melamchi Pul Bazaar back to the Arniko Highway and Kathmandu. Some companies split the middle section differently, overnighting in Mangengoth before Tharepati, or skipping Melamchigaon altogether and walking straight from Tharepati to Tarkeghyang in one long day. Others extend the whole thing further north to include Panch Pokhari, which we will get to separately. Treat any itinerary you are given, including the one below, as representative rather than fixed. Guides adjust the daily breaks depending on group fitness, weather, and lodge availability anyway.
With that caveat up front, here is a fairly standard seven to eight day breakdown, with elevations drawn from multiple operator itineraries and cross checked against each other.
Day 1: Sundarijal to Chisapani
You leave Kathmandu by road to Sundarijal, sitting around 1,400 meters, then start climbing almost immediately on stone steps alongside a water pipeline into Shivapuri National Park. The climb to the Burlang Bhanjyang ridge pushes you over 2,400 meters before you drop slightly into Chisapani, which sits at roughly 2,200 to 2,300 meters depending on which source you check. Expect four to six hours of walking, with a net elevation gain on the order of 800 to 900 meters. This is a genuinely tough opening day for anyone unfit, front loaded with stairs, which catches a lot of first timers off guard.
Day 2: Chisapani to Kutumsang
The trail undulates along a ridge through Pati Bhanjyang and the lunch stop at Gul Bhanjyang, with repeated short climbs and drops through forest and terraced farmland before arriving at Kutumsang, around 2,450 to 2,470 meters. Walking time runs five to seven hours, and while the net elevation gain looks modest on paper, maybe 150 to 250 meters net, the constant up and down adds real fatigue that a simple start and end elevation number does not capture.
Day 3: Kutumsang to Tharepati
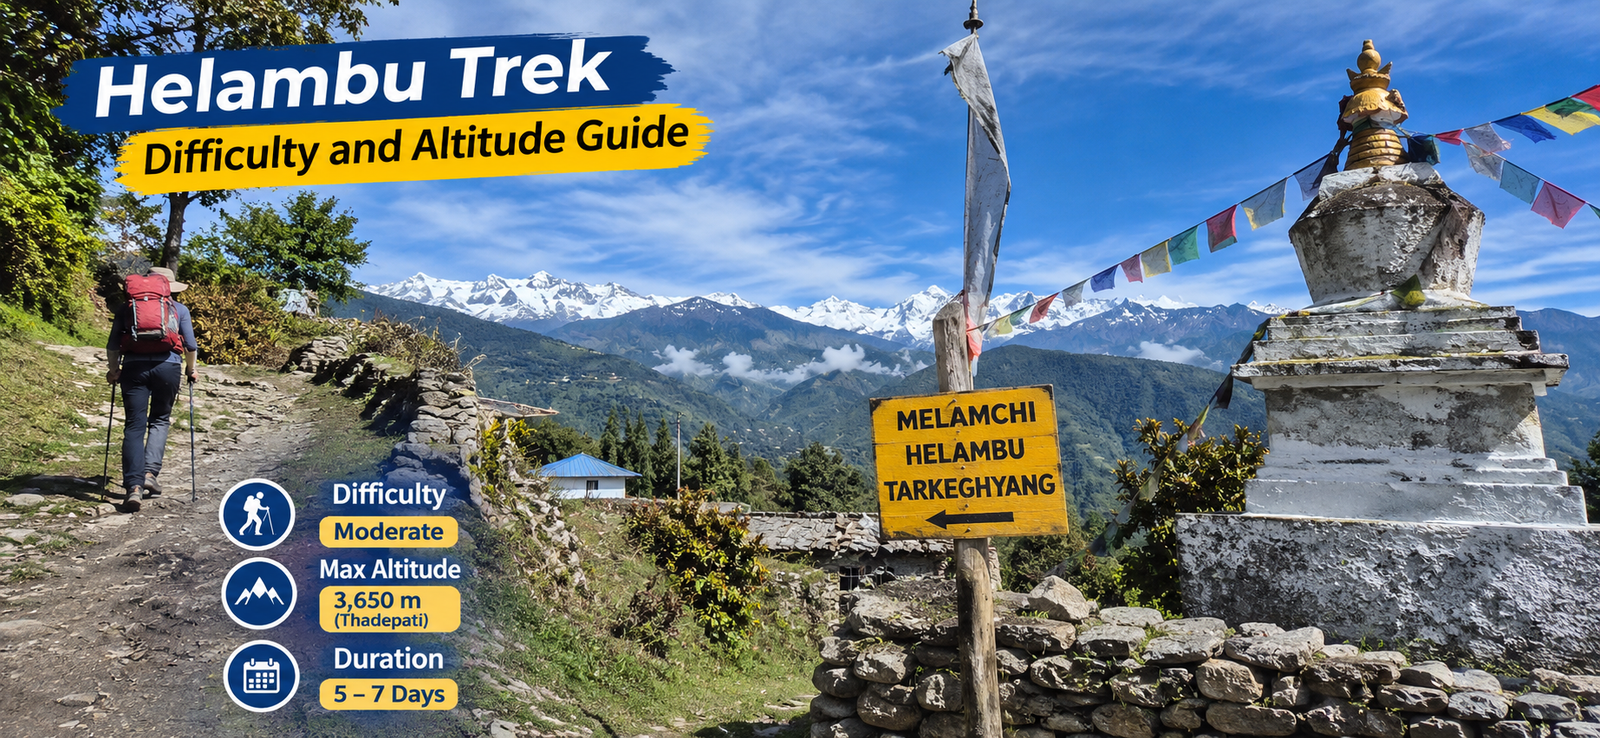
This is widely regarded as the hardest day on the standard route. You leave the farmland behind and climb steadily through rhododendron and oak forest, sometimes stopping at Mangengoth for lunch depending on pacing, before a sustained final push onto the open ridge at Tharepati, sitting around 3,650 meters by most counts. Expect five to seven hours of walking and a net gain of 1,100 to 1,200 meters over the day. The forest cover disappears in the final stretch and you are exposed to wind on an open ridgeline, which matters a lot if weather turns.
Day 4: Tharepati to Melamchigaon
On itineraries that include this stop, you descend steeply off the ridge through forest into the Melamchi valley, dropping to the Sherpa village of Melamchigaon at around 2,500 to 2,600 meters. This is a knee punishing day. The descent from Tharepati loses close to 1,000 meters, sometimes more depending on the exact trail taken, over four to six hours, on a mix of dirt, root strewn forest path, and loose stone. Trekkers who skip the Melamchigaon overnight do this descent and the climb to Tarkeghyang in a single long day instead, which is a noticeably harder option.
Day 5: Melamchigaon to Tarkeghyang
A shorter day, typically three to five hours, crossing the river and climbing back up the opposite side of the valley to Tarkeghyang, a larger Hyolmo village sitting around 2,550 to 2,600 meters. Net elevation change is modest, though there is a real climb involved to get there.
Day 6: Tarkeghyang to Sermathang
A gentler day by Helambu standards, following a fairly level trail through forest and past monasteries and mani walls to Sermathang, around 2,600 to 2,650 meters. Walking time is usually three to four hours, with gentle undulation rather than any serious climb.
Day 7: Sermathang to Melamchi Pul Bazaar, then drive to Kathmandu
A long, steady descent on a mix of trail and farm track down to Melamchi Pul Bazaar at around 800 to 900 meters, followed by a three to four hour drive back to Kathmandu on the Arniko Highway. Walking time on foot is usually three to four hours, but this is where the cumulative altitude loss over the whole trek finally catches up with tired knees. Some itineraries instead route the exit through Timbu or further along toward the highway, depending on road conditions and where the operator has arranged transport.
Some versions compress this into five or six days by cutting Melamchigaon or combining two shorter days, while heritage circuit style itineraries stretch it to nine or ten days with an extra cultural day built in. None of these variations are wrong exactly, they are just different operators making different calls on pacing. If distances and exact kilometer counts matter to you, be aware that very few operators actually publish them, most quote walking hours instead, and the hour counts themselves vary by up to an hour or two between companies for the same day. Take any single number you are given as an estimate, not a guarantee.
Looking at the Whole Trek’s Elevation Profile Together
Individual daily numbers only tell part of the story, because what actually wears a body down on this trek is the cumulative total of climbing and descending, not any single day’s net change. Add up a typical seven day Helambu loop and you are looking at something in the region of 3,000 to 3,500 meters of total ascent across the whole trek, and a very similar figure in total descent, since the route starts and finishes at a comparable low elevation near Kathmandu. That total is spread across several days rather than concentrated in one brutal push, which is part of why the trek feels manageable to reasonably fit people, but it is still a substantial amount of vertical movement, comparable in scale to climbing a very large staircase city sized building more than once over the course of a week. Trekkers coming from flat home countries, with no hills to train on at all, consistently underestimate how much this cumulative climbing and descending asks of untrained calves, quadriceps, and knees, even when no single day looks intimidating on its own.
It is also worth flagging that descent, not ascent, is usually what people complain about afterward. Climbing is slow and aerobically demanding, but descending for hours on stone steps or loose forest trail loads the knees and front of the thighs in a way that tends to produce more lingering soreness, particularly on the Tharepati to Melamchigaon drop, which some itineraries squeeze into a single long day rather than splitting it. If you only train one movement pattern before you travel, make it this one: downhill walking with control, ideally on real hills or stairs rather than a flat treadmill.
Maximum Altitude and AMS Risk on the Standard Route
The highest point on the standard Helambu loop is the Tharepati ridge, and this is one area where sources genuinely do not agree on the exact figure. Wikipedia’s entry on the Helambu region describes the ridge route topping out close to 3,650 to 3,700 meters. Several independent trekking operator write ups cite 3,650 meters specifically, while at least one detailed difficulty breakdown we checked gives 3,690 meters for the same point. Our own cost and permits guide on this site uses roughly 3,640 meters. These numbers are close enough that the practical implication is the same, but precise enough in their disagreement that we are not going to pretend there is one definitive figure. If you want a number to plan around, treat the high point as somewhere in the 3,600 to 3,700 meter band, and do not be alarmed if a map, a guidebook, and your trekking permit each show you something slightly different.
What matters more than the exact meter count is what that altitude means for acute mountain sickness, or AMS. Medical guidance generally treats 2,500 meters as the point where AMS becomes possible, and the risk climbs meaningfully above 3,000 meters, particularly with rapid ascent and overnight stays. On the standard Helambu route, you typically climb from below 2,500 meters up to the Tharepati high point and back down again within a day or two, spending at most one or two nights near or above 3,000 meters. That is a real exposure, not a token one, and mild symptoms, a dull headache, slight breathlessness, a bit of nausea, are not unusual among trekkers reaching Tharepati, especially those who have flown into Kathmandu from near sea level only a day or two before starting. It is categorically less risky than spending a week above 4,000 or 5,000 meters the way you would on Everest Base Camp or the Annapurna Circuit, but it is not zero risk, and the fact that the maximum altitude is moderate does not mean a case of HAPE or HACE becomes biologically impossible, just considerably less likely. Anyone who develops a severe headache, confusion, loss of coordination, or breathlessness at rest on this trek should descend and seek help exactly as they would at any altitude, rather than assuming Helambu is too low for it to be serious.
A sensible approach is the same one you would use on any trek that gains altitude quickly: drink more water than feels necessary, avoid pushing hard on the Kutumsang to Tharepati day if you are feeling off, and do not let a tight itinerary pressure you into ignoring early symptoms. Because the standard route only holds you at altitude for a short window, this is usually manageable with basic common sense rather than a dedicated acclimatization schedule.
The Panch Pokhari Extension and Its Much Higher Altitude Risk
Some operators offer an extended version of this trip that pushes north from the Helambu villages toward Panch Pokhari, a set of sacred alpine lakes beneath the Jugal Himal range. This is a genuinely different animal from the standard loop and should not be lumped in with it when talking about difficulty. Wikipedia lists the Panch Pokhari lakes at approximately 4,100 meters, which several independent trek operators corroborate, though as with Tharepati you will see minor variation between sources, some citing figures a little above or below that mark. Either way, you are talking about an altitude roughly 400 to 500 meters higher than anything on the standard Helambu route, reached over a longer, steeper approach with less built up infrastructure and fewer lodges along the way.
The AMS calculation changes substantially once you are approaching or exceeding 4,000 meters. This is squarely within the range where altitude sickness becomes a real and relatively common issue if ascent is rushed, and the Panch Pokhari extension typically involves a faster net gain per day than the gentler Helambu villages section. If you are adding this extension onto a Helambu itinerary, you should treat it with the same seriousness you would give to any trek that reaches 4,000 meters: build in an extra acclimatization day if your schedule allows it, watch your pace on the final approach, and do not treat it as a casual add on just because the rest of the trip felt manageable. Trekkers who comfortably handled Tharepati at 3,650 meters with no symptoms at all can still develop AMS pushing up toward 4,100 meters a few days later if they ascend too fast, because altitude tolerance does not scale in a straight line and prior comfort at a lower height is not a guarantee of comfort higher up.
What the Trail Actually Feels Like Underfoot
Guidebooks tend to reduce trail conditions to a single adjective, and that undersells how much the terrain changes over the course of this trek. The opening climb out of Sundarijal is almost entirely stone steps, built to manage the steep gradient alongside the water pipeline, and it is relentless in a way that surprises people expecting a gentle warm up. Once you are over the Shivapuri ridge and into the Helambu villages proper, the trail shifts to a mix of wide dirt mule tracks, the kind historically used to move goods between villages, interspersed with sections of packed earth through terraced fields.
The middle section through Gul Bhanjyang, Kutumsang, and up toward Tharepati runs largely through rhododendron and oak forest, with a root strewn, sometimes rocky path underfoot that can be genuinely slick when wet. The final approach to Tharepati itself opens out onto exposed ridgeline walking, no tree cover, more wind exposure, and views in every direction when it is clear. The descent off that ridge toward Melamchigaon drops back into dense forest on a steep, often loose trail that is hard on the knees and easy to slip on if you are moving too fast or the ground is damp.
Lower down near Tarkeghyang, Sermathang, and the final descent to Melamchi Pul Bazaar, trails broaden out again into a mix of farm track and stone paved village paths, walking through mani walls, chortens, and terraced fields that feel far more pastoral than mountainous. None of this requires technical skill, there is no scrambling, no exposed scree traverse, no glacier crossing, but the surface underfoot changes constantly and you need ankles that can handle uneven stone steps one hour and soft forest mud the next.
One underrated factor on the lower and middle sections is shared use of the trail. Several stretches, particularly around Pati Bhanjyang, Gul Bhanjyang, and the approach to Kutumsang, still function as working mule routes moving supplies between villages, and you will regularly need to step aside and let a loaded mule train pass on a narrow path, sometimes on a section with a drop on one side. It is a minor thing, but it catches people off guard the first time it happens, and it is one more reason sturdy footwear with real ankle support matters more here than the easy reputation of the trek suggests. Our Helambu Trek Packing List goes into footwear and layering choices in more detail, but as far as difficulty goes, the short version is that worn in boots with decent grip matter more on this route’s mixed surfaces than they would on a single consistent trail type.
Footbridges are another small but constant feature. The route crosses numerous streams and at least a few larger rivers on simple wooden or suspension footbridges, some well maintained, others visibly older. None of these crossings are dangerous for someone paying attention, but they are not something to cross while distracted by your phone or the view, especially after rain when the approach can be muddy.
Fitness You Actually Need
You do not need to be an athlete for this trek, but you do need a working baseline of cardiovascular fitness and leg strength. Most days run five to seven hours of actual walking, occasionally stretching toward seven or eight on the harder middle section, carrying a daypack typically in the five to seven kilogram range if a porter is handling your main bag. That is a meaningful daily workload repeated for the better part of a week, not a single big effort you can grit your way through once and then recover.
If you can currently walk briskly for two to three hours on hilly ground without needing a long recovery afterward, you are probably fit enough with a few weeks of focused preparation. If your current baseline is closer to occasional short walks with no hills and no sustained effort, you can still do this trek, people regularly do, but you should expect the early days to hurt more and you should put real effort into the training plan below rather than skipping it.
How Helambu Compares to Poon Hill and Mardi Himal
Since this question comes up constantly, a brief word on the other short treks people weigh against Helambu. The Ghorepani Poon Hill trek, which tops out around 3,200 meters, is generally considered a notch easier than Helambu, mostly because its elevation gains are gentler and the famous stone staircases, while long, are predictable rather than relentless across varied terrain. Mardi Himal, by contrast, pushes higher, with its upper viewpoint sitting well above 4,000 meters, and tends to feel a bit harder than Helambu overall because of that extra altitude and a steeper, more exposed final stretch. Helambu sits comfortably in between the two for most trekkers, a touch more demanding than Poon Hill day to day, generally a bit gentler than Mardi Himal at its highest point.
A Training Plan If You Are Starting From Near Zero
If you have decided to do this trek and your current fitness is closer to sedentary than active, you have time to fix that, and a few weeks of deliberate preparation will change your experience on the trail more than almost any piece of gear you buy. Here is a realistic plan built around what the trek actually demands: sustained hours on your feet, repeated elevation change, and a loaded pack.
- Weeks six to four before departure: Build a cardio base. Aim for three to four sessions a week of thirty to forty five minutes, brisk walking, jogging, cycling, or swimming, whatever you will actually stick with. The goal here is not speed, it is getting your heart and lungs used to sustained moderate effort several times a week.
- Weeks six to four, in parallel: Add basic leg strength work twice a week. Bodyweight squats, lunges, step ups onto a box or sturdy chair, and calf raises are enough. You are training the muscles that absorb the pounding of descents, which is usually what people undertrain and then regret on day three.
- Weeks four to two before departure: Start taking real hikes, not just walks. If you have access to hills, stairwells, or a stadium, use them. A weekly session of stair climbing, repeated flights for thirty to sixty minutes, builds the specific muscular endurance you will need on the Sundarijal climb and the Tharepati push far better than flat walking does.
- Weeks four to two, weighted hikes: Start carrying a daypack loaded to roughly the weight you will actually carry on trek, five to seven kilograms is a reasonable target, on your longer walks. This matters more than people expect, since even a modest pack changes your balance and tires your shoulders and lower back in ways an unloaded walk does not reveal.
- Final two weeks: Do at least one, ideally two, longer practice hikes of four or more hours with your loaded pack and the actual boots you plan to wear. This is as much about breaking in your boots and testing your gear as it is about fitness. Taper down intensity in the final few days before you fly out so you arrive rested rather than depleted.
Throughout all of this, pay attention to your knees specifically, since the steep descents off Chisapani and Tharepati are where knee pain shows up for people who skipped strength work. If you already know your knees are a weak point, trekking poles are worth the small amount of extra weight and are genuinely useful on this route’s steeper drops, not just a gimmick.
Who Should Not Attempt This Trek
Being honest about difficulty cuts both ways. Just as it would be wrong to oversell Helambu as dangerous, it would be irresponsible to pretend everyone can do it safely. A few groups should think hard before signing up, or should talk to a doctor first.
- Anyone with a diagnosed serious cardiac condition, uncontrolled high blood pressure, or a history of heart events should get specific medical clearance. Sustained daily exertion at moderate altitude for a week is a real physiological load, not a gentle stroll, and this is not the trek to test an unstable heart condition against.
- Anyone with significant respiratory disease, severe asthma that is not well controlled, COPD, or similar conditions should also seek medical advice first, since even moderate altitude can meaningfully worsen breathing difficulty, and rescue options on parts of this route are slower and less immediate than people assume.
- Anyone with a recent or unhealed lower limb injury, a bad knee, ankle, or hip that is not currently stable, should be cautious, given how much of this route involves steep stone steps and uneven descent.
- People combining genuinely zero physical preparation with zero prior hiking background of any kind, who are also unwilling to do any training beforehand, are taking on more risk and more suffering than they probably realize. This trek is forgiving of modest fitness and some preparation. It is not forgiving of total unreadiness combined with a refusal to prepare at all.
- Anyone who has previously had a severe altitude related reaction at relatively modest elevations should discuss this specific trek, and especially the Panch Pokhari extension, with a doctor experienced in altitude medicine before committing.
If none of that applies to you, and you are willing to put in a few weeks of preparation, Helambu is well within reach for most reasonably healthy adults, including first time trekkers.
Common Questions About Difficulty on This Trek
A few specific questions come up often enough from first time trekkers that they are worth answering directly rather than leaving scattered through the sections above.
Can a complete beginner really do this without a guide failing them halfway through? Yes, in the sense that the trail itself does not require technical skill and lodges exist along the whole route, so you are never more than a few hours from shelter and food. That said, a licensed guide is required for this route under current Nepal trekking regulations, and beyond the legal requirement, a guide who knows the pace and the usual rest points genuinely reduces the chance that an unprepared beginner pushes too hard on the Kutumsang to Tharepati day and pays for it the next morning.
Do I need altitude sickness medication for a trek that only reaches 3,650 to 3,700 meters? Most healthy trekkers do not need preventive medication for altitude this moderate, and plenty of guides will tell you it is unnecessary at these heights. Whether to carry something as a precaution is a conversation to have with your own doctor beforehand, particularly if you have reacted badly to altitude before or if you are adding the Panch Pokhari extension, where the altitude profile is meaningfully different.
Is this trek harder in the Melamchigaon direction or the direct Tarkeghyang direction? Routing through Melamchigaon adds a day but spreads the brutal Tharepati descent and the climb back out over two separate, shorter days rather than forcing both into one long push. If your fitness is on the lower end, the version that includes Melamchigaon is the gentler choice even though it takes longer overall.
How much does altitude actually slow down walking pace compared to lower trails? Noticeably, even at these moderate heights. Most trekkers find their pace drops somewhere around ten to twenty percent on the final approach to Tharepati compared to their pace lower down the same morning, simply from reduced oxygen availability combined with accumulated fatigue from several days of walking. Guides build this into their time estimates, which is part of why Tharepati day walking times tend to run longer than the distance alone would suggest.
How Weather Changes the Difficulty Equation
Season affects this trek more than most people expect, and it genuinely changes the difficulty, not just the comfort level. Our Best Time to Trek Helambu guide covers month by month conditions in more depth, but here is what it means specifically for difficulty and safety.
During the monsoon months, roughly June through early September, the forest sections between Sundarijal, Chisapani, and especially the climb toward Tharepati turn genuinely slick. Stone steps that are merely steep in dry conditions become slippery, dirt trails become mud, and leeches become a real and fairly unpleasant feature of the lower forest sections, something most trekkers do not anticipate until they are picking them off their socks at a lunch stop. Visibility on the exposed Tharepati ridge also drops substantially in cloud and rain, which matters for navigation and for simply enjoying the views you came for. None of this makes the trek unsafe exactly, but it does make it slower, muddier, and more physically taxing than the same route in good weather, and falls on wet stone steps are the single most common minor injury people report from monsoon season trekking here.
Winter, roughly December through February, flips the problem. The Tharepati ridge and the forest sections just below it can hold snow and ice after storms, and that section in particular, being exposed, higher, and north facing in places, is where winter trekkers most often report difficult, occasionally treacherous footing. A dusting of snow on stone steps or a frozen muddy trail is a genuinely different experience from the same trail in dry autumn conditions, and trekking poles plus proper traction become far more than a nice to have. Cold nights at altitude are also a real factor, since teahouses at Tharepati and similar elevations are not heated the way lodges in Kathmandu are, and temperatures well below freezing are common overnight in winter.
Spring, March through May, and autumn, late September through November, are when most of the difficulty concerns above largely fall away. Trails are generally dry and stable, visibility is typically good, and these are the seasons when the trek most closely matches the easy to moderate reputation it has. If you have flexibility in your dates and difficulty is your main concern, picking one of these windows does more to reduce the physical and logistical challenge of this trek than almost any other single decision you can make.
One honest note on terrain in general, independent of season: because the trail passes through several distinct ecological zones, subtropical forest lower down, rhododendron and oak forest in the middle, open ridgeline higher up, conditions can genuinely differ between the start and end of a single day’s walk. Do not assume that because the morning was dry and warm, the afternoon on an exposed ridge in cloud will be the same.
Putting It All Together
The honest summary is this. The Helambu Trek is a real trek with real physical demands, five to eight days of sustained walking, significant daily elevation change, variable terrain, and a genuine, if moderate, altitude component on the standard route, and a considerably more serious one on the Panch Pokhari extension. It is also, in the context of Nepal’s major trekking routes, a comparatively gentle introduction, reachable without a flight, without extended time above 3,500 meters on the standard route, and without technical terrain. Reasonably fit beginners who put in a few weeks of preparation generally handle it well. People hoping to coast through on zero preparation often get through it too, just with more suffering than necessary and a higher chance of a minor injury along the way.
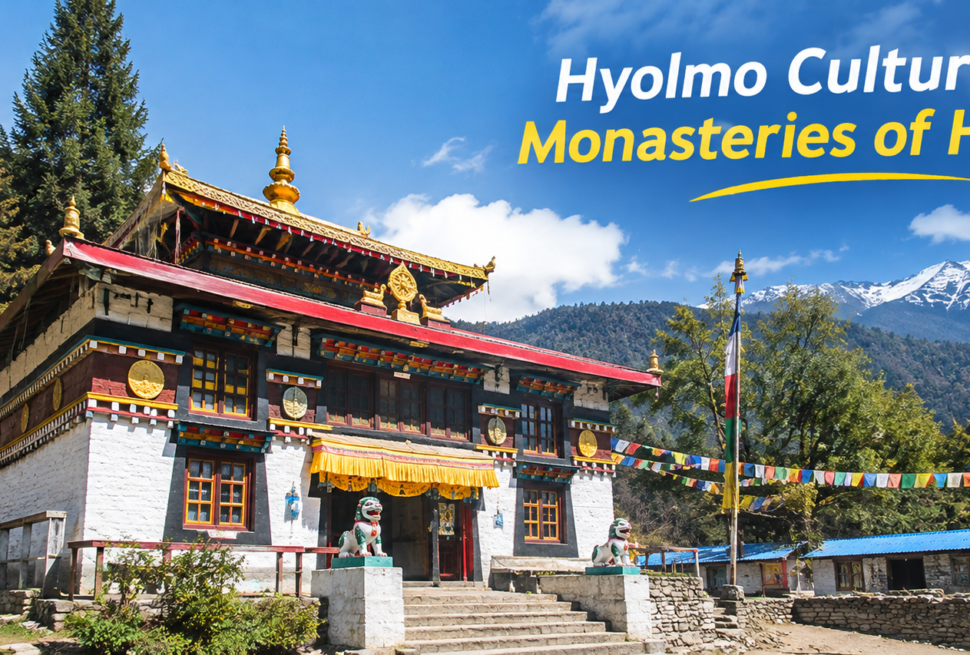
If you are deciding between this trek and others nearby, our dedicated Helambu Trek vs Langtang Valley Trek comparison goes into that choice in more depth, and if you want to understand the villages, monasteries, and the Hyolmo Culture and Monasteries of Helambu that make this route distinctive beyond its physical profile, that is covered in its own dedicated piece as well. Once your dates are set, our Helambu Trek Packing List is the next logical stop, since a lot of the fatigue and discomfort people blame on difficulty is really a gear problem, wrong footwear, an overloaded pack, or layers that do not match the conditions described above.