
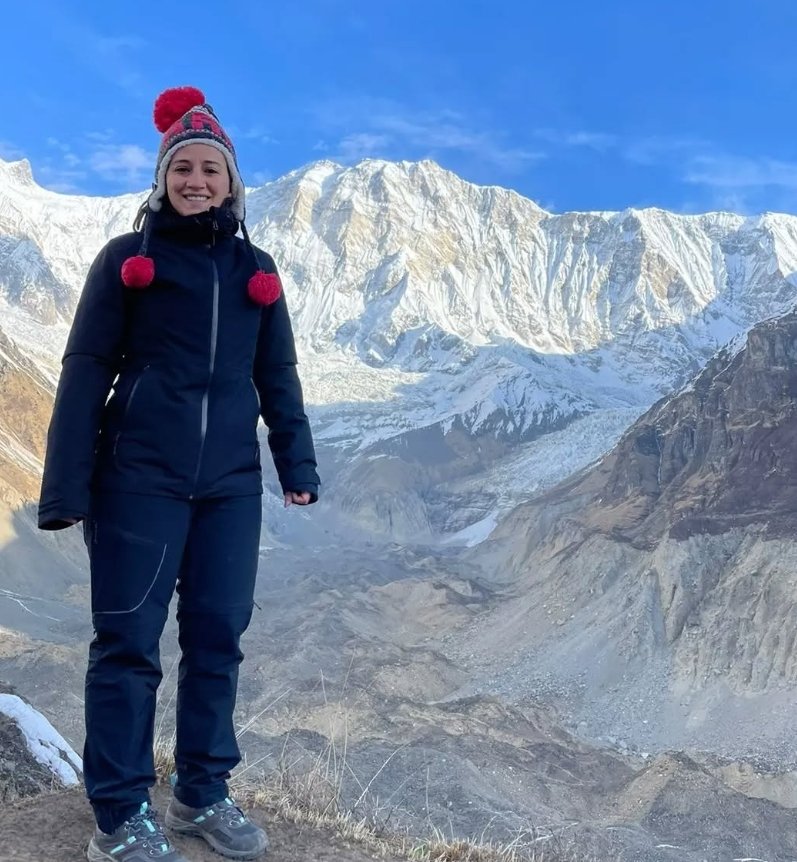
Annapurna Base Camp Trek

13 Days
TRIP INFO Trek Information
Country: Nepal
Duration: 13 Days
Difficulty: Moderate
Activity: Trekking/Hiking
Max. Altitude: 5,555 m / 18,225 ft
Best Season: Mar-May, Sep-Nov
Accommodation: Tea House & Hotel
Meals: Included
Start/End Point: Kathmandu

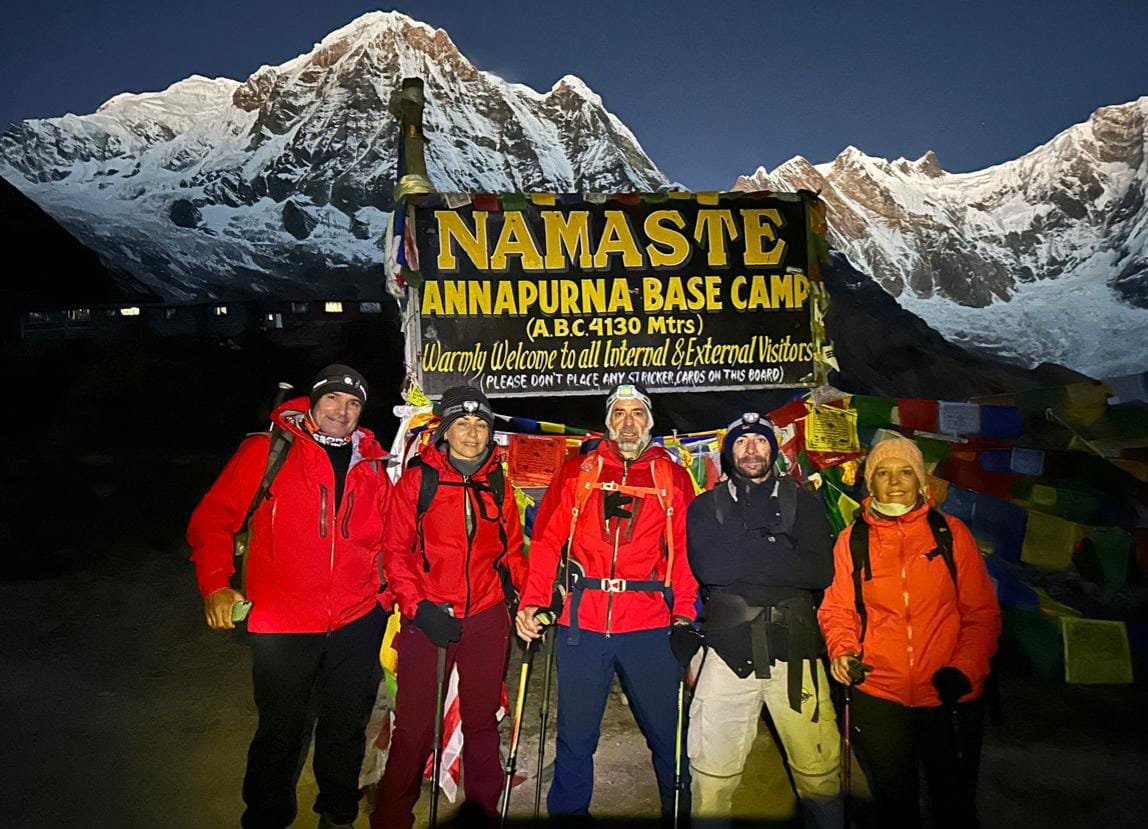
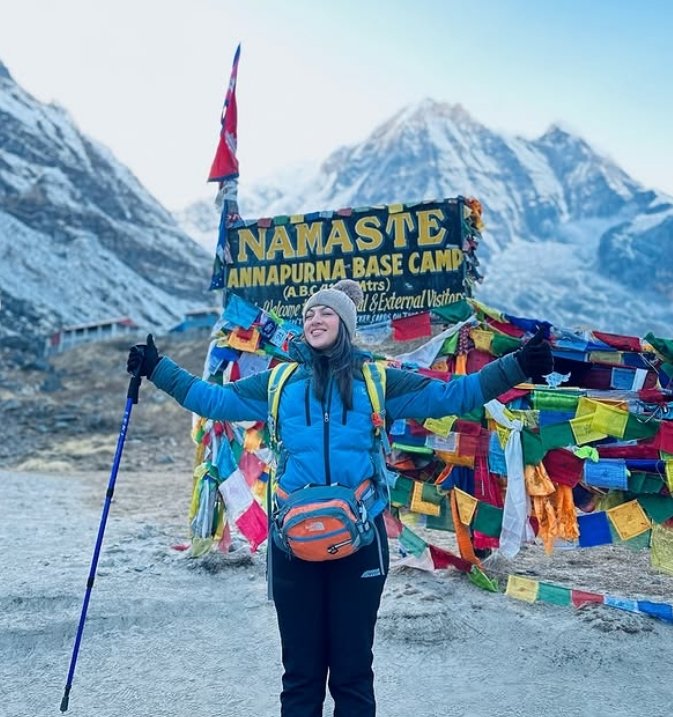
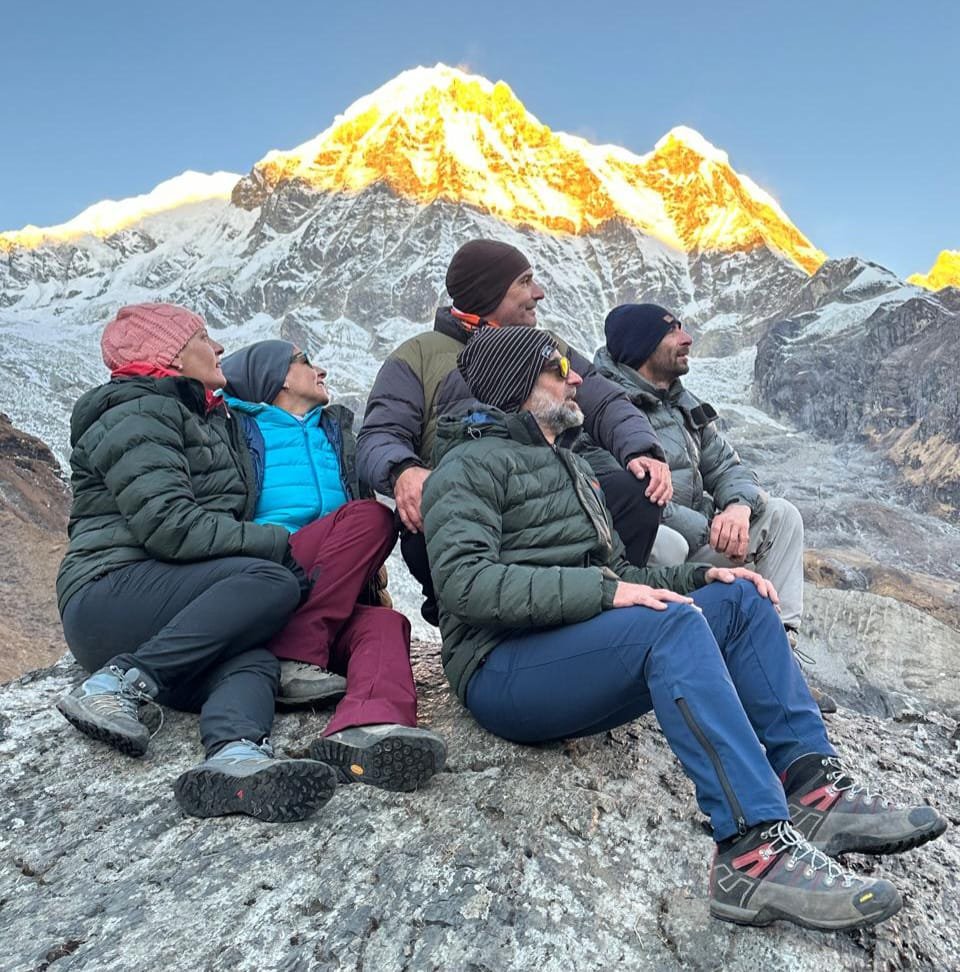
The Annapurna Base Camp trek is a walking trail in central Nepal that takes you to the foot of Annapurna I, the 10th-highest mountain in the world at 8,091 meters. The base camp itself sits at 4,130 meters inside a natural bowl called the Annapurna Sanctuary, where walls of rock and ice rise on all sides, blocking the wind. You stand in a circle of peaks, Annapurna I directly above you, Annapurna South to the left, Machhapuchhre straight ahead with its fish tail shape, and Hiunchuli, Gangapurna, Annapurna III and Annapurna IV completing the ring. No other base camp trek in Nepal puts you inside such a tight amphitheater of 7,000 and 8,000-meter peaks.

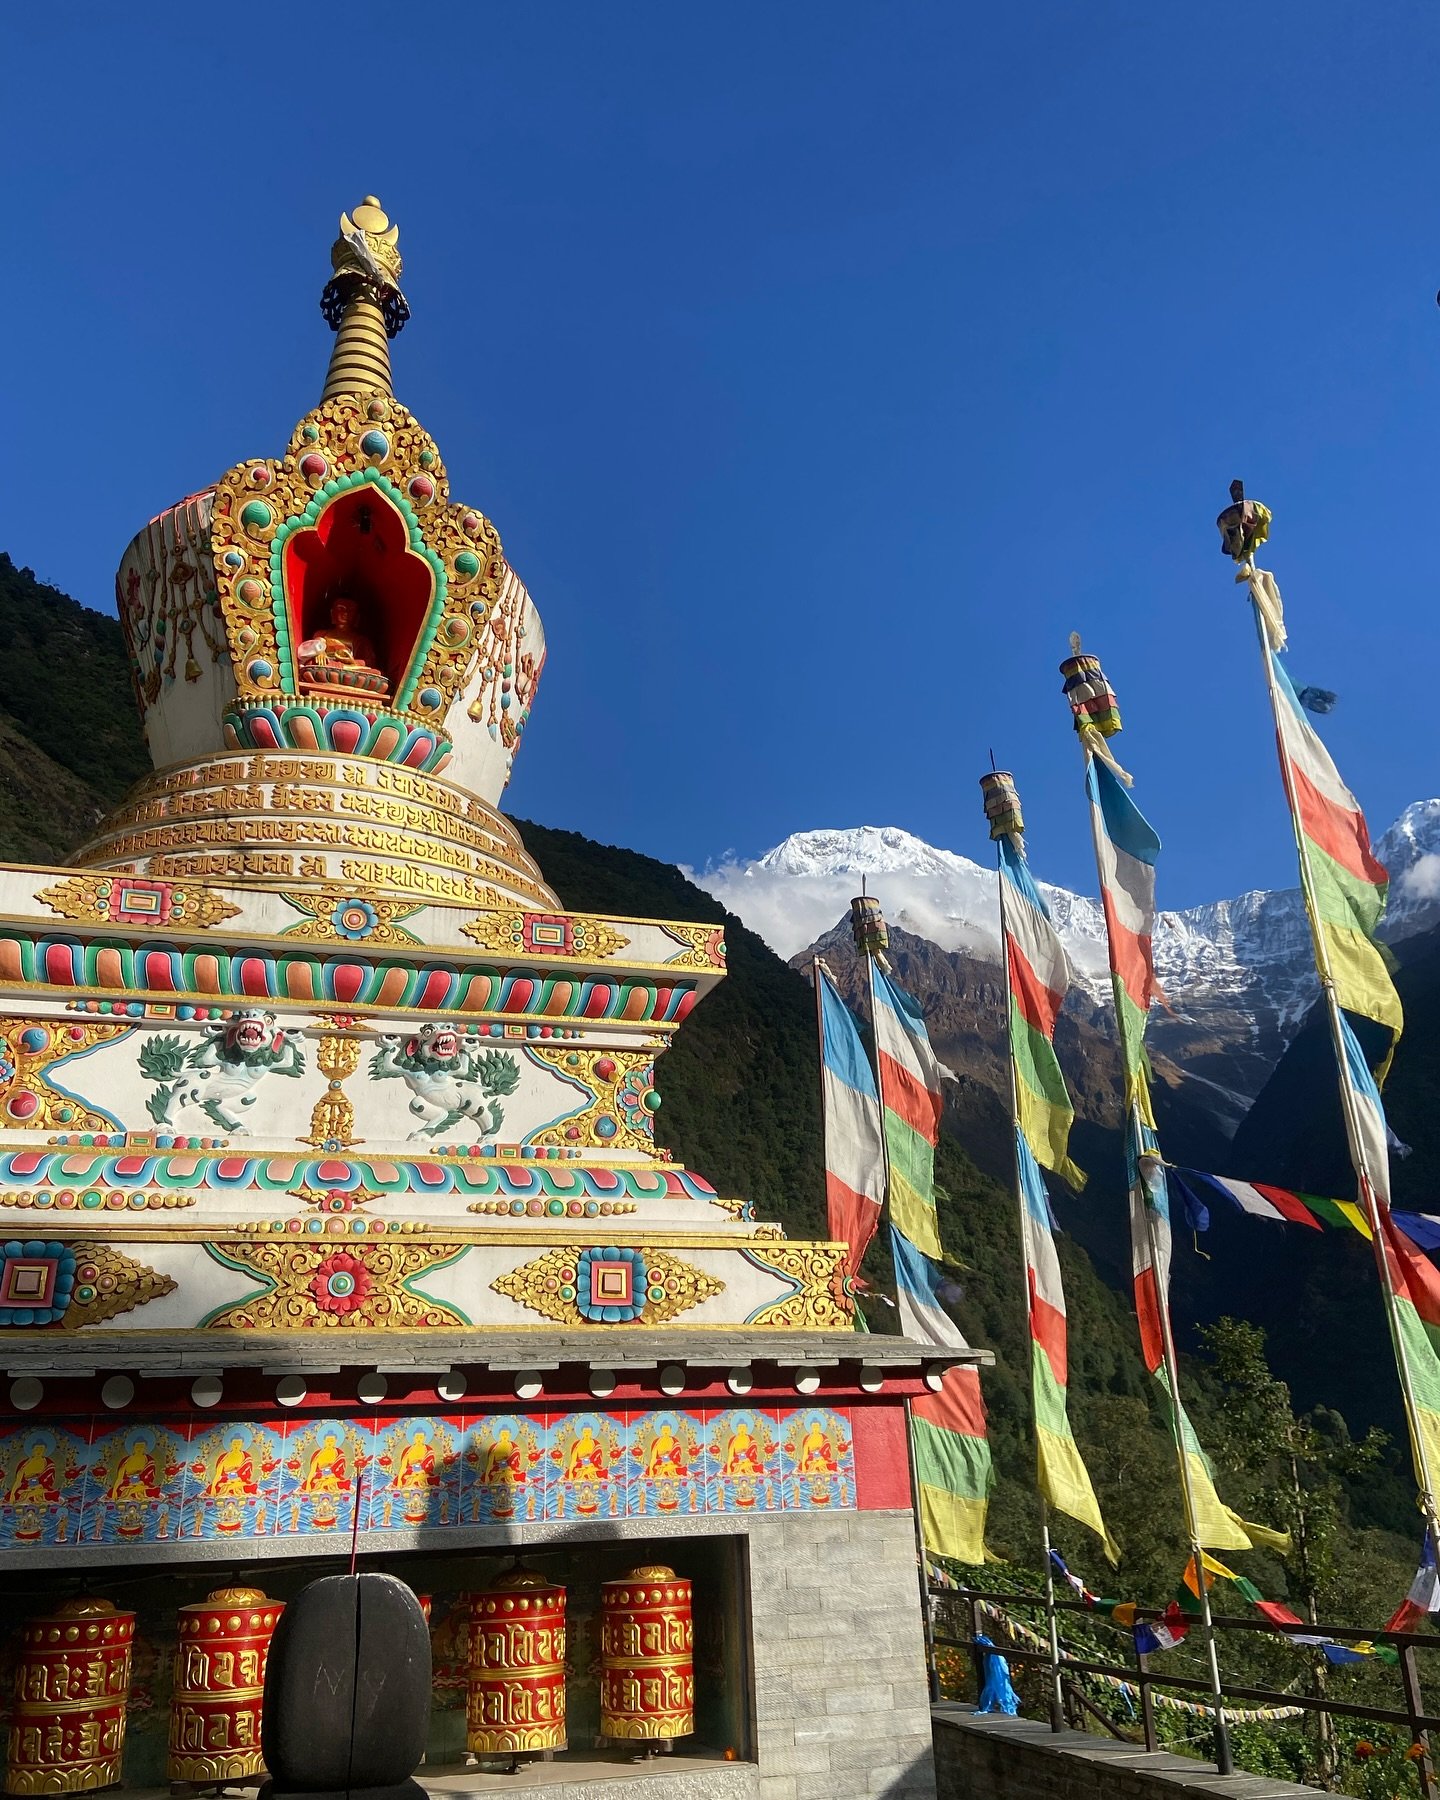
These trails are not new. Long before foreign trekkers arrived, local people used them as pilgrimage routes and trade paths. Hindus came to the Annapurna Sanctuary to worship the goddess Annapurna, the deity of food and nourishment. Buddhists followed the same trails to sacred sites and stupas along the way. Between Nepal and Tibet, traders carried salt, wool, grains, and herbs across these high passes. The stone steps you climb today were laid by local hands over generations to make the route safer for pilgrims and caravans. The Gurung and Magar communities who live in these villages today are descendants of the people who built and maintained these paths for centuries.

The modern story of this trek begins with mountaineering. In 1950, a French expedition led by Maurice Herzog made the first ascent of Annapurna I, the first time any human stood on an 8,000-meter peak. Herzog and Louis Lachenal reached the summit on June 3, 1950 without supplemental oxygen. Both men suffered severe frostbite on the descent and lost fingers and toes, but their success put the Annapurna massif on the world map. The north approach route they used became known as the Maurice Herzog Trail. Herzog later wrote Annapurna, which sold over 11 million copies and inspired the golden age of Himalayan climbing.

Commercial trekking came next. In the early 1960s, a British army officer named James Owen Merion Roberts, now known as the father of trekking in Nepal, began leading organized groups to the Annapurna region. In 1965, he founded Mountain Travel, the first trekking agency in Asia. Roberts had already led the first ascent of Annapurna II in 1960, and he used his knowledge of the terrain to create safe, guided group travel for ordinary walkers. Before Roberts, the trails were used only by locals, pilgrims and the occasional expedition. He turned them into a structured tourism product.

The route opened to all foreign trekkers in 1977. Before that, access was restricted due to conflicts involving Khampa guerrillas from Tibet, local communities and the Nepal army. A peaceful resolution in 1977 ended those restrictions and transformed the Annapurna region from a local pilgrimage route into an international trekking destination. The first foreign trekkers walked the Annapurna Base Camp trail as part of the longer Annapurna Circuit, but over time the shorter base camp route became a standalone trek in its own right.

The entire trek lies within the Annapurna Conservation Area, Nepal's largest protected area at 7,629 square kilometers. The conservation area stretches from subtropical valleys at 790 meters up to the summit of Annapurna I at 8,091 meters, covering parts of five districts: Manang, Mustang, Myagdi, Lamjung and Kaski. It borders the dry alpine deserts of Mustang and Tibet to the north, the Kali Gandaki River to the west, the Marsyangdi Valley to the east, and the foothills of the Pokhara Valley to the south. The Kali Gandaki Gorge, which runs through the conservation area, is the world's deepest river gorge.

The Annapurna Conservation Area Project, or ACAP, was created to protect this landscape. In 1985, King Birendra visited the region and declared the need for protection after seeing deforestation and soil erosion caused by the growing number of trekkers. A pilot project began in 1986 in Ghandruk village, managed by the National Trust for Nature Conservation. It covered just one village development committee and 200 square kilometers at first. By 1990, the project had expanded to 16 village committees and 1,500 square kilometers. In 1992, the government officially gazetted the entire area as a conservation area, covering 55 village committees at its current size.

ACAP works differently from a national park. Local residents are allowed to live inside the boundaries, own private property, and keep their traditional rights to use natural resources. The project does not use army patrols to enforce rules. Instead, it collects entry fees from trekkers and reinvests that money directly into the communities. The funds pay for schools, health posts, clean drinking water, reforestation, trail maintenance, and training programs for lodge owners and guides. This model makes it one of the most successful examples of community-based conservation in the world. Over 120,000 people from more than 10 ethnic groups live inside the conservation area, and the region receives roughly 120,000 trekkers per year, about three times the number that visit Everest Base Camp.

The trail starts from Pokhara, a lakeside town about 200 kilometers west of Kathmandu. Most trekkers drive to Birethanti or Nayapul, then walk. The full round trip covers roughly 95 to 115 kilometers, depending on whether you include the Poon Hill side trip. The classic route with Poon Hill takes 12 to 13 days. A direct route without Poon Hill can be done in 7 to 10 days, though that means longer walking hours and less time for your body to adjust to the altitude.

The path climbs through the conservation area, passing through Gurung and Magar villages built on terraced hillsides, crossing bamboo and rhododendron forest that turns red and pink in March and April, then entering the Modi Khola gorge where the river has cut one of the deepest valleys on earth between Annapurna and Dhaulagiri. Above 3,000 meters, the trees thin out, and you are walking on moraine and rock. At Machhapuchhre Base Camp, 3,700 meters, you are already above the tree line and sleeping in the shadow of the Fishtail peak. The next morning you walk the final two hours to Annapurna Base Camp at 4,130 meters.

ABC is not a technical climb. No ropes, no crampons needed in the normal seasons, no glacier crossing. The trail is a maintained footpath the entire way. What makes it hard is the cumulative gain and loss, the long days, and the thin air. At 4,130 meters, the atmosphere holds about 60 percent of the oxygen at sea level. That hits everyone, fit or not. The stone staircase section from Tikhedhunga to Ulleri, over 3,700 steps, is the first real test. The section between Sinuwa and Chhomrong, where you drop 300 meters to the river and climb straight back up, is the part most trekkers remember as the hardest single day. The descent from base camp back to Bamboo covers roughly 19 kilometers and 1,800 meters of downhill, which destroys knees if you are not ready for it.

Teahouses line the entire route. You sleep in simple lodges, eat dal bhat and noodles, and do not carry tents or cooking gear. The food is better here than on the Everest trail at the same altitude because the lower Annapurna region has more road access for supplies. You need two permits: the Annapurna Conservation Area Permit and the TIMS card. Both are available in Pokhara. As of 2026, a licensed guide is mandatory on this trail.

The trek is suitable for first-time Himalayan walkers with basic fitness who can handle 4 to 7 hours of walking per day. The age range is typically 14 to 65. You do not need prior high-altitude experience, but you do need to respect the altitude. The best windows are October to November for clear skies, and March to April for rhododendron bloom. December to February is possible but cold, with night temperatures at base camp dropping to minus 10 to minus 15 degrees. June to August is monsoon and not recommended.

That is the Annapurna Base Camp trek. It is a walking route built on centuries of pilgrimage and trade, opened to the world by a historic 1950 climb and a pioneering 1960s trekking industry, protected by a conservation model that keeps the money in local hands, and leading to one of the most dramatic natural amphitheaters on the planet. It is achievable without mountaineering skills, but it is still a real physical challenge due to the altitude and distance.

Annapurna Base Camp Trek Overview

Who Is Annapurna Base Camp Trek For

Annapurna Base Camp is for regular people who want to stand in front of a real 8,000 meter peak without learning to use an ice axe. You do not need to be an athlete. You do not need to have climbed anything before. You need to be able to walk for several hours with a backpack and not quit when your legs hurt.

You will probably be fine if:

  • You can walk around your city for 2 to 3 hours without sitting down every 10 minutes
  • You are between 14 and 65 years old and your doctor has not told you to avoid strenuous activity
  • You have about 2 weeks free and $950 or more to spend
  • You are okay sleeping in a basic room with thin walls and sharing a dining hall with strangers
  • You have never been above 4,000 meters before and you are curious what it feels like
  • You understand that the food will be simple, the toilets will be cold, and the showers will cost extra
  • You accept that some days you will walk slowly and that is normal at altitude

You should talk to a doctor first if:

  • You have ever had a heart attack, heart surgery, or your blood pressure reads above 160/100
  • You got altitude sickness before, especially above 3,000 meters where you vomited or had to turn back
  • You use an inhaler regularly for asthma or you have COPD, sleep apnea, or any lung condition
  • You are pregnant or trying to become pregnant
  • You take insulin for diabetes
  • You have had a blood clot or deep vein thrombosis

What fit actually means here:

Being able to run 5 kilometers on flat ground does not help much on these trails. The stairs from Tikhedhunga to Ulleri are over 3,700 steps. Nothing in a gym prepares you for that. The best training is walking up hills with weight on your back. Start 6 to 8 weeks before you fly to Nepal. Find stairs or a steep path near your home. Walk for an hour with 5 kilograms in a backpack. Do this twice a week. If you can finish without your knees swelling or your feet blistering, you are ready.

Age is just a number on these trails:

I have seen a 14 year old girl outwalk her father every single day. I have seen a 67 year old man from Germany reach base camp smiling while a 28 year old from his group turned back at Deurali because he thought he was too fit to need training. The 14 to 65 range is a suggestion. What matters is whether you prepared and whether your body handles altitude. Some people never adjust to thin air no matter how strong they are. Others barely notice it.

If you are traveling alone:

You will not be alone for long. Group departures fill up with people from different countries who are all nervous on day one. By day three you are sharing chocolate and complaining about the same sore muscles together. Many people who book solo end up traveling with someone they met on the trail for the rest of their time in Nepal. If you want your own guide, your own pace, and no small talk at dinner, book a private trip.

If you want to bring your family:

It works for families with teenagers aged 14 and up. Younger kids usually do not have the patience for 6 hour walking days and they struggle with altitude more than adults. A family trip can be amazing if everyone trained together. It can be miserable if one person is unprepared and everyone has to wait or turn back. Be honest about your weakest member, not your strongest.

If you have done Everest Base Camp or Kilimanjaro:

Annapurna Base Camp will feel easier in some ways. The highest point is 4,130 meters, not 5,364. The teahouses are warmer and the food is better. But the trail itself has more ups and downs. The descent from base camp to Bamboo is 19 kilometers of downhill that destroys knees. Do not skip training just because you summited something higher. Different mountains punish different muscles.

If you are worried about the cost:

$950 is the starting price for a group departure. It covers your guide, permits, transport, teahouse rooms, and three meals a day on the trail. You will spend extra on bottled water, hot showers, WiFi, and tips. Budget another $150 to $200 for those. Travel insurance is not included and you cannot skip it. It must cover helicopter evacuation to 6,000 meters. If you think that sounds expensive, compare it to a week at a beach resort. The beach resort does not change your life.

Why Annapurna Base Camp Trek

  • Lower altitude than Everest Base Camp. Annapurna Base Camp is 4,130 meters. Everest Base Camp is 5,364 meters. That 1,200 meter difference means less headache, better sleep, deeper breathing at night, and a lower chance of serious altitude sickness. More people finish this walk without medical problems than finish the Everest route.
  • Better teahouses and food. The Annapurna region is accessible by road from Pokhara. Supplies arrive fresh by truck, not helicopter. The dal bhat tastes better. The rooms are warmer because firewood is cheaper and easier to transport. You eat apples grown in nearby villages, not apples that cost $5 because a yak carried them for a week.
  • The trail changes every day. One morning you walk through a village where rice dries on bamboo mats. That afternoon you are in a bamboo forest where monkeys throw sticks. The next day you are above the tree line in a landscape that looks like the moon. Then you sleep in a stone lodge surrounded by peaks that glow orange at sunset. The Everest trail is rocks and prayer flags after Namche. Here the scenery keeps changing.
  • The people are not burned out yet. Gurung and Magar villages have welcomed walkers since the 1970s. The grandmother who cooks your dinner asks about your mother. The child who serves tea wants to practice English. The conservation area puts your permit money directly into their schools and health posts. You see where it goes.
  • Poon Hill is included, not extra. From 3,210 meters, you see Dhaulagiri, Annapurna I, Annapurna South, and Machhapuchhre in a single sunrise. On the Everest trail you pay extra and walk an extra day for Kala Patthar. Here it is part of the normal schedule.
  • The cost is lower. $950 for 13 days, including meals, rooms, permits, and a guide. The Everest route starts around $1,400 for a shorter trip with worse food. You save money and see mountains that are just as impressive. The only thing missing is the bragging rights. Bragging rights do not keep you warm or fill your stomach.
  • The trail is safer. Lower altitude means more oxygen, better judgment, and fewer helicopter evacuations. The path is wider and better maintained. You are not squeezing past a yak train on a narrow cliff edge carrying cement to a hotel.
  • It fits a normal vacation. 13 days total, including travel from Kathmandu. The direct route without Poon Hill is 7 to 10 days. Everest Base Camp requires at least 16 days, plus buffer days for weather or altitude acclimatization. If your annual leave is limited, Annapurna is a good fit.
  • The hot spring at Jhinu Danda is real. After 8 days of walking you sit in a natural pool by the Modi Khola while hot water bubbles from the ground. Your muscles relax. Your blisters stop hurting. You can drink a cold beer. The Everest trail has nothing like this. The closest thing is a lukewarm shower that costs $6 and runs out in 3 minutes.
  • You see the 10th-highest mountain from its base. Annapurna I is 8,091 meters. It was the first 8,000-meter peak ever climbed, back in 1950, before Everest was summited. The south face rises directly above base camp in a wall of ice and rock. The scale hits you in the chest. Standing there is not a lesser experience than Everest. It is a different one.
  • The right level of hard. Not so easy that you feel like you paid for a park tour. Not so hard that you spend the trip afraid of dying. The stone stairs hurt. The altitude slows you down. The cold nights make you appreciate your sleeping bag. But you finish healthy, your photos are clear, and your memory of the mountains is not blurred by pain and fear.

When to Do Annapurna Base Camp Trek

  • March to May is spring. The rhododendron forest between Tikhedhunga and Ghorepani turns red and pink. The lower hills are green. Temperatures at base camp are 0 to 8 degrees Celsius during the day, dropping to minus 5 to minus 10 at night. Mornings are usually clear. Clouds build by noon and sometimes bring light rain below 3,000 meters. The trail is busy but not crowded. Book teahouses 2 to 3 weeks ahead.
  • September to November is autumn. This is the most stable season. The monsoon is finished. The air is clean from months of rain. The skies are the clearest you will see all year. You can count on mountain views every morning. Temperatures are similar to spring, maybe slightly colder at night. This is the busiest time. Teahouses fill up. Book a month ahead if you want a private room.
  • December to February is winter. Fewer people on the trail. The views are sharp because the air is cold and dry. But the cold is real. Night temperatures at base camp drop to minus 10 to minus 15 degrees Celsius. Water bottles freeze inside your sleeping bag. Toilets are miserable. Ice can form on the trail above Deurali. Some teahouses close for the season. Only go if you have proper winter gear and experience with cold weather camping. Not recommended for first timers.
  • June to August is monsoon. Do not go. Leeches attach to your boots and legs in the forest below 2,000 meters. Trails turn to mud and slip. Rivers swell and crossing them becomes dangerous. Clouds sit on the mountains every day. You will walk for 10 days and see nothing. Some lodges close. The risk of landslide is real on the road from Kathmandu to Pokhara. This is not a matter of toughness. It is a matter of wasting your money and putting your guide in danger.
  • October is the peak month. If you want the best weather and you do not mind sharing the trail with hundreds of other people, book October. If you want good weather with fewer people, late September or early November are better. The first two weeks of November still have clear skies but the crowds thin out after the major holidays.
  • April is the best spring month. Early March can still have snow on the trail above 3,000 meters. Late May brings pre-monsoon haze and afternoon thunderstorms. April hits the sweet spot. The rhododendron are fully open. The weather is stable. The trail has people but not the October crush.
  • Full moon matters for the night sky. If you can align your dates, reach base camp or Machhapuchhre Base Camp during a full moon. The moonlight reflects off the snow peaks and you can see the mountains without a headlamp. It is cold but worth stepping outside for 10 minutes at 2 AM.
  • Avoid major Nepali holidays if you want a quiet trail. Dashain in September or October and Tihar in October or November bring domestic tourists to the region. Teahouses fill with local families. The atmosphere is festive but the rooms are full and the kitchens are slow. Check the lunar calendar before booking.
.weather-section { font-family: Arial, sans-serif; padding: 10px; background: #f5f5f5; border-radius: 10px; max-width: 1200px; margin: 0 auto; } .weather-section h2 { text-align: center; color: #00aeef; font-size: 22px; margin-bottom: 20px; } .weather-grid { display: grid; gap: 10px; grid-template-columns: repeat(auto-fit, minmax(130px, 1fr)); } .month-card { background: white; padding: 10px; border-radius: 8px; text-align: center; box-shadow: 0 1px 3px rgba(0,0,0,0.1); } .month-card h4 { margin: 0; font-size: 16px; } .month-card p { margin: 10px 0; font-size: 14px; line-height: 1.4; } .badge { display: inline-block; padding: 4px 6px; font-size: 12px; border-radius: 5px; white-space: nowrap; } .badge-blue { background: #00aeef; color: #fff; } .badge-orange { background: #fbaf46; color: #fff; } .badge-gray { background: gray; color: #fff; } .section-title { text-align: center; font-size: 18px; margin: 30px 0 15px; } .section-title.blue { color: #00aeef; } .section-title.orange { color: #fbaf46; }

Super Best Time

☀️ FEB

-8°C / 8°C
P: 20 mm
W: 10 km/h

Super Best

☀️ MAR

-5°C / 10°C
P: 35 mm
W: 12 km/h

Super Best

☀️ APR

0°C / 15°C
P: 60 mm
W: 12 km/h

Super Best

☀️ SEP

10°C / 20°C
P: 150 mm
W: 8 km/h

Super Best

☀️ OCT

5°C / 15°C
P: 50 mm
W: 10 km/h

Super Best

☀️ NOV

-2°C / 10°C
P: 20 mm
W: 10 km/h

Super Best

Other Months

JAN

-10°C / 5°C
P: 15 mm
W: 8 km/h

Good Time

MAY

5°C / 18°C
P: 100 mm
W: 12 km/h

Good Time

🌦️ AUG

12°C / 22°C
P: 250 mm
W: 8 km/h

Good Time

🌧️ JUN

10°C / 20°C
P: 200 mm
W: 10 km/h

Not Ideal

🌧️ JUL

12°C / 22°C
P: 300 mm
W: 8 km/h

Not Ideal

❄️ DEC

-5°C / 7°C
P: 10 mm
W: 8 km/h

Not Ideal

13 Days Annapurna Base Camp Trek Highlights

  • Stunning Views of Annapurna Range – Witness panoramic views of Annapurna I (8,091m), Machhapuchhre (6,993m), Hiunchuli, and Dhaulagiri.
  • Diverse Landscapes & Flora – Trek through dense rhododendron forests, terraced fields, alpine meadows, and glacial moraines.
  • Annapurna Base Camp (4,130m) – Stand at the foot of the world’s 10th highest peak and soak in the 360° Himalayan views.
  • Ghorepani Poon Hill (Optional) – Experience a breathtaking sunrise over Annapurna and Dhaulagiri from Poon Hill (3,210m).
  • Hot Springs at Jhinu Danda – Relax in natural hot springs after days of trekking.
  • Gurung & Magar Culture – Explore traditional villages like Ghandruk and Chhomrong, experiencing local hospitality and culture.
  • Moderate Difficulty & Short Duration – Ideal for trekkers with 7–12 days and moderate fitness.
  • Authentic Village Experience – Walk through traditional Gurung and Magar villages

13 Days Everest Base Camp Trek Itinerary

  • Day
    01

    Arrival at Tribhuvan International Airport in Kathmandu and transfer to hotel

    When you arrive at Tribhuvan International Airport, our team from Next Trip Nepal will be waiting for you outside the arrival gate with your name written on a banner. After meeting you, we will take you to your hotel in Kathmandu by private car.

    Once you check in, you can rest after your flight or walk around Thamel, the main tourist area filled with cafés, shops, and trekking stores. In the evening, we will meet for a short trip briefing and check your trekking equipment to make sure everything is ready for the Annapurna Base Camp Trek.

    Breakfast
    3 Stars Hotel
  • Day
    02

    Drive from Kathmandu to Pokhara (820m / 2,690ft) – Duration: 6-7 hours

    After breakfast, we begin our scenic drive from Kathmandu to Pokhara, which takes about 6–7 hours. The journey follows rivers, hills, and local villages, offering a nice view of Nepal’s countryside along the way.

    Pokhara sits at 820 meters above sea level and is known for its peaceful lakeside atmosphere and mountain views. After arrival, you’ll have free time to relax, walk around Lakeside, or enjoy the evening near Phewa Lake.

    7 hour
    Breakfast
    3 Stars Hotel
  • Day
    03

    Drive from Pokhara to Nayapul & trek to Ulleri (1,900m / 6,234ft) – Duration: 6-7 hours

    After breakfast, we drive from Pokhara to Nayapul, the starting point of the trek. From here, we begin our walk through small villages, terraced fields, and along the Modi Khola river.

    The trail passes through Tikhedhunga before climbing the long stone steps to reach the Magar village of Ulleri, located at 1,900 meters. It’s a challenging but rewarding day, and by the time we arrive, the mountain views make the effort worthwhile.

    Breakfast + Lunch + Dinner
    Tea House
  • Day
    04

    Trek from Ulleri to Ghorepani (2,860m / 9,383ft) – Duration: 5-6 hours

    Today we trek from Ulleri to Ghorepani, walking mostly through beautiful rhododendron and oak forests. The trail climbs steadily, and during spring the forest is full of colorful flowers.

    As we gain altitude, the air becomes cooler and the views open up. After about 5–6 hours of walking, we reach Ghorepani at 2,860 meters, a well-known mountain village famous for its surrounding Himalayan scenery.

    Breakfast + Lunch + Dinner
    Tea House
  • Day
    05

    Hike up to Poon Hill viewpoint (3,210m / 10,531ft) & trek to Chuile (2,710m / 8,891ft) – Duration: 6-7 hours

    Early in the morning, we hike up to Poon Hill to watch the sunrise over the Himalayas. From the viewpoint at 3,210 meters, you can see Annapurna South, Dhaulagiri, and Machhapuchhre glowing in the morning light.

    After returning to Ghorepani for breakfast, we continue the trek through forest trails and quiet mountain paths. The walk is mostly peaceful with fewer trekkers on this route. By late afternoon, we arrive at Chuile, located at 2,710 meters, where we spend the night.

    Breakfast + Lunch + Dinner
    Tea House
  • Day
    06

    Trek from Chuile to Upper Sinuwa (2,360m / 7,743ft) – Duration: 5-6 hours

    Today we leave Chuile and continue trekking through forest trails and small villages. The path goes up and down along the hillside, with occasional views of the surrounding mountains and valleys.

    After descending to the river, we cross a suspension bridge and begin the gradual climb toward Upper Sinuwa. After about 5–6 hours of walking, we reach the village at 2,360 meters, where we rest for the night surrounded by peaceful mountain scenery.

    Breakfast + Lunch + Dinner
    Tea House
  • Day
    07

    Trek from Sinuwa to Deurali (3,200m / 10,499ft) – Duration: 5-6 hours

    From Upper Sinuwa, we continue trekking through dense bamboo and rhododendron forests. The trail follows the Modi Khola valley, passing places like Bamboo, Dovan, and Himalayan Hotel.

    As we walk higher, the landscape slowly changes and the air becomes cooler. After around 5–6 hours of trekking, we reach Deurali at 3,200 meters, a small settlement surrounded by steep cliffs and mountain views.

    Breakfast + Lunch + Dinner
    Tea House
  • Day
    08

    Trek from Deurali to ABC (4,120m / 13,517ft) – Duration: 5-6 hours

    Today is one of the most memorable days of the trek. We leave Deurali and walk uphill toward Machhapuchhre Base Camp, enjoying close views of the surrounding peaks.

    After a short rest, we continue along the wide valley to reach Annapurna Base Camp (4,120 meters). Standing in the middle of the mountains, surrounded by Annapurna I, Annapurna South, Hiunchuli, and Machhapuchhre, is an unforgettable experience.

    After about 5–6 hours of walking, we arrive at base camp and spend the night enjoying the quiet mountain atmosphere.

    Breakfast + Lunch + Dinner
    Tea House
  • Day
    09

    Trek from ABC to Bamboo (2,400m / 7,874ft) – Duration: 5-6 hours

    We wake up early to enjoy sunrise views from Annapurna Base Camp, then begin our descent after breakfast. The trail leads back down through Machhapuchhre Base Camp and Deurali, following the same route we used on the way up.

    As we lose altitude, the air becomes warmer and walking feels easier. After around 5–6 hours of trekking, we reach Bamboo at 2,400 meters, where we stop for the night.

    Breakfast + Lunch + Dinner
    Tea House
  • Day
    10

    Trek from Bamboo to Jhinu Danda (Hot Spring) (1,760m / 5,774ft) via Chhomrong – Duration: 5-6 hours

    After breakfast, we leave Bamboo and climb up toward Chhomrong, the last large village on the trail. From Chhomrong, the path goes steeply downhill to the river and then climbs again to reach Jhinu Danda.

    Jhinu is famous for its natural hot spring, which is located a short walk from the village. After around five to six hours of trekking, you can relax in the warm pools beside the river and enjoy a well earned rest for the night.

    Breakfast + Lunch + Dinner
    Tea House
  • Day
    11

    Trek from Jhinu Danda to Nayapul & drive to Pokhara (820m / 2,690ft) – Duration: 6-7 hours

    After breakfast, we leave Jhinu Danda and continue trekking through villages and terraced farmland. The trail gradually descends and follows the river before reaching Nayapul, where our trek comes to an end.

    From Nayapul, we drive back to Pokhara, located at 820 meters. After around six to seven hours of walking and driving, we arrive in Pokhara and have the rest of the evening free to relax by the lakeside.

    Breakfast + Lunch
    Tea House
  • Day
    12

    Drive from Pokhara to Kathmandu (820m / 2,690ft) – Duration: 6-7 hours

    After breakfast, we travel from Pokhara to Kathmandu by road. The journey takes around six to seven hours, passing rivers, hills, and local villages along the way.

    For travelers who prefer a quicker and more comfortable option, a 25 minute domestic flight from Pokhara to Kathmandu is available at an additional cost. The flight offers beautiful views of the Himalayan range and saves valuable travel time.

    Once we arrive in Kathmandu, you will be transferred to your hotel. In the evening, Next Trip Nepal will organize a farewell dinner, where we celebrate the successful completion of the trek. During the dinner, you will also receive a trip achievement certificate as a memory of your Annapurna Base Camp journey.

    Breakfast + Dinner
    3 Stars Hotel
  • Day
    13

    International departure from Kathmandu Airport

    international departure.

    Your Annapurna Base Camp Trek comes to an end with wonderful memories of the mountains, villages, and people of Nepal. We hope to welcome you back again for another adventure with Next Trip Nepal.

    Breakfast + Dinner
    3 Stars Hotel

What’s Included in Your 13 Days Annapurna Base Camp Trek?

  • Airport pickup and drop by private vehicle.
  • Two nights in Kathmandu at a 3-star hotel (twin sharing), including breakfast.
  • Three meals a day (breakfast, lunch, and dinner) with tea/coffee at breakfast, seasonal fruits after dinner, and tea/coffee during meals.
  • Trekking lodge (Tea House) accommodations throughout the trek.
  • All permit fees including:
  • Annapurna Conservation Area Permit (ACAP)
  • TIMS Card (Trekkers’ Information Management System)
  • Kathmandu to Pokhara transport (bus or private vehicle) and Pokhara to Nayapul by private vehicle.
  • Hotel accommodations in Pokhara (3-star hotel, twin sharing) with breakfast.
  • Experienced guide and porter with salary, accommodation, meals, drinks, transport, and insurance.
  • Accommodation in teahouses as per the itinerary.
  • First aid kit and emergency medical supplies.
  • Farewell dinner and celebration party in Kathmandu.
  • Necessary trekking equipment (sleeping bag, down jacket, walking poles, if needed).
  • Next Trip Nepal T-shirt, cap, and duffel bag.
  • Government taxes and official expenses.
  • Annapurna Base Camp Trekking map.
  • Oxymeter for monitoring pulse, oxygen levels, and heart rate.
  • Helicopter service arrangements (if needed, paid by travel insurance).

What’s Excluded in Your 13 Days Annapurna Base Camp Trek?

  • Meals in Kathmandu (Lunch and Dinner).
  • Meals in Pokhara (Lunch and Dinner).
  • Nepal entry visa fee:
  • $30 USD for 15 days
  • $50 USD for 30 days
  • $125 USD for 90 days
  • (Visa can be obtained on arrival at Tribhuvan International Airport, Kathmandu).
  • Travel and medical insurance.
  • International airfare to and from Nepal.
  • Personal expenses (such as laundry, telephone, souvenirs, and extra snacks).
  • Alcoholic and non-alcoholic drinks (including tea, coffee, hot chocolate, and soft drinks) on the trek.
  • Desserts and sweet items (chocolate, cake, pie, pudding).
  • Hot shower and battery charging fees at tea houses (if applicable).
  • Tips for your guide, porter, and driver (Tipping is expected).

What to Pack for Annapurna Base Camp Trek

Bags

  • A 40 to 50 liter backpack for the porter to carry. This is your main bag. Keep it under 15 kilograms. The porter is a person, not a machine.
  • A 20 to 25 liter daypack for you to carry. This holds water, snacks, camera, rain jacket, and layers you put on and off during the day.
  • A waterproof cover for both bags. Or line the inside with a heavy plastic garbage bag. Rain happens. Porters slip. Bags get wet on the trail or on top of buses.

Footwear

  • Broken in trekking boots with ankle support. Not running shoes. Not new boots you bought yesterday. Blisters on day two ruin the whole trip. Wear them for at least 50 kilometers before you fly to Nepal.
  • Camp shoes or sandals. Plastic flip flops work. You want something to let your feet breathe in the evenings. Teahouse floors are dirty. Bathrooms are wet. Your boots need to dry.
  • Wool or synthetic trekking socks. Three to four pairs. Cotton socks hold moisture and cause blisters. Change socks at lunch if your feet sweat.
  • Liner socks. Thin synthetic socks worn under trekking socks. They reduce friction. Worth the extra weight.

Clothing

  • Base layers. Two sets. Synthetic or merino wool. Long sleeve top and long bottoms. You wear these against your skin for 10 days. They need to dry overnight and not smell like a dead animal after day three.
  • Trekking pants. Two pairs. Lightweight synthetic that dry fast. One pair can be zip off into shorts for the lower warm sections.
  • Insulation layer. A fleece or down jacket. You wear this in the evenings above 3,000 meters and at base camp. Down is warmer and packs smaller. Fleece dries faster if it gets wet.
  • Waterproof shell jacket and pants. Not water resistant. Waterproof. The afternoon rain below 3,000 meters is real. The wind above 3,000 meters cuts through everything else.
  • Warm hat and sun hat. The warm hat is for mornings and evenings above 3,000 meters. The sun hat is for the exposed sections where UV burns your scalp through your hair.
  • Gloves. Lightweight fleece gloves for walking. Heavy insulated gloves or mittens for base camp mornings. Your fingers go numb holding trekking poles in cold wind.
  • Buff or neck gaiter. Multi purpose. Sun protection, dust filter, warm layer for neck and face, emergency towel, blindfold for sleeping in bright teahouses.

Sleeping

  • Sleeping bag rated to minus 10 degrees Celsius. Teahouses provide blankets but they are not washed often and they are not warm enough at 4,130 meters. A bag rated to minus 10 keeps you alive at minus 5. A bag rated to 0 degrees leaves you shivering.
  • Sleeping bag liner. Silk or synthetic. Adds warmth, keeps your bag cleaner, and feels better against your skin than nylon.

Hydration and Nutrition

  • Water bottles or hydration bladder. Two liters capacity minimum. You need to drink 3 to 4 liters per day at altitude. Dehydration feels like altitude sickness and makes it worse.
  • Water purification. Tablets, drops, or a filter. Bottled water costs more as you climb. A liter at base camp can cost $4. Purifying tap water saves money and reduces plastic waste.
  • Electrolyte powder or tablets. Add to your water. You sweat more than you think in cold dry air. Cramps at 3,000 meters are avoidable.
  • Snacks. Energy bars, nuts, chocolate, dried fruit. You burn 3,000 to 4,000 calories per day. Teahouse portions are sized for Nepali workers, not hungry trekkers. Supplement between meals.

Health and Hygiene

  • Sunscreen SPF 50 or higher. The sun is stronger at altitude. Reflection off snow burns skin you forgot existed. Apply to your face, neck, ears, and back of hands.
  • Lip balm with SPF. Your lips crack and bleed in the wind. Regular lip balm without sun protection is useless.
  • Toilet paper and hand sanitizer. Teahouses run out. Toilets are often squat style with no paper and no sink. Carry your own and burn or pack it out. Do not leave it in the toilet pit.
  • Wet wipes. For days when showers are too cold or too expensive. Biodegradable if possible.
  • Personal first aid kit. Blister plasters, painkillers, anti diarrhea tablets, rehydration salts, any prescription medication. Your guide carries a bigger kit but you need your own basics.
  • Diamox if your doctor prescribes it. For altitude sickness prevention. Not a cure. Not a guarantee. Talk to your doctor before you buy it online.

Electronics

  • Headlamp with extra batteries. Power cuts happen. Toilets are outside and dark. Early morning starts for Poon Hill require a headlamp. LED lamps last longer on batteries.
  • Power bank. Solar chargers are unreliable in cloudy valleys. A 10,000 mAh power bank charges a phone twice. Teahouses charge money for outlet use and the power is not always on.
  • Camera. You will take 500 photos minimum. Bring extra memory cards or cloud storage. Cold drains batteries faster. Sleep with your camera inside your sleeping bag.

Documents and Money

  • Passport and photocopies. You need your passport for the TIMS card and permit. Keep copies in a separate bag in case the original gets wet.
  • Cash in Nepali rupees. No ATMs on the trail. Budget 2,000 to 3,000 rupees per day for water, snacks, showers, WiFi, and tips. Carry small bills. Teahouses struggle to change large notes.
  • Travel insurance documents. Printed copy. Must cover helicopter evacuation to 6,000 meters. Your guide will ask to see this before you start walking.

What Not to Bring

  • Jeans. Heavy, slow to dry, chafe when wet, useless on the trail.
  • Cotton t-shirts. They hold sweat and make you cold when you stop.
  • A hair dryer. No teahouse has the power outlet for it. Your hair will be dirty anyway.
  • A hard suitcase. Porters carry bags on their backs or heads. A rigid suitcase is impossible to strap. It will be left in Pokhara.
  • Too many clothes. You wear the same thing for days. One set for walking, one set for evening. Laundry is not available above 3,000 meters. Less is more.

Travel Note for Annapurna Base Camp Trek

Visa for Annapurna Base Camp Trek

  • Visa on arrival is available at Tribhuvan International Airport in Kathmandu, Pokhara International Airport, and major land borders. Most nationalities, including the USA, UK, Canada, Australia, EU, Japan, South Korea, Singapore, Thailand, and Malaysia, can get a visa on arrival. Fill out the online form at nepaliport.immigration.gov.np within 15 days of arrival and print the barcode receipt to skip the kiosk line.
  • Visa fees are fixed in US dollars. 15 days cost $30. 30 days cost $50. 90 days cost $125. Pay in cash with clean bills. Card machines exist at the airport but network errors are common. Nepalese rupees and Indian rupees are not accepted for visa fees. Land borders only take cash.
  • Some nationalities must apply before arrival. Citizens of Nigeria, Ghana, Zimbabwe, Swaziland, Cameroon, Somalia, Liberia, Ethiopia, Iraq, Palestine, Afghanistan, Iran, Syria, and refugees with travel documents must obtain a visa from a Nepali embassy before flying. Airlines may refuse boarding without a visa stamp.
  • Free visas for some nationalities. Chinese citizens receive a free 30-day visa on arrival. SAARC citizens from Bangladesh, Bhutan, the Maldives, Pakistan, and Sri Lanka get a free 30-day visa on their first visit per calendar year. Children under 10 get a free visa, except for US citizens, who pay normal fees. Indian nationals do not need a visa.
  • Your passport must be valid for 6 months beyond your departure date and have at least two blank pages. Damaged passports or those with no blank pages may be rejected. Check your visa sticker before leaving the immigration counter. Mistakes are hard to fix later.
  • Visa extensions are possible up to 150 days per calendar year. Visit the Department of Immigration in Kathmandu or the Immigration Office in Pokhara. Minimum extension is 15 days for $45. Each additional day costs $3. Overstay fine is $5 per day. Do not overstay even by one day.

Nepal Visa Cost 2026

Visa Type Duration Cost
Tourist on Arrival 15 days $30
Tourist on Arrival 30 days $50
Tourist on Arrival 90 days $125
Extension 15 days minimum $45 + $3 per extra day
Overstay Fine Per day $5
Free Visa 30 days $0
No Visa Required Unlimited $0
Pre-Approved Varies Varies
* { margin: 0; padding: 0; box-sizing: border-box; } body { font-family: 'Segoe UI', Arial, sans-serif; background: #f8f9fa; padding: 20px; } .flight-container { max-width: 800px; margin: 0 auto; } /* Header Card */ .header-card { background: linear-gradient(135deg, #1e3a5f 0%, #2c5282 100%); color: white; padding: 30px; border-radius: 12px; margin-bottom: 25px; text-align: center; } .header-card h2 { font-size: 28px; margin-bottom: 10px; } .header-card p { font-size: 16px; opacity: 0.9; line-height: 1.6; } /* Region Cards */ .region-card { background: white; border-radius: 12px; padding: 25px; margin-bottom: 20px; box-shadow: 0 2px 8px rgba(0,0,0,0.08); border-left: 4px solid #2c5282; } .region-card h3 { font-size: 20px; color: #1e3a5f; margin-bottom: 15px; display: flex; align-items: center; gap: 10px; } .region-card h3::before { content: ""; font-size: 24px; } /* Hub Tags */ .hub-container { display: flex; flex-wrap: wrap; gap: 8px; margin: 15px 0; } .hub-tag { background: #e8f4f8; color: #1e3a5f; padding: 6px 14px; border-radius: 20px; font-size: 13px; font-weight: 600; } /* Route Box */ .route-box { background: #f8f9fa; border-radius: 8px; padding: 15px; margin: 12px 0; border: 1px solid #e2e8f0; } .route-box .airline { font-weight: 700; color: #2c5282; font-size: 15px; margin-bottom: 8px; } .route-box .details { color: #4a5568; font-size: 14px; line-height: 1.7; } .route-box .details strong { color: #1e3a5f; } /* Price Tag */ .price-tag { display: inline-block; background: #fef3c7; color: #92400e; padding: 8px 16px; border-radius: 6px; font-weight: 700; font-size: 14px; margin-top: 10px; } /* Quick Stats */ .stats-row { display: grid; grid-template-columns: repeat(auto-fit, minmax(140px, 1fr)); gap: 12px; margin: 20px 0; } .stat-box { background: #f0f7ff; padding: 15px; border-radius: 8px; text-align: center; } .stat-box .number { font-size: 24px; font-weight: 800; color: #2c5282; display: block; } .stat-box .label { font-size: 12px; color: #64748b; margin-top: 4px; } /* Tip Box */ .tip-box { background: #fffbeb; border: 1px solid #fcd34d; border-radius: 8px; padding: 15px; margin: 15px 0; display: flex; gap: 12px; align-items: flex-start; } .tip-box .icon { font-size: 20px; flex-shrink: 0; } .tip-box .text { font-size: 14px; color: #78350f; line-height: 1.6; } /* Direct Flight Badge */ .direct-badge { display: inline-block; background: #dcfce7; color: #166534; padding: 4px 10px; border-radius: 4px; font-size: 12px; font-weight: 700; margin-left: 8px; } /* Connection Badge */ .connect-badge { display: inline-block; background: #fee2e2; color: #991b1b; padding: 4px 10px; border-radius: 4px; font-size: 12px; font-weight: 700; margin-left: 8px; } /* City List */ .city-list { display: flex; flex-wrap: wrap; gap: 6px; margin: 10px 0; } .city-pill { background: #f1f5f9; color: #475569; padding: 4px 10px; border-radius: 4px; font-size: 13px; } /* Responsive */ @media (max-width: 600px) { .header-card { padding: 20px; } .header-card h2 { font-size: 22px; } .region-card { padding: 18px; } .stats-row { grid-template-columns: repeat(2, 1fr); } }

Flights to Nepal

All international flights land at Tribhuvan International Airport in Kathmandu. No direct flights from Americas, Europe, Africa, or Australia. Everyone connects through Asian or Middle Eastern hubs.

1 International Airport
15+ Airlines
30+ Countries Connected
3 Main Hub Cities

🇺🇸 USA & Canada

NO DIRECT - CONNECTION REQUIRED
Doha 🇶🇦 Dubai 🇦🇪 Istanbul 🇹🇷
Qatar Airways via Doha
From: NYC, Chicago, LA, Dallas, Houston, DC, Boston, Miami, Seattle, SF, Toronto
Doha → Kathmandu: 4h 15m | 3 flights daily
Total time: 18-22 hours from East Coast
Emirates via Dubai
From: All major US & Canadian cities
Dubai → Kathmandu: ~4 hours via FlyDubai
Total time: 18-24 hours
Turkish Airlines via Istanbul
From: NYC, Chicago, LA, DC, Boston, Houston, Miami, SF, Seattle, Toronto
Istanbul → Kathmandu: ~8 hours | 3x weekly
Total time: 20-24 hours from East Coast
$900 - $1,500 round trip
October & November are most expensive. Book 2-3 months ahead. January & February are cheapest but need winter gear.

🇪🇺 Europe

NO DIRECT (except Istanbul)
Istanbul 🇹🇷 Doha 🇶🇦 Dubai 🇦🇪
Turkish Airlines via Istanbul BEST OPTION
From: London, Paris, Frankfurt, Amsterdam, Rome, Madrid, Zurich, Copenhagen, Vienna + more
Istanbul → Kathmandu: ~8 hours
Total time: 12-16 hours from Western Europe
Qatar Airways via Doha
From: London, Paris, Frankfurt, Amsterdam, Rome, Madrid, Barcelona, Milan, Munich, Zurich, Brussels, Stockholm, Oslo, Dublin
Doha → Kathmandu: 4h 15m | 3 flights daily
Total time: 14-18 hours
Budget: FlyDubai / Air Arabia
Via: Dubai or Sharjah
Layover: 6-10 hours
Trade-off: Longer wait but cheaper fares
$700 - $1,200 round trip
London & Frankfurt have the most competitive fares due to airline competition. Eastern Europe sometimes cheaper.

🇧🇷 Brazil & South America

NO DIRECT - LONG CONNECTION
Doha 🇶🇦 Dubai 🇦🇪 Istanbul 🇹🇷
Qatar Airways via Doha BEST ROUTE
From: São Paulo, Buenos Aires
Doha → Kathmandu: 4h 15m
Total time: 22-26 hours from São Paulo
Emirates via Dubai
From: São Paulo, Buenos Aires, Rio de Janeiro
Total time: 24-28 hours
Turkish Airlines via Istanbul
From: São Paulo, Buenos Aires, Bogotá
Total time: 24-28 hours
$1,200 - $2,000 round trip
Limited competition makes this expensive. Book 3-4 months ahead. São Paulo has best connections.

🇮🇳 Asia

MANY DIRECT FLIGHTS AVAILABLE
India 🇮🇳 - SHORTEST ROUTE
Cities: Delhi, Mumbai, Kolkata, Bengaluru
Airlines: Air India, IndiGo, Vistara, Nepal Airlines, Buddha Air, Himalaya Airlines
Delhi → Kathmandu: 1h 30m | Multiple daily
Price: From $150 round trip
Southeast Asia
Bangkok 🇹🇭 → 3 hours | Thai Airways, Nepal Airlines daily
Singapore 🇸🇬 → 5 hours | Singapore Airlines, Silk Air daily
Kuala Lumpur 🇲🇾 → 4h 30m | Malaysia Airlines daily
Price: $300 - $700 round trip
East Asia
China 🇨🇳 Guangzhou, Chengdu, Beijing, Chongqing, Kunming | 4-6 hours
Hong Kong 🇭🇰 Cathay Dragon direct
South Korea 🇰🇷 Seoul | 6-7 hours | Korean Air, Asiana
Japan 🇯🇵 Tokyo, Osaka | Nepal Airlines
Price: $400 - $1,000 round trip
South Asia & Middle East
Bangladesh 🇧🇩 Dhaka | 1 hour | Daily
Bhutan 🇧🇹 Paro | 1 hour | Daily
Sri Lanka 🇱🇰 Colombo | 3 hours | Sri Lankan Airlines
Qatar 🇶🇦 Doha | 4h 15m | Qatar Airways 3x daily
UAE 🇦🇪 Dubai | 4 hours | FlyDubai daily
Oman 🇴🇲 Muscat | Oman Air, Nepal Airlines
Saudi Arabia 🇸🇦 Riyadh, Dammam | Himalaya Airlines
Kuwait 🇰🇼 Jazeera Airways
Vietnam, Cambodia, Laos, Philippines, Indonesia, Taiwan → connect via Bangkok, Singapore, or Delhi. Short 2-4 hour additional flights.

🇦🇺 Australia & New Zealand

NO DIRECT - VIA ASIA OR MIDDLE EAST
Singapore 🇸🇬 Doha 🇶🇦 Dubai 🇦🇪
Singapore Airlines via Singapore
From: Sydney, Melbourne, Brisbane, Perth, Adelaide, Auckland
Singapore → Kathmandu: ~5 hours
Total time: 14-18 hours from Sydney
Qatar Airways via Doha
From: Sydney, Melbourne, Brisbane, Perth, Auckland
Total time: 18-22 hours from Sydney
$800 - $1,600 round trip
Book during Australian winter (June-August) for better fares. This is Nepal's peak trekking season.

Africa & Middle East

Direct from Middle East
Qatar 🇶🇦 Doha | 4h 15m | Qatar Airways 3x daily
UAE 🇦🇪 Dubai | 4 hours | FlyDubai daily
Oman 🇴🇲 Muscat | Oman Air, Nepal Airlines
Saudi Arabia 🇸🇦 Riyadh, Dammam | Himalaya Airlines
Kuwait 🇰🇼 Jazeera Airways
From Africa (connect via Doha/Dubai/Istanbul)
East Africa: Addis Ababa, Nairobi | $700 - $1,200
South Africa: Johannesburg | $800 - $1,400
West Africa: Lagos | $1,000 - $1,600
North Africa: Cairo, Casablanca | Via Qatar or Emirates

Booking Tips

Peak season (Oct-Nov): Book 2-3 months ahead. Flights sell out.
Good season (Mar-Apr): Book 1-2 months ahead.
Low season (Dec-Feb, Jun-Aug): Last minute deals possible 2-3 weeks out.

Best hubs to compare: Delhi, Doha, Dubai, Istanbul. Prices change monthly.

We don't book international flights. Use your local agent or book direct with airlines. We handle everything from Kathmandu airport pickup onward.

Altitude Sickness in Annapurna Base Camp

Altitude Sickness and How to Handle It

The Annapurna Base Camp trek is not as extreme as Everest Base Camp. The maximum altitude is 4,130 meters, which is over 1,200 meters lower than Everest. The trail starts at 1,000 meters in Pokhara and climbs gradually over several days. This gradual ascent is your best protection. Most people who prepare properly and walk slowly do not get serious altitude sickness on this trek. But it still happens. And it can happen to anyone regardless of age or fitness. You need to know what to look for and what to do about it.

Why ABC Is Lower Risk Than Other Treks

The standard 13-day itinerary builds in natural acclimatization. You start at 1,000 meters in Pokhara. You sleep at 2,073 meters in Ulleri, 2,860 meters in Ghorepani, 2,170 meters in Chhomrong, 2,310 meters in Bamboo, 2,600 meters in Dovan, 2,920 meters in Himalaya Hotel, 3,230 meters in Deurali, 3,700 meters in Machhapuchhre Base Camp, and finally 4,130 meters in Annapurna Base Camp. Each step up is small enough that your body has time to adjust.

The two nights at Ghorepani at 2,860 meters are particularly valuable. This is your first significant altitude exposure, and you spend two full days there before climbing higher. Most trekkers feel some mild symptoms at Ghorepani. Headache, slight nausea, poor sleep. This is normal. Your body is learning to function with less oxygen. By the time you leave Ghorepani, most people have adjusted and feel better.

The descent from ABC back to Bamboo on day 9 drops 1,800 meters in one day. This rapid descent is the best treatment for altitude sickness if symptoms appear at base camp. Most people feel dramatically better within hours of descending. This is a major advantage of the ABC trek compared to Everest Base Camp, where the descent is longer and more gradual.

What Altitude Sickness Actually Is

At sea level the air contains about 21 percent oxygen. At 4,130 meters the air still contains 21 percent oxygen, but the atmospheric pressure is lower. This means each breath contains fewer oxygen molecules. Your body compensates by breathing faster and deeper. Your heart beats faster to move oxygen around. This is normal and happens to everyone.

Altitude sickness occurs when your body cannot compensate fast enough. Fluid leaks from blood vessels into the brain or lungs. This causes swelling. Mild swelling causes headache and nausea. Severe swelling is life-threatening. The key is recognizing the early signs before they become serious.

Altitude sickness does not care about your fitness level. A marathon runner can get it. A 65-year-old who never exercises might not. Previous experience at altitude helps but is not a guarantee. If you got altitude sickness before, you are more likely to get it again. If you have never been above 3,000 meters, you do not know how your body will react.

The Three Stages of Altitude Sickness

Stage 1: Acute Mountain Sickness (AMS) — Mild headache, nausea, dizziness, fatigue, poor sleep, loss of appetite. These symptoms feel like a hangover. They are common above 2,500 meters and usually appear within 6 to 12 hours of reaching a new altitude. Most people get some degree of AMS on the ABC trek. It is not dangerous if you recognize it and do not climb higher while symptoms persist.

What to do: Rest at the same altitude. Drink 3 to 4 liters of water. Eat even if you are not hungry. Take ibuprofen or paracetamol for the headache. Do not climb higher until symptoms improve. Most mild AMS resolves within 24 to 48 hours. If symptoms worsen after 24 hours, descend.

Stage 2: High Altitude Pulmonary Edema (HAPE) — Fluid in the lungs. Symptoms are shortness of breath at rest, persistent cough, chest tightness, pink frothy sputum, blue lips or fingernails, extreme fatigue. HAPE is life-threatening and can kill within hours. It usually appears after 2 to 4 days at altitude.

What to do: Immediate descent of at least 500 to 1,000 meters. This is the only treatment that works. Supplemental oxygen if available. Dexamethasone or nifedipine if carried. Evacuation by helicopter if descent is not possible quickly. Do not wait. HAPE does not get better on its own.

Stage 3: High Altitude Cerebral Edema (HACE) — Fluid in the brain. Symptoms are severe headache not relieved by medication, confusion, disorientation, loss of coordination, inability to walk straight, altered mental state, coma. HACE is also life-threatening and can kill within hours.

What to do: Immediate descent of at least 500 to 1,000 meters. Supplemental oxygen. Dexamethasone if available. Evacuation by helicopter. HACE is a medical emergency. Every minute counts.

Symptoms to Watch For Every Day

Check yourself every morning before starting to walk. Ask yourself these questions honestly. Do not lie to yourself or your guide.

- Do I have a headache that is more than mild? Headache is the most common early symptom.

- Do I feel nauseous or have I vomited? Loss of appetite is normal. Vomiting is not.

- Am I more tired than I should be for the walking I did yesterday? Normal fatigue is expected. Extreme fatigue is not.

- Did I sleep poorly last night? Waking up frequently is common at altitude. Complete inability to sleep is a warning sign.

- Do I feel dizzy when I stand up? Mild dizziness is normal. Severe dizziness or fainting is not.

- Is my breathing normal at rest? Shortness of breath while walking is normal. Shortness of breath while sitting still is not.

- Can I walk in a straight line? Loss of coordination is a serious sign of HACE.

- Are my lips or fingernails blue or gray? This indicates low oxygen and is an emergency.

If you answer yes to any of these questions, tell your guide immediately. Do not hide symptoms because you are embarrassed or determined to reach base camp. Altitude sickness is not weakness. It is biology. Your guide has seen it hundreds of times and knows what to do.

Prevention: What Actually Works

Walk slowly. This is the single most important thing. Your pace on the ABC trek should be slower than your normal walking pace. You should be able to hold a conversation while walking. If you are breathing hard, you are walking too fast. The goal is not speed. The goal is reaching base camp safely.

Drink 3 to 4 liters of water per day. Dehydration makes altitude sickness worse and feels similar. Your urine should be pale yellow. Dark urine means you are not drinking enough. Drink even when you are not thirsty. The dry air at altitude dehydrates you faster than you realize.

Eat carbohydrates. Your body burns more calories at altitude. Dal bhat is the perfect food. Rice, lentils, vegetables. High carbs, easy to digest, unlimited refills. Avoid heavy, fatty, or spicy foods. They are harder to digest and take oxygen away from your brain.

Sleep low when possible. The ABC itinerary naturally does this. You sleep at Ghorepani before climbing higher. You sleep at Chhomrong before the steeper sections. Trust the itinerary. Do not skip rest days to save time.

Avoid alcohol and sleeping pills. Alcohol dehydrates and suppresses breathing. Both make altitude sickness worse. Sleeping pills also suppress breathing. A bad night of sleep at altitude is better than a sedated night that lowers your oxygen levels further.

Do not overexert yourself. The trek is hard enough. Do not add extra hikes or push for speed. The side trip to Poon Hill is worth it but walk slowly. The climb from Deurali to ABC is steep but short. Take breaks. Rest every 20 to 30 minutes.

Garlic soup. This is a traditional Nepali remedy. Most teahouses serve it. Locals believe it helps with acclimatization. It is warming, nutritious, and cheap. Worth trying even if you are skeptical. It will not hurt and might help.

Medication: Diamox

Diamox is the brand name for acetazolamide. It is a prescription medication that speeds up acclimatization. It works by making your blood more acidic, which stimulates breathing. You take in more oxygen and exhale more carbon dioxide. This helps your body adjust faster to altitude.

The standard dose is 125 mg twice daily, starting 24 hours before you reach altitude and continuing for 2 to 3 days at altitude or until you feel acclimatized. Some people take 250 mg twice daily. Your doctor will advise the right dose for you.

Side effects include tingling in fingers and toes, increased urination, and a metallic taste in your mouth. These are annoying but not dangerous. The tingling usually goes away after a few days. The increased urination means you need to drink even more water.

Diamox does not prevent altitude sickness completely. It reduces the risk and severity. You still need to walk slowly, drink water, and listen to your body. It is not a substitute for proper acclimatization.

Talk to your doctor before taking Diamox. Do not buy it online without a prescription. It is not suitable for everyone. People with kidney disease, liver disease, or certain allergies should not take it. Pregnant women should not take it. Your doctor needs to know your full medical history.

When to Descend: The Golden Rule

The golden rule of altitude sickness is simple. If you have symptoms, do not go higher. If your symptoms worsen, descend immediately. Descent is the only cure that works every time.

On the ABC trek, descending is usually easy. The trail is well-marked and you are never more than a few hours from a lower village. From ABC you can descend to Bamboo in one long day, dropping 1,800 meters. From MBC you can descend to Deurali in 2 hours. From Deurali you can descend to Dovan in 2 hours.

Your guide will make the decision if you are not thinking clearly. Trust your guide. They have training in altitude sickness recognition. They carry a pulse oximeter to measure your blood oxygen level. They know when someone is in trouble before that person knows it themselves.

Do not argue with your guide if they tell you to descend. They are not trying to ruin your trip. They are trying to save your life. The mountain will still be there next year. You need to be there too.

Helicopter Evacuation

If someone cannot walk down and needs emergency evacuation, helicopters are available. The cost is $2,000 to $4,000 depending on the distance and weather conditions. This is why travel insurance is mandatory. Your insurance must cover helicopter evacuation up to 6,000 meters.

Helicopters can fly from ABC to Pokhara in about 20 minutes. From MBC or Deurali the flight is shorter. Weather is the main factor. Clouds, wind, and rain can ground helicopters for hours or days. This is why early recognition and descent on foot is always better than waiting for a helicopter.

Your guide carries a satellite phone or has radio contact with the nearest village. They can call for a helicopter if needed. But they will try descent first unless the situation is critical. Walking down is safer, cheaper, and more reliable than waiting for a helicopter in bad weather.

Who Is Most at Risk

- People who have had altitude sickness before. Previous episodes significantly increase future risk.

- People who fly directly to high altitude without acclimatization. The ABC trek is better because you start low and climb slowly. But flying from sea level to Pokhara at 820 meters and starting the trek the next day is still a shock.

- People who overexert themselves. Walking too fast, carrying too much weight, not taking rest days.

- People who are dehydrated. Not drinking enough water is the most common preventable cause of altitude sickness.

- People with respiratory infections. A cold or cough makes breathing harder and reduces oxygen intake.

- People who ignore symptoms. The most dangerous person on the mountain is the one who refuses to admit they are sick.

The Bottom Line

Altitude sickness on the Annapurna Base Camp trek is manageable because the altitude is moderate and the descent is quick. Most people experience mild symptoms. A few people experience moderate symptoms. Serious cases are rare but possible. The key is preparation, awareness, and honesty.

Prepare by training before you come. Be aware of your body every day. Be honest with yourself and your guide about how you feel. Walk slowly. Drink water. Eat dal bhat. Sleep when you can. Do not drink alcohol. Do not take sleeping pills. Trust the itinerary. Trust your guide.

The Annapurna Base Camp trek is not dangerous for people who respect the altitude. Thousands of trekkers complete it safely every year. You can be one of them. But only if you take altitude sickness seriously and act early if symptoms appear.

Accommodation and Food on Annapurna Base Camp Trek

Where You Sleep and What You Eat

Accommodation on the Annapurna Base Camp trek is in teahouses. These are family-run lodges, not hotels. Rooms get simpler as you climb. Food gets more expensive as you climb. Everything above Chhomrong is carried uphill by porters or mules. That is why a plate of rice that costs $3 in Pokhara costs $8 at base camp.

How Teahouses Work

The system is simple. Rooms are cheap because teahouses expect you to eat all your meals in their dining hall. This is how mountain families earn income. Walking next door to eat cheaper food breaks this system and is considered disrespectful. Do not do it.

Every room has two beds. This is the standard setup for two people. Some teahouses also have dormitory rooms with multiple beds for solo trekkers or larger groups. Every teahouse provides one blanket per bed. The blanket is usually a wool or synthetic blanket. It is not a thick duvet. Bring your own sleeping bag rated to minus 10 degrees Celsius. The teahouse blanket alone is not warm enough at altitude, especially above 3,000 meters.

Toilets are shared and outside the main building in most teahouses. Every teahouse has 2 to 3 western-style bathrooms. These are the better toilets with a seated bowl. The rest are squat-style. Both types are shared. There are no private bathrooms attached to rooms in the upper villages. In lower villages like Ghorepani and Ghandruk, some teahouses offer attached bathrooms for a higher price. But this is the exception, not the rule.

Rooms are never heated. The dining hall has a wood stove or metal heater burning from around 4 PM to 9 PM. That is the warmest place. Your bedroom will be cold. Bring a sleeping bag rated to minus 10 degrees Celsius. Teahouse blankets are not washed often and are not warm enough at 4,130 meters.

Accommodation by Village

Pokhara (820m) — Your starting point. Lakeside hotels range from $10 guesthouses to $200 resorts. Most trekkers stay in mid-range hotels at $15 to $25 per night with hot showers, WiFi, and proper beds. Withdraw all your cash here. Sleep well. Your next comfortable bed is several days away.

Ulleri (2,073m) — First night on the trail. More than 20 teahouses. Small wooden rooms. Every room has two beds. Shared toilets outside. Some teahouses have 2 to 3 western-style bathrooms. One blanket per bed. Rooms cost 250 to 1,000 rupees depending on type. This is the last cheap accommodation before prices climb.

Ghorepani (2,860m) — The comfort peak of the trek. Brick and concrete rooms, better soundproofing, attached toilets and showers at many lodges, mountain views from your window. The best teahouse experience on the entire route. Every room has two beds. Some dormitory rooms available. Shared toilets outside at simpler lodges. Every teahouse has 2 to 3 western-style bathrooms. Rooms range from 800 to 1,500 rupees. Some luxury options up to $250 per night exist here.

Tadapani (2,630m) — Only about six teahouses. Timber and plasterboard walls. Simple furnishings. Every room has two beds. Some dormitory rooms. Shared toilets outside. Every teahouse has 2 to 3 western-style bathrooms. Rooms 500 to 700 rupees.

Ghandruk (1,940m) — Around 50 hotels and homestays. One of the most developed villages on the route. Hotels run around $20. Homestays closer to $5. Every room has two beds. Some dormitory rooms. Shared toilets outside at most places. Every teahouse has 2 to 3 western-style bathrooms. Hot showers, WiFi, and electricity often free here. Rooms 500 to 1,500 rupees.

Chhomrong (2,170m) — The last major comfort stop. Family-run lodges with decades of experience. Every room has two beds. Some dormitory rooms. Shared toilets outside. Every teahouse has 2 to 3 western-style bathrooms. Electric blankets in some lodges. Wider food menu. Reliable hot showers. Charge every device here. Buy snacks in village shops, they are 30 to 50 percent cheaper than anything above. Rooms around 500 rupees. Hot shower 100 rupees. WiFi 200 rupees. Charging 100 rupees per device.

Sinuwa (2,340m) — Mostly a lunch stop. Two to three basic teahouses for overnight. Every room has two beds. Some dormitory rooms. Rooms are clean but do not expect much. Shared toilets outside. Every teahouse has 2 to 3 western-style bathrooms. Simple, quiet atmosphere. Rooms 500 to 600 rupees. This is where the comfort level drops noticeably. From here upward, rooms are basic and functional.

Bamboo (2,310m) — Four to five teahouses in a bamboo forest. Simple wooden structures. Every room has two beds. Some dormitory rooms. Shared toilets outside. Every teahouse has 2 to 3 western-style bathrooms. Temperature drops at night. Rooms 500 to 600 rupees. Dal bhat 650 to 750 rupees. Hot shower 150 rupees. WiFi 300 rupees. Charging 200 rupees.

Dovan (2,600m) — Five teahouses split into Upper and Lower. Choose Lower Dovan if possible. Brighter, warmer, better maintained. Every room has two beds. Some dormitory rooms. Shared toilets outside. Every teahouse has 2 to 3 western-style bathrooms. Rooms 500 rupees. Dal bhat 650 to 750 rupees. Hot shower 150 rupees. WiFi 300 rupees. Charging 200 rupees.

Himalaya Hotel (2,920m) — Three to four teahouses. Good views of Annapurna South and Hiunchuli. Basic rooms. Every room has two beds. Some dormitory rooms. Shared toilets outside. Every teahouse has 2 to 3 western-style bathrooms. Thin walls. Rooms 500 to 700 rupees. Dal bhat 700 to 800 rupees. Hot shower 200 rupees. WiFi 300 rupees. Charging 200 rupees.

Deurali (3,230m) — The psychological turning point. Every room has two beds. Some dormitory rooms. You may share rooms with 3 to 4 other trekkers in peak season. Plywood walls, wooden frames with foam pads. Shared toilets outside. Every teahouse has 2 to 3 western-style bathrooms. Temperature drops to 0 degrees or below at night. Rooms 500 rupees. Dal bhat 750 to 800 rupees. Hot shower 250 rupees and often unavailable. WiFi 300 rupees. Charging 200 rupees.

Machhapuchhre Base Camp (3,700m) — Small metal or wooden structures beneath the Fishtail peak. Every room has two beds. Some dormitory rooms. Shared toilets outside. Every teahouse has 2 to 3 western-style bathrooms. Pipes freeze at night. Running water is unreliable. The dining hall is the only warm place and the best part of the experience. Rooms 500 to 700 rupees. Dal bhat 750 to 850 rupees. Hot shower 350 rupees and rarely available. WiFi 300 rupees and rarely works. Charging 200 to 250 rupees.

Annapurna Base Camp (4,130m) — Stark and non-negotiable. Every room has two beds. Some dormitory rooms. Shared toilets outside. Every teahouse has 2 to 3 western-style bathrooms. Small rooms, thin mattresses, heavy wool blankets, temperatures well below freezing at night. Electricity from solar panels that underperform on cloudy days. Do not bargain over room rates here. You are at 4,130 meters surrounded by 8,000 meter peaks. The room is not the point. Set your alarm for 5:15 AM. The sunrise is what every hard mattress and cold morning was for. Rooms 500 to 700 rupees. Dal bhat 800 to 950 rupees. Hot shower 350 rupees and rarely available. WiFi 300 rupees and do not expect it to work. Charging 200 to 250 rupees.

What You Eat

Menus are similar at most teahouses. Meals are freshly cooked and take 30 to 60 minutes to prepare. Order as soon as you arrive at the teahouse so your food is ready when you are hungry.

Dal Bhat — The national dish and the best food on the trail. Steamed rice, lentil soup, vegetable curry, pickled vegetables, and sometimes papad. Unlimited refills at most teahouses. High carbohydrates for sustained energy. Complete protein from rice and lentils. Always vegetarian and freshly cooked. Easier to digest than Western food at altitude. The phrase "Dal Bhat power, 24 hours" is accurate. Costs 450 to 600 rupees below 2,500 meters. 600 to 800 rupees between 2,500 and 3,500 meters. 800 to 950 rupees above 3,500 meters.

Thukpa — Tibetan noodle soup. Warming after cold days. Available at most teahouses. Good for lunch or dinner.

Momos — Nepali dumplings. Vegetable or meat filling. Steamed or fried. Popular snack or meal. Meat momos are safe below 2,000 meters. Above that, stick to vegetable.

Fried Rice and Chow Mein — Vegetable fried rice or noodles. Simple, filling, familiar. Available everywhere.

Pizza — Basic mountain-style pizza. Thin crust, limited toppings, yak cheese at higher elevations. Quality varies significantly. Costs 800 to 1,400 rupees. Novelty food, not recommended as your main meal.

Pasta — Spaghetti, macaroni, or penne with tomato or cream sauce. Often oily. Costs 700 to 1,100 rupees.

Pancakes and Porridge — Breakfast staples. Pancakes with honey or jam. Porridge with milk. Simple, hot, filling.

Eggs — Fried, scrambled, or boiled. Served with toast or Tibetan bread. Good protein for breakfast.

Tibetan Bread — Fried bread, often served with honey or jam. Heavy, filling, good for breakfast or a snack on the trail.

Apple Pie — ABC trek specialty. The Annapurna region grows apples. Served warm, sometimes with custard. Comfort food. Costs 400 to 700 rupees.

Garlic Soup — Traditional Nepali remedy believed to help with altitude acclimatization. Warming and nutritious. Available at most teahouses. Costs 400 to 650 rupees. Worth trying even if you are skeptical.

Ginger Tea — Helps with nausea and digestion. Warming effect. Anti-inflammatory. Common at all teahouses. Better than coffee at altitude.

Drinks

Black Tea and Milk Tea — The standard drink. Cheap, available everywhere, warming. Costs 50 to 150 rupees depending on altitude.

Ginger Tea and Lemon Tea — Good for altitude. Costs slightly more than regular tea.

Coffee — Available but expensive at altitude. Instant coffee is standard. Real coffee is rare above 3,000 meters. Costs 150 to 400 rupees.

Hot Chocolate — Popular with trekkers. Sweet, warming, comforting. Costs 150 to 300 rupees.

Beer and Alcohol — Available in lower villages. Not recommended above 3,000 meters. Alcohol dehydrates and worsens altitude sickness. Costs 500 to 1,000 rupees per bottle.

Boiled Water — The safest option. Teahouses sell boiled water for 100 to 250 rupees per liter. Bring your own bottle and refill.

Bottled Water — Available but expensive and creates plastic waste. Costs 100 rupees in Pokhara, 300 to 400 rupees at base camp. Not recommended.

Food Prices by Elevation

Below 2,500 meters — Dal bhat 450 to 600 rupees. Fried rice 400 to 600 rupees. Momos 300 to 500 rupees. Tea 50 to 100 rupees.

2,500 to 3,500 meters — Dal bhat 600 to 800 rupees. Fried rice 500 to 700 rupees. Momos 400 to 600 rupees. Tea 100 to 150 rupees.

Above 3,500 meters — Dal bhat 800 to 950 rupees. Fried rice 700 to 900 rupees. Momos 500 to 800 rupees. Tea 150 to 200 rupees. Pizza 800 to 1,400 rupees. Pasta 700 to 1,100 rupees.

Dietary Needs

Nepali cuisine is naturally vegetarian-friendly. Most menu items are vegetable-based or easily modified. Dal bhat is always vegetarian. Simply inform the teahouse staff you are vegetarian. They understand and accommodate easily.

For vegans, ask teahouses to prepare without butter, ghee, milk, dairy, or eggs. Dal bhat can be made vegan if you request no ghee in the rice. Vegetable curry, fried rice, noodles, and soups work well with modifications. Communicate exactly what you avoid. Bring supplemental protein like nuts or protein powder if you are concerned about intake.

Meat is available until Chhomrong. After that it is not recommended due to lack of refrigeration. Stick to vegetarian options above 2,000 meters. It is safer and what the locals eat.

Daily Food Budget

Budget trekker — 18 to 25 dollars per day. Mainly dal bhat, tea, and boiled water. Saves 80 to 120 dollars over 10 days compared to eating Western food.

Standard trekker — 25 to 35 dollars per day. Mix of dal bhat, fried rice, momos, occasional coffee or treat.

Comfort trekker — 35 to 50 dollars per day. Western food, multiple coffees, desserts, beer in lower villages.

Total food cost for a 10-day trek ranges from 220 to 450 dollars. Breakfast is 5 to 10 dollars. Lunch is 8 to 15 dollars. Dinner is 10 to 20 dollars. Snacks and drinks add 5 to 15 dollars per day.

What to Avoid

Heavy oily food is hard to digest at altitude. Large meat portions require more oxygen to digest. Alcohol dehydrates and worsens altitude sickness. Excessive dairy can cause digestive issues. Spicy food if you have a sensitive stomach. Raw vegetables above 3,000 meters where washing water may not be clean.

Buy snacks in Pokhara before starting. A Snickers bar costs 60 rupees in Pokhara but 300 to 400 rupees at base camp. Stock up on energy bars, chocolate, and nuts for significant savings.

The Dining Hall Experience

The communal dining hall is the social center of every teahouse. This is where trekkers gather after walking ends, usually by 3 or 4 PM. The Bukhari stove burns wood or dung and keeps the room warm until around 9 PM. Guides share trail news. Trekkers from different countries mix, share experiences, and compare sore muscles. This is genuinely one of the best parts of the ABC experience, even when the room itself is forgettable.

At Machhapuchhre Base Camp and Annapurna Base Camp, the dining hall is the only warm place. Everyone congregates from mid-afternoon onward. The atmosphere is social, the conversation is international, and the shared experience of being cold and tired together creates bonds that last beyond the trek.

Booking Tips

During peak seasons of October and April, teahouses fill up. Your guide should call ahead each morning to reserve rooms for that night. At Machhapuchhre Base Camp and Annapurna Base Camp, space is very limited. Pre-booking is essential in peak season. In shoulder seasons of March, May, and November, walk-in is usually fine but booking ahead is still recommended above Chhomrong.

Some teahouses in peak season put extra beds in the dining hall or have trekkers sleep there when rooms are full. This is normal at Bamboo, Deurali, MBC, and ABC. Be flexible. The goal is reaching base camp, not luxury.

Annapurna Base Camp Permit Rules 2026

What Permits You Need and How to Get Them

The Annapurna Base Camp trek requires one mandatory permit. The Annapurna Conservation Area Permit, called ACAP. This is the only permit you need for the standard ABC route. The TIMS card was previously required but has not been enforced on Annapurna trails since 2023. Your guide handles the ACAP permit as part of your package. But you should still understand what it is, who can get it, and how the system works.

Annapurna Conservation Area Permit (ACAP)

The ACAP is mandatory for every trekker entering the Annapurna Conservation Area. No exceptions. It covers the entire region including Annapurna Base Camp, Annapurna Circuit, Poon Hill, and Mardi Himal. One ACAP permit covers all these routes during the same visit. You do not need a separate permit for each trek.

Cost for foreign nationals: NPR 3,000 per person. Approximately USD 23 to 30 depending on exchange rate.

Cost for SAARC nationals: NPR 1,000 per person. Approximately USD 8 to 10.

Cost for Nepali citizens: NPR 100 per person. Nepali citizens do not need a TIMS card.

Children under 10 years: Free. No permit required. But their details must be registered on the parent or guardian's permit.

The fee includes tax. An additional 2.9 percent charge applies if you pay online through the official e-permit portal. No extra charge if you pay in person at the counter.

Who Can Obtain the Permit

Foreign nationals from all countries can obtain the ACAP permit. There are no nationality restrictions for the standard Annapurna Base Camp route. Citizens of Nigeria, Ghana, Zimbabwe, Cameroon, Somalia, Liberia, Ethiopia, Iraq, Palestine, Afghanistan, Iran, and Syria who need pre-approved visas for Nepal can still get the ACAP permit once they enter the country legally.

SAARC nationals from Afghanistan, Bangladesh, Bhutan, India, Maldives, Nepal, Pakistan, and Sri Lanka receive the discounted rate of NPR 1,000. Indian nationals do not need a visa to enter Nepal but still need the ACAP permit for trekking at the discounted rate.

Nepali citizens pay NPR 100. This is a nominal fee for record-keeping purposes. Nepali trekkers must still register their itinerary at the trail entry point for safety tracking.

Solo trekkers as of March 2026, solo trekkers can obtain the ACAP permit. The previous rule requiring a minimum of two trekkers for restricted areas has been removed. However, a licensed guide is still mandatory for all foreign trekkers in the Annapurna region. You cannot trek independently without a guide.

How to Obtain the Permit

Option 1: Online (Recommended)

Visit the official e-permit portal at epermit.ntnc.org.np. Fill out the application form with your personal details, passport information, trekking route, entry and exit points, and dates. Upload a copy of your passport and a passport-sized photo. Pay online with Visa or MasterCard. The permit is emailed to you within 24 hours. Print it and carry it on the trek. An additional 2.9 percent payment gateway charge applies.

Option 2: In Person at Kathmandu

Visit the Nepal Tourism Board office at Bhrikutimandap, Kathmandu. Open Sunday to Friday, 10 AM to 5 PM. Bring your original passport, a photocopy of your passport, two passport-sized photos, and the fee in Nepali rupees cash. Fill out the form on-site. The permit is issued immediately. No appointment needed.

Option 3: In Person at Pokhara

Visit the Nepal Tourism Board office or the TAAN office in Pokhara, located near the Lakeside district. Same requirements as Kathmandu. Open Sunday to Friday, 10 AM to 5 PM. This is more convenient if you are already in Pokhara before starting the trek.

Option 4: Through Your Trekking Agency

This is the easiest option. Next Trip Nepal handles the permit for you. We apply online or in person before your trek starts. The permit cost is included in your package price. You do not need to visit any office or fill any form. We need a copy of your passport and a photo, which you can email us before arrival.

What You Need to Apply

- A valid passport with at least 6 months remaining validity

- A valid Nepali visa or visa on arrival stamp

- Two passport-sized photos

- Trekking route and rough itinerary

- Entry and exit points with dates

- Emergency contact in Nepal (your guide or agency)

- Emergency contact in your home country

- Travel insurance policy number (optional but recommended)

- Payment in Nepali rupees cash for in-person applications, or credit card for online

Permit Validity

The ACAP permit is valid for a single entry into the Annapurna Conservation Area. Once you exit the conservation area, the permit expires. If you plan to re-enter for another trek, you need a new permit.

There is no fixed time limit for how long you can stay inside the conservation area with the permit. The dates you write on the application are for record-keeping and safety tracking. You can stay for the duration of your trek as long as you do not overstay your Nepali visa.

The permit is non-transferable and non-refundable. You cannot give it to another person. If you lose it, you must apply for a replacement at the nearest conservation office or checkpoint. Carry a photocopy or digital photo of your permit as backup.

Where the Permit Is Checked

ACAP checkpoints are located at three main points on the Annapurna Base Camp trail. Rangers check your permit and may ask for your passport to verify identity.

Nayapul — This is the first checkpoint you encounter when starting the trek from Pokhara. Located at the trailhead near Birethanti. Rangers verify your permit before you enter the conservation area. This is the main entry point for most ABC trekkers.

Ghorepani — Located at the Poon Hill junction. Rangers check permits here because Ghorepani is a major intersection where multiple trails meet. This is a secondary checkpoint for trekkers doing the Poon Hill side trip.

Chhomrong — Located at the entry to the upper Annapurna Sanctuary. This checkpoint controls access to the higher elevation section of the trail. Rangers verify permits and may ask about your guide and itinerary for safety tracking.

There are no ACAP checkpoints at Deurali, Machhapuchhre Base Camp, or Annapurna Base Camp. The three checkpoints at Nayapul, Ghorepani, and Chhomrong are sufficient to monitor trekker movement throughout the entire route. Keep your permit accessible in your daypack at all times, not buried in your main bag.

If you are caught without a permit, the fine is double the permit fee. At checkpoints this means NPR 6,000 for foreigners. Rangers can also turn you back and require you to return to Pokhara to obtain the permit. Do not risk this. The permit is cheap and easy to obtain.

About the TIMS Card

The TIMS card, or Trekkers Information Management System, was previously required for all treks in Nepal. It was designed to track trekker movements for safety and rescue purposes. As of 2023, the TIMS card is no longer enforced on Annapurna trails.

Some older websites and blogs still mention the TIMS card as required. This is outdated information. The Nepal Tourism Board officially discontinued TIMS for the Annapurna region because the ACAP permit now serves the same tracking function.

However, the TIMS card is still required for the Everest region and some other trekking areas. If you are combining the ABC trek with a trek to Everest, you will need both permits. For the standard ABC trek, only the ACAP is needed.

If you see a TIMS card fee listed on a trekking agency website, ask whether it is actually needed. Some agencies still include it out of habit or to cover administrative costs. At Next Trip Nepal, we only charge for the ACAP permit, which is included in your package price.

What the Permit Fee Pays For

The ACAP fee is not just a tax. It funds real conservation and community work in the Annapurna region. The National Trust for Nature Conservation manages the funds.

- Trail maintenance and bridge repair

- Forest conservation and reforestation

- Wildlife protection including snow leopards, red pandas, and Himalayan tahr

- Community development projects in villages

- School and health post construction

- Clean drinking water projects

- Training programs for local guides and lodge owners

- Waste management and garbage collection on the trails

When you pay the NPR 3,000 fee, you are directly contributing to the preservation of the Annapurna region and the livelihood of the communities who live there. This is one of the most successful community-based conservation models in the world.

Important Tips

- Apply for the permit at least one day before your trek starts. Do not wait until the morning of departure.

- If you get the permit at a checkpoint instead of Kathmandu or Pokhara, the fee is double. Always get it in advance.

- Carry the printed permit in a waterproof bag or ziplock. Rain and sweat can damage the paper.

- Take a photo of your permit with your phone as backup. If the original gets lost, a digital copy can help with replacement.

- The permit is not a visa. It does not extend your stay in Nepal. You must still have a valid Nepali visa for the duration of your trek.

- Children under 10 do not need a permit but must be registered on a parent's application. Bring their passport for verification.

- The permit fee is the same year-round. It does not change by season. Budget the same amount whether you trek in October or March.

Annapurna Base Camp Trek FAQ

How difficult is the Annapurna Base Camp trek?

The Annapurna Base Camp trek is considered moderate in difficulty. It involves daily walking of 5–7 hours through steep ascents and descents, but it is suitable for both beginners and experienced trekkers with basic fitness.

How many days are required for the ABC trek?

Normally, the Annapurna Base Camp trek can be completed in 6 days if you're short on time. It's a great option for those who want a shorter adventure. However, if you have more time, you can stretch it to 7, 8 days, or even longer for a more relaxed experience and better acclimatization.

Can I do the ABC trek in winter?

Yes, December to February is doable, but expect snowy trails, colder nights, and limited tea houses. It's best for experienced trekkers with proper winter gear.

What kind of accommodation is available on the trek?

You’ll stay in cozy tea houses along the route. Up to Chhomrong, many rooms have attached bathrooms. Even in places like Bamboo, Deurali, MBC, and ABC, you’ll find clean, comfy rooms and warm meals. Simple and perfect after a long day’s trek.

Do I need a guide for the ABC trek?

A guide is highly recommended for safety, navigation, and local insights. Plus, it makes your journey smoother and more enjoyable.

What permits are required for the Annapurna Base Camp trek?

You’ll need two permits: the ACAP (Annapurna Conservation Area Permit) and the TIMS card. We’ll arrange both for you.

Can beginners do the Annapurna Base Camp trek?

Yes! It’s beginner-friendly if you’re reasonably fit. We recommend at least an 8-day itinerary Annapurna Bae camp trek itinerary for first-timers gives you enough time to enjoy the trek and adjust to the altitude comfortably.

Is there internet or phone signal on the ABC trek?

Yes, both work. You’ll get a mobile signal in many areas and Wi-Fi in most tea houses, even at Annapurna Base Camp. Wi-Fi usually comes with a small fee